Economical Ways to Update Honey Oak Cabinets for a Fresh, Modern Look

 Old honey oak cabinets can give a kitchen a dated look, but with a few economical updates, you can transform your space and increase your home’s perceived value. Here's how you can refresh your cabinets and create a bright, inviting kitchen without breaking the bank.


  1. Paint Your Cabinets a Neutral Color


Painting your honey oak cabinets is one of the most cost-effective ways to give them a new lease on life. Choose a neutral color, such as a soft white, warm gray, or beige, to create a modern, clean look. Neutral colors not only brighten up the space but also appeal to a wide range of potential buyers.

Steps to Paint Your Cabinets:

  1. Remove the cabinet doors and hardware.
  2. Clean the cabinets thoroughly to remove grease and grime.
  3. Sand the surface to create a smooth base for the paint.
  4. Apply a primer to help the paint adhere better.
  5. Paint the cabinets with a high-quality paint in your chosen color.
  6. Reattach the doors and hardware.

2. Update the Knobs and Pulls

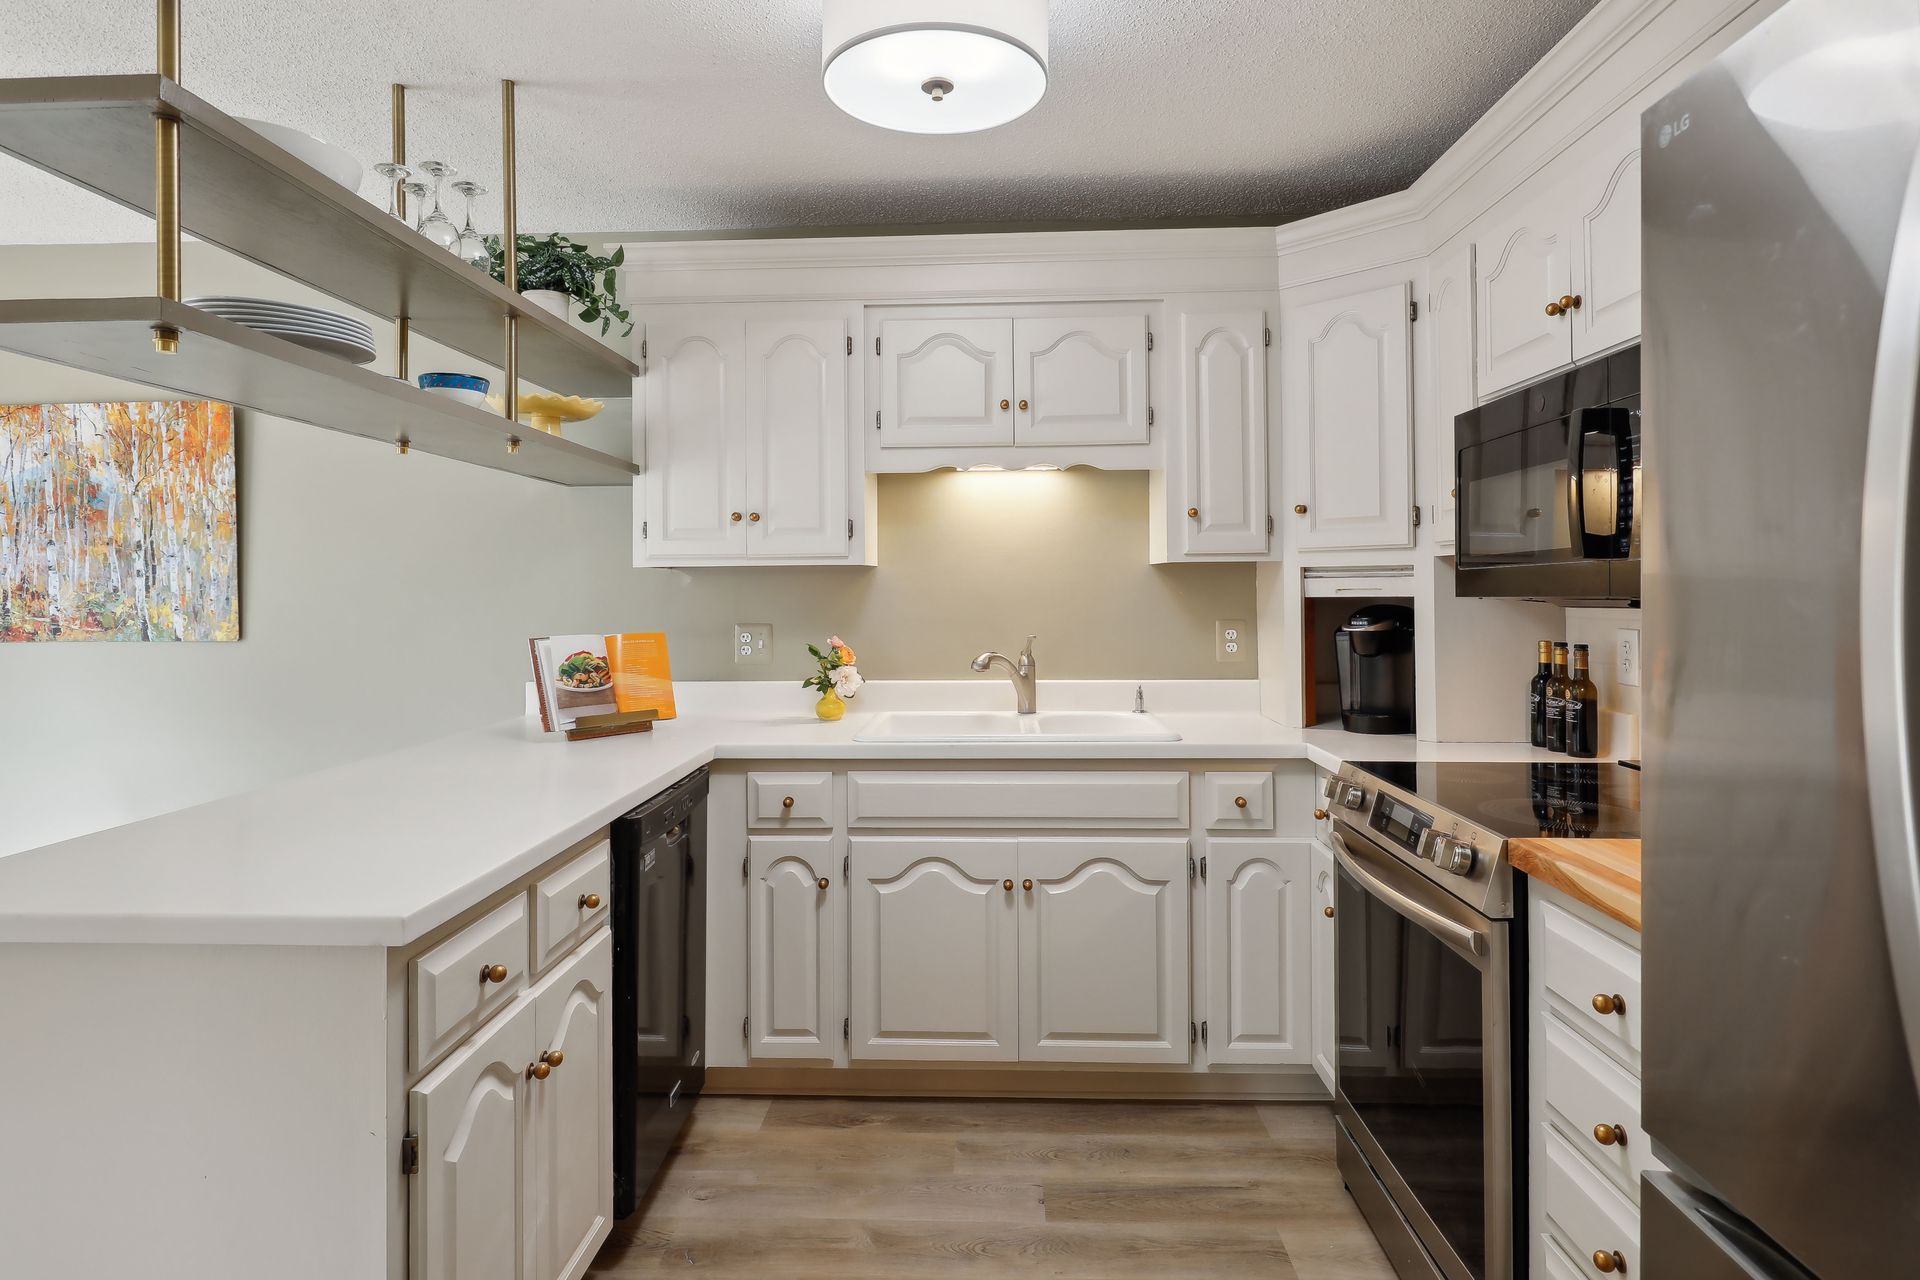
Swapping out old hardware for new, stylish handles and knobs can make a big difference in the overall look of your cabinets. Opt for hardware that complements the new color of your cabinets and adds a touch of elegance. In this kitchen we opted for an antique gold.

Hardware Ideas:

- Brushed nickel for a sleek, modern look.

- Oil-rubbed bronze for a classic, timeless feel.

- Matte black for a bold, contemporary vibe.

-Antique gold for a classic look

3. Add Crown Molding
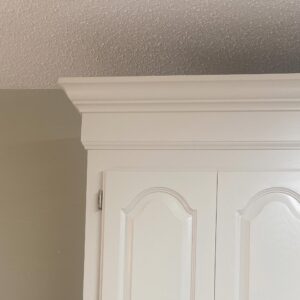
Adding crown molding to your cabinets can bridge the dreaded gap between the top of the cabinets and the ceiling. This simple addition gives your kitchen a polished, custom look.The crown molding lifts the eye and makes the kitchen feel larger.

Steps to Add Crown Molding:

  1. Measure the gap between the cabinets and the ceiling.
  2. Cut the crown molding to fit the measurements. We added a straight board on top of the cabinets first and then the crown to make the crown larger.
  3. Attach the molding to the top of the cabinets using a nail gun or adhesive.
  4. Fill any gaps or seams with caulk and paint to match the cabinets.

 4. Replace Upper Cabinets on the Peninsula with Suspended Shelving
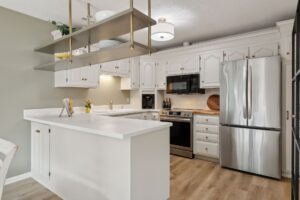
Removing the upper cabinets on the peninsula and replacing them with suspended shelving is a great way to open up the space and let in more natural light from an adjacent room. The open shelving creates an airy feel and allows you to showcase decorative items or frequently used kitchenware.

Steps to Install Suspended Shelving:
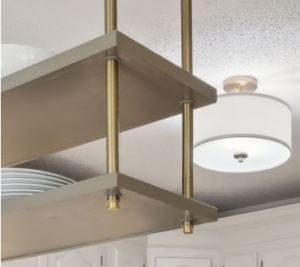
  1. Remove the existing upper cabinets on the peninsula.
  2. Use the  existing brackets or suspenders from the ceiling to support the shelves but cover them with rods that match your decor.
  3. Attach the shelves to the brackets or suspenders. To make it even  more economical, we used the wood from the cabinets we removed to make the shelving and then painted them in a complimentary color to the new cabinet color.
  4. Arrange decorative items or everyday essentials on the shelves.

Conclusion

Updating your old honey oak cabinets doesn't have to be an expensive or complicated process. By painting the cabinets a neutral color, updating the hardware, adding crown molding, and replacing upper cabinets with suspended shelving, you can achieve a fresh, modern look that enhances your kitchen's appeal and increases your home value. These economical updates can make a significant impact and create a space you'll love.

The Woodbury Retreat – Creating a Curated Home

retreat statue

A Private Place to Reflect

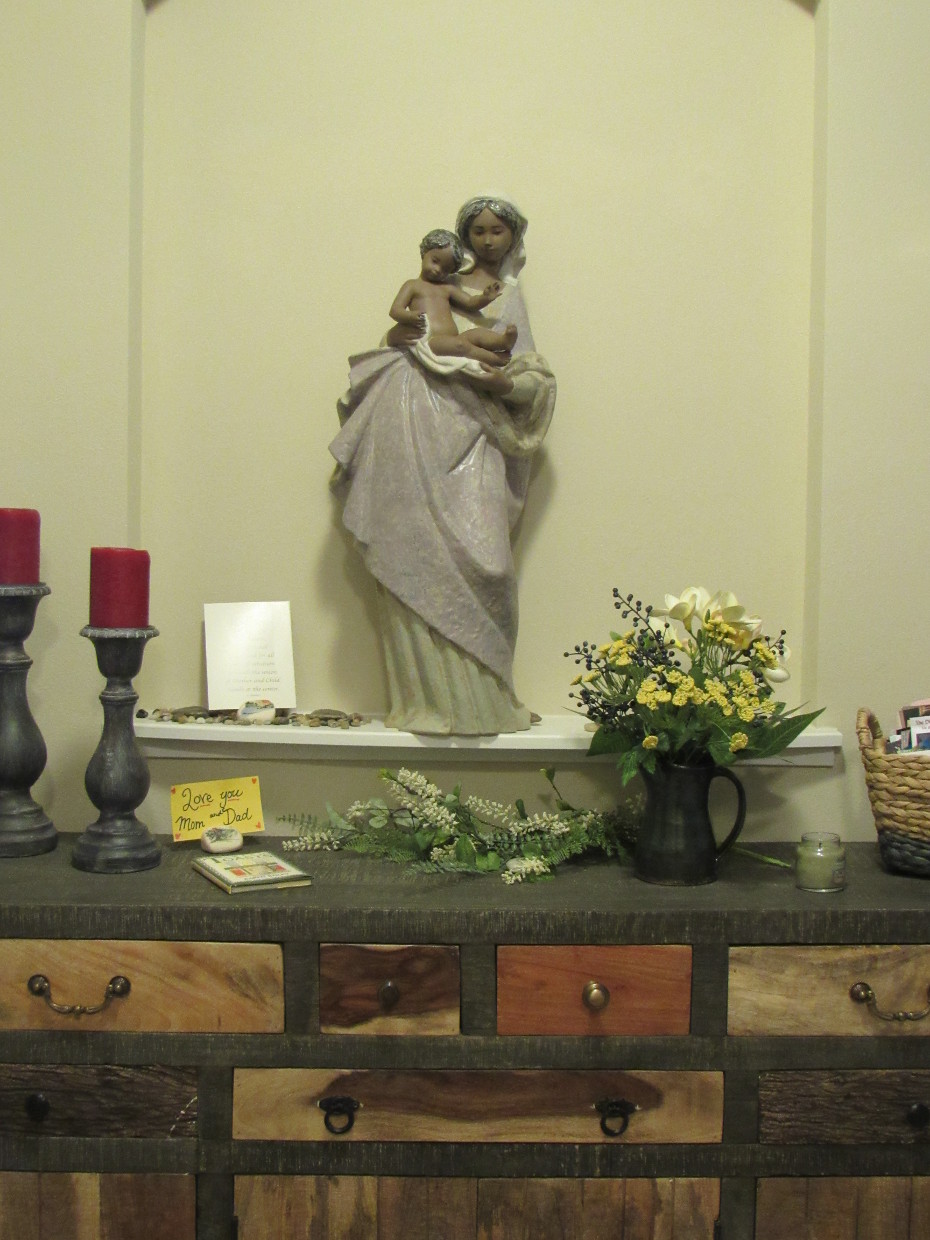
She wanted to rest and retreat from the stress in her life. This focal wall as you entered her apartment set the stage to what you would experience throughout her home. A restful retreat. This statue was purchased at one of St. Thomas Academy’s annual auctions. It is now a comforting feature in my client’s home.

After selling her long time home in St. Paul which I helped her stage, she asked me to help turn her new apartment into a home.

She needed a place to get away and reflect. She was entering a new stage in life.

Feature Wall

The first thing she asked me to do was to help with this feature wall that greeted you as you first entered her new apartment retreat. She wanted the statue of the Blessed Mother here but the statue seemed to fade into the white wall behind. We need it to be a focal point.

retreat entrance
Statue needed to be featured

In response, I decided to raise it up and center it more in the space and create a faux painted wood panel to be installed behind it. This helped the statue of The Blessed Mother become a prominant feature without making it look “churchy”. I pulled the colors from the Blessed Mother and layered them when staining the wood panel.

retreat statue
Layering paint creates this beautiful faux wood panel to bring out the colors in the statue.

Hiding Wires

Then, there was the challenge of hiding the modem wires and finding a place for the grandchildren’s toys. She loved the modern touch that this buffet and the additional needed storage it provided.

Build in storage

A simple solution to hiding the TV and modem wires was these covers from the local hardware store. They worked wonderfully.

Hidden wires can help make a room feel less cluttered.

Paying attention to sight lines added to the Retreat Atmosphere

As a matter of fact, the living room wall happened to be the wall she saw from her bed. Therefore it needed to be addressed with a focal point. If you want to learn more about “sight lines” and “focal points” I talk more about them in the Love Your Layout Workshop. What you see from other rooms is important to consider when curating your home.

sight line in retreat
The placement of pictures can inspire!

Subsequently, she bought this print by Steve Henderson entitled “Ocean Breeze” [from greatbigcanvas.com]. Simply put, it was a delightful find that was an emotional lift at the start of each new day.

Uplifting painting added to the retreat atmosphere
A Fresh New Day!

Additionally, she wanted to feature another inspiring painting that was created by her nephew when he was, also, going through a traumatic time in his life. The painting, entitled “Eternal Hunger”, represented a nursing child finding solice in his mother’s arms.

Retreat Image of mother and child
Mother and Child

And then it was just a matter of tying together her existing decor to create a cohesive color scheme that was calm and relaxing.

Retreat Guest Room Color Scheme

In the guest room, using the colors in a picture she treasured from a friend, we then took the soft teal from the ocean in the picture and repeated it throughout the room by painting the oak frame and hand painting the pillow to coordinate.

Working from things she loves
Retreat Guest room Pillow

Focal Point for Dining Room

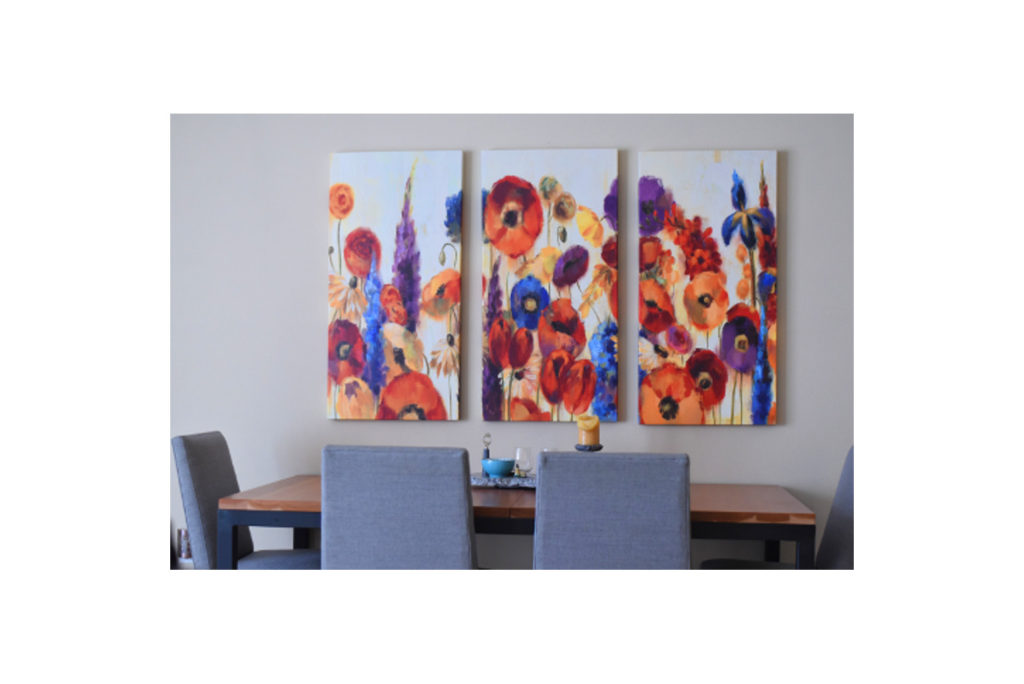
Lastly, we needed to create a focal point behind the dining room table. Since, it was an open floor plan with the living room, the colors needed to be cohesive. And due to the muted colors of soft greys and cream throughout these rooms , she found delight in the colors in this grouping. We centered them over the dining room table to draw the eye as if to call you to sit down.

A home is all about surrounding yourself with things that you love and inspire you.

It was, indeed, an honor to be a part of her journey to help her create a retreat to refresh and reflect and rejoice in God’s love for her.

Nancy and Sandra in retreat
Love her!
Verified by ExactMetrics