Economical Ways to Update Honey Oak Cabinets for a Fresh, Modern Look

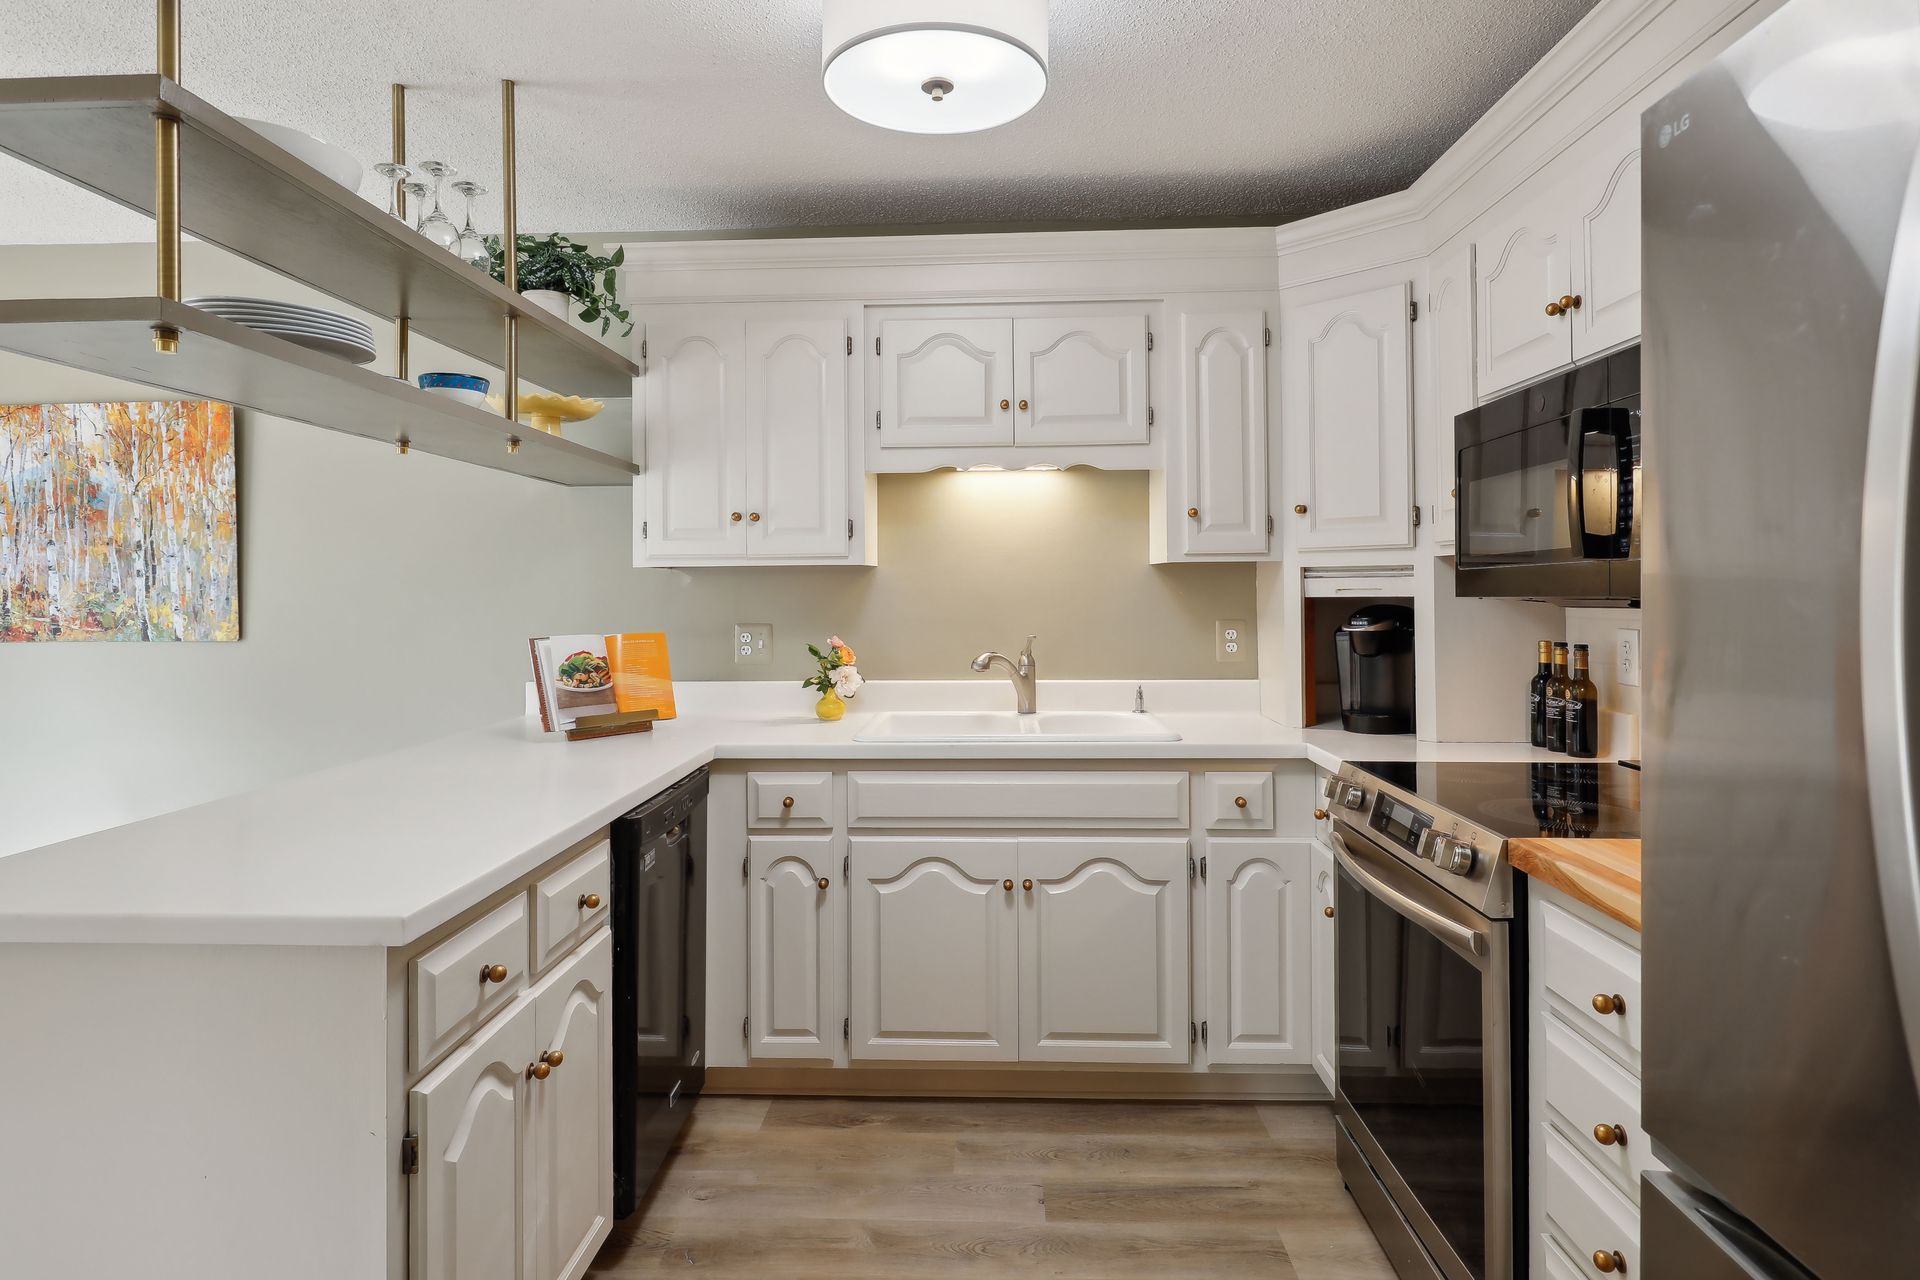
 Old honey oak cabinets can give a kitchen a dated look, but with a few economical updates, you can transform your space and increase your home’s perceived value. Here's how you can refresh your cabinets and create a bright, inviting kitchen without breaking the bank.


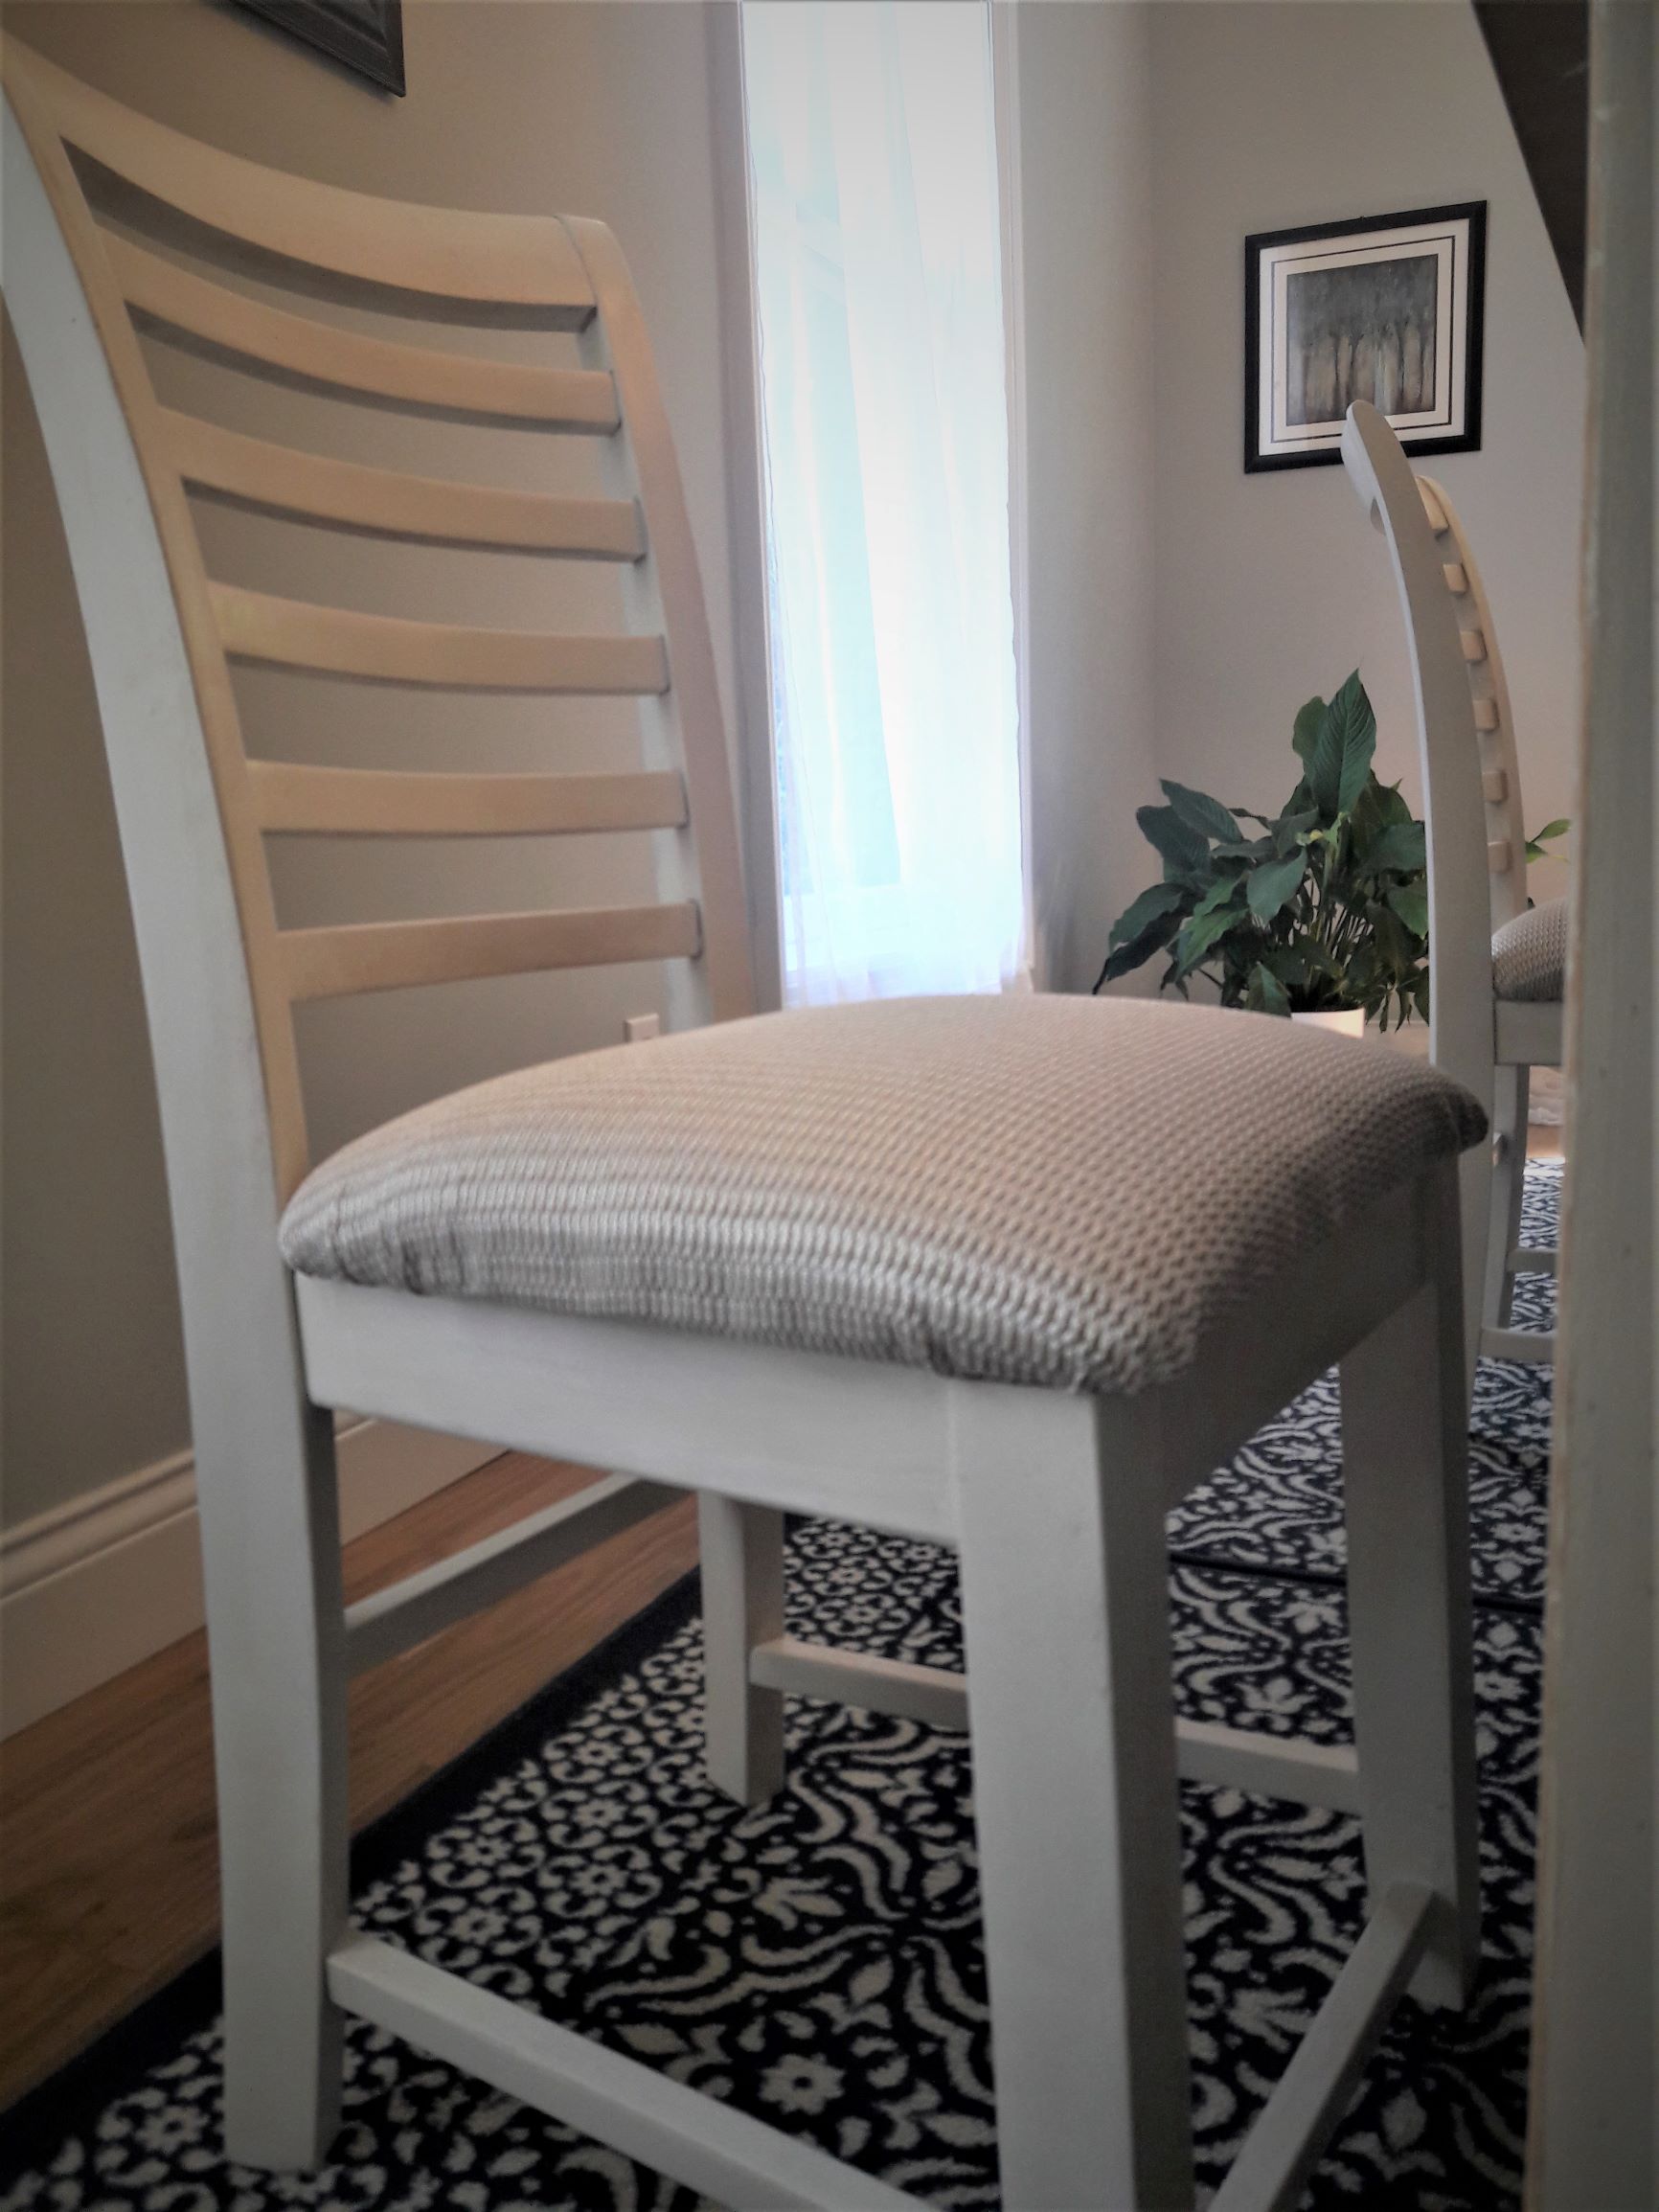
  1. Paint Your Cabinets a Neutral Color


Painting your honey oak cabinets is one of the most cost-effective ways to give them a new lease on life. Choose a neutral color, such as a soft white, warm gray, or beige, to create a modern, clean look. Neutral colors not only brighten up the space but also appeal to a wide range of potential buyers.

Steps to Paint Your Cabinets:

  1. Remove the cabinet doors and hardware.
  2. Clean the cabinets thoroughly to remove grease and grime.
  3. Sand the surface to create a smooth base for the paint.
  4. Apply a primer to help the paint adhere better.
  5. Paint the cabinets with a high-quality paint in your chosen color.
  6. Reattach the doors and hardware.

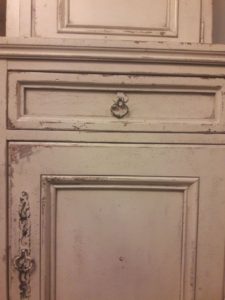
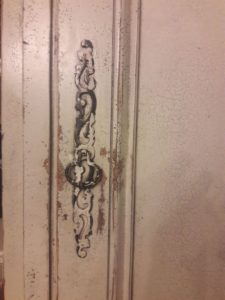
2. Update the Knobs and Pulls

Swapping out old hardware for new, stylish handles and knobs can make a big difference in the overall look of your cabinets. Opt for hardware that complements the new color of your cabinets and adds a touch of elegance. In this kitchen we opted for an antique gold.

Hardware Ideas:

- Brushed nickel for a sleek, modern look.

- Oil-rubbed bronze for a classic, timeless feel.

- Matte black for a bold, contemporary vibe.

-Antique gold for a classic look

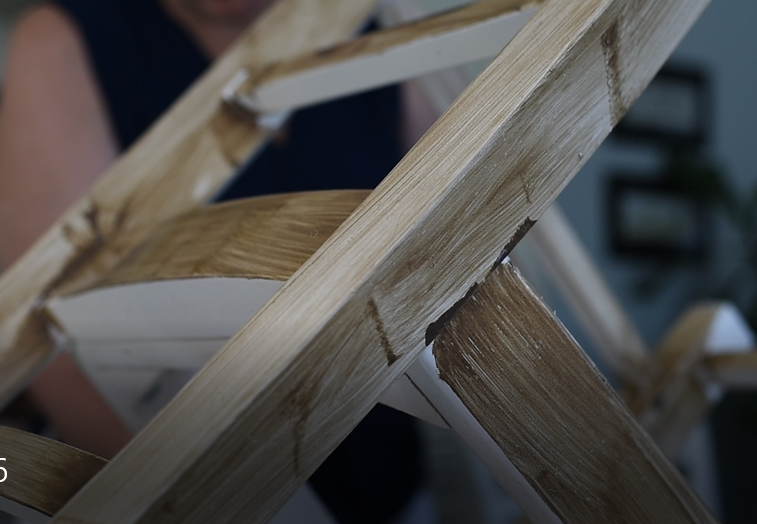
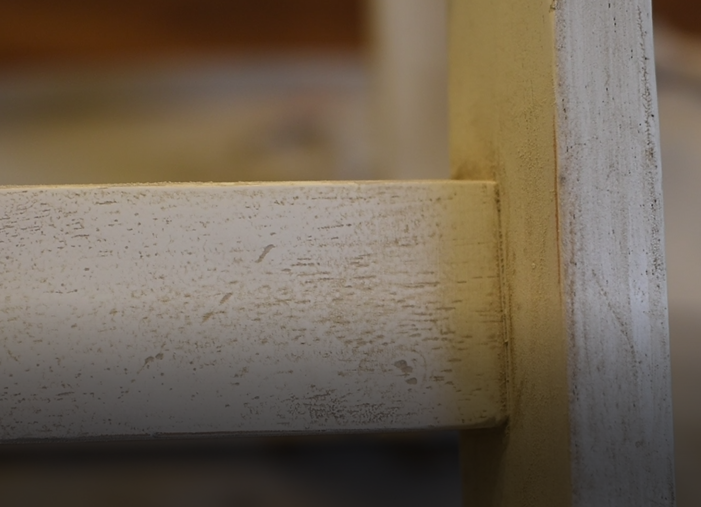
3. Add Crown Molding

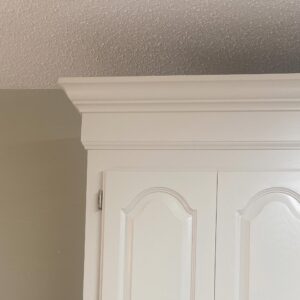
Adding crown molding to your cabinets can bridge the dreaded gap between the top of the cabinets and the ceiling. This simple addition gives your kitchen a polished, custom look.The crown molding lifts the eye and makes the kitchen feel larger.

Steps to Add Crown Molding:

  1. Measure the gap between the cabinets and the ceiling.
  2. Cut the crown molding to fit the measurements. We added a straight board on top of the cabinets first and then the crown to make the crown larger.
  3. Attach the molding to the top of the cabinets using a nail gun or adhesive.
  4. Fill any gaps or seams with caulk and paint to match the cabinets.

 4. Replace Upper Cabinets on the Peninsula with Suspended Shelving

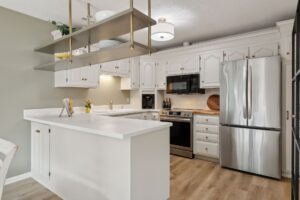
Removing the upper cabinets on the peninsula and replacing them with suspended shelving is a great way to open up the space and let in more natural light from an adjacent room. The open shelving creates an airy feel and allows you to showcase decorative items or frequently used kitchenware.

Steps to Install Suspended Shelving:

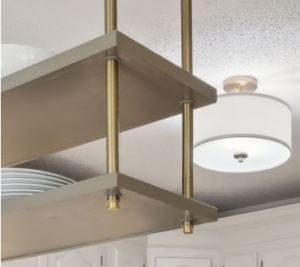
  1. Remove the existing upper cabinets on the peninsula.
  2. Use the  existing brackets or suspenders from the ceiling to support the shelves but cover them with rods that match your decor.
  3. Attach the shelves to the brackets or suspenders. To make it even  more economical, we used the wood from the cabinets we removed to make the shelving and then painted them in a complimentary color to the new cabinet color.
  4. Arrange decorative items or everyday essentials on the shelves.

Conclusion

Updating your old honey oak cabinets doesn't have to be an expensive or complicated process. By painting the cabinets a neutral color, updating the hardware, adding crown molding, and replacing upper cabinets with suspended shelving, you can achieve a fresh, modern look that enhances your kitchen's appeal and increases your home value. These economical updates can make a significant impact and create a space you'll love.

Preparing Your Home for Sale: What to do With Your Belongings


Selling your home is a significant undertaking, and one of the key aspects of preparing it for sale is managing your belongings.  Properly sorting, organizing, and sorting your items can make your home more appealing to potential buyers. Here's a step-by-step guide to help you navigate this process:

Step 1: Sorting Your Belongings

The first step in preparing your home for sale is to sort through all of your belongings.  This involves making decisions about what to keep, what to give away, sell, throw out, or pack.

Here's how to approach it:

  1.   Assess Each Item:  Go through each room and assess every item. Decide whether it will be kept for staging but disposed of before moving, kept for staging and want to keep for the next house, given away now, sell now, thrown out now, or packed now.
  2. Categorize Items:  One way to do this is by simply putting a colored sticky note  on each item or group of items to denote whether they are to be given away, sold or packed and make a plan to sort them on a day in your calendar.  Designate a color for each category.  For those items you want for staging buy plan on getting rid of after the sale of your home, make a list of those items so you can easily keep them apart from the items you will be packing to move to your next house.
  3. Make a Plan: Make a plan to pack your house up room by room.  You have already done the work of categorizing your items. Now, make a plan to actually do the work of packing and sorting. Perhaps designate one room and closet each day or more than one room based on the time you have to prepare.

Step 2:  Staging Essentials

When it comes to staging your home, less is more.  You want to create a clean, clutter-free space that allows potential buyers to envision themselves living there.  Keep only the items that enhance the appearance of your home.

Let me know if you want help deciding how to stage your home for sale.  We can do a video call and you can show me what you have done and I can suggest what more you may want to do.  Click here to Schedule a call with me if there is a way I can help.

  1. Select Staging Items: Choose furniture, decor, and other items that will make your home look its best.  Focus on pieces that highlight the best features of your home.
  2. Store Non-Essential Items:  Items that aren't used for staging should be stored away.  This includes personal items, excess furniture, and any decor that may not appeal to a wide audience.

Step 3: Managing Essential Living Items

If you are still living in your home while it's on the market, you'll need to keep essential items for dailing living.  However, these items should be stored in a way that keeps your home looking tidy:

  1. Hidden Storage: Plan areas where essential living items can be stored out of sight. For example, store your everyday toaster in a cabinet and pull it out only when needed.
  2. Minimize Visible Clutter: Only keep the seential out in the open. Everything else should be neatly tucked away to maintain a clean appearance.

Step 4: Storing Large Items

Large items can be challenging to manage, especially if they aren't needed for staging.  Here's how to handle them:

  1.   Offsite Storage: Consider renting a storage locker to keep large items that won't be used for staging. this helps free up space and keeps your home looking uncluttered.
  2. Garage Storage:  If renting a storage locker isn't an option, store large items in the garage.  Buyers expect to see a few stored items in the garage, so this won't be a major issue.

Conclusion

Preparing your home for sale involves more than just cleaning and fixing up the space.  Properly managing your belongings is crucial to creating a welcoming and attractive environment for potential buyers.  By sorting, staging, and storing items effectively, you can make your home stand out and increase its appeal.

Remember, the goal is to create a space that potential buyers can see themselves living in.  With a little effort and organization, you can make your home shine and sell it quickly.

Updating My Dining Room Chairs

Reupholstered Chair

Updating my dining room chairs was the right solution since they were still in good condition.

Since we are holding up in our house more right nowbecause of COVID, I decided to finish an ongoing project. I have been updating my dining room tables and chairs.

I am happy to say that I am done!  It has been a long project.

It all started because our tables and chairs were bar height and the wrong wood tone.  We found that the tall height was hard on some of our backs and this height was a less formal look than what I was looking for.

The first thing we did was to cut our table legs down and the chair legs down.  As you can see from this picture, the cross bar ended up to be pretty low to the floor but we were willing to live with that.  It was far easier (we thought) to refinish the chairs and to use what we had rather than buying a new table and chairs.

Updating my dining room chairs - Comparing bar height and regular height chairs

Updating my Dining Room Chairs to Compliment My Existing Furniture

I have a large buffet piece that we love has moved along with us from home to home.  It has found a home in 5 houses including a trip across the country from Virginia to Minnesota.  It was important to me that the dining room table and chairs coordinate with this piece.  The table and chairs were blonde wood which didn’t compliment the buffet or our walnut floors.  The buffet is a painted piece with a distressed finish.

Updating my dining room chairs - distressed finish
Distressed finish
closeup of buffet door pull

My table and chairs, on the other hand, were not very expensive but they serve us well.  We love their versalit! Depending on how we arrange them, we can accomodate groups of all different sizes.  We have two 5′ square tables that allow us to sit up to 16 people when set apart.  Each has a leaf that can change the table size to seat either 6 or 8 people.  When we put them together we can seat 12 all around one large table.   We rearrange them depending on the number of people we are hosting.

So, I decided to first refinish and update the table first.  I don’t have any pictures of this process but it is pretty much what I did on the chairs. I primed and painted the table legs and apron the same color as the buffet.  Then proceeded to distress them by hammering small indentations with a tip of a nail and sanding them a bit.  I finished with a glaze.

I then sanded and stained the tabletop to compliment the walnut floors. In the picture on the left of my son’s birthday, you can see when the table top was blonde compared to the picture on the right after I stained it a darker color to compliment the floors in our new house.

Blonde Wood Table Top
Blonde wood tabletop
stained table top
Tabletop stained and finished with polyeurethane
painted table leg and apron
Painted blonde wood legs

Whew!  That was fun but I was not looking forward to finishing the chairs.  THERE ARE 16 OF THEM!

Updating My Dining Room Chairs

I started by sanding off the polyeurethane finish and then staining them just like I did the table top.  I was hoping to match the table top.  The soft wood soaked up the stain unevenly though.

Ultimately, I didn’t like the finished look.

closeup of unfinished chair
chair being stained
Wiping on stain

PLAN B… I decided to paint them instead.

Lots of chairs
Updating dining room chairs - spray painting

I spent several days priming and painting the chairs.

Thankfully, I had a hand-held sprayer that I bought for a client project.  Each was lightly sanded and then primed and painted.

The painted chairs looked great but they looked too new when compared to the distressed finish on the buffet and newly refinished table.  Each chair needed to be glazed to create a more antique look.

I was able to achieve this by wiping a glaze on each and then wiping it back off with a damp cloth leaving a small residue in grain lines.

chair being glazed
Painted glaze on with a brush
closeup of glazed chair leg
glaze remained in the wood grain
closeup of chair leg

Recovering the Dining Room Chair Pads

Lastly, each chair seat needed to be recovered.  The pads that came with the chairs were not very comfortable. They were not very dense and not very thick.  The fabric was very stained as well from many years of use.

I took this opportunity to take apart the covers and replace the pads with a more dense and thick foam to help cushion. To do this, I needed to remove all the staples from the cover fabric so I could get at the padding.  First there were approximately 20 staples on the facing fabric and then over a hundred staples holding the fabric on each cushion!

Updating my dining room chairs - underside of seat cushion
100 staples on back of cushion

It was just too difficult to remove them so I ended up cutting away the fabric around the staples and just leaving the staples in the base board.  It was taking me 15 minutes to remove just 8-10 staples.  The staples were so flush with the board that I couldn’t get under them to pull them out.  I ended up just turning over the board and placing the staples on the top side under the padding.  Sometimes we just got to do what we got to do:)

Updating my dining room chairs - laying out chair seat cushion

I then stretched the new fabric cover over the padding and base board.  Then stapled it tight making sure the corners were smooth.  I was able to achieve this by creating small folds on the underside gathering up the excess fabric.

Updating my dining room chairs - stapling seat cushion fabric

Ta Da! Finished!

As all projects go… there is always more to do…

On to the walls!

My style is a mix of traditional and modern, otherwise known as Modern European.  I plan on painting them with a specialty limewash paint from Portola Paints.  This will create a mottled finish similar to suede.  I think it will look fantastic as a textured finish next to my buffet and modern accents.

Stay tuned for a how-to post on that.

Finished chair

The Woodbury Retreat – Creating a Curated Home

retreat statue

A Private Place to Reflect

She wanted to rest and retreat from the stress in her life. This focal wall as you entered her apartment set the stage to what you would experience throughout her home. A restful retreat. This statue was purchased at one of St. Thomas Academy’s annual auctions. It is now a comforting feature in my client’s home.

After selling her long time home in St. Paul which I helped her stage, she asked me to help turn her new apartment into a home.

She needed a place to get away and reflect. She was entering a new stage in life.

Feature Wall

The first thing she asked me to do was to help with this feature wall that greeted you as you first entered her new apartment retreat. She wanted the statue of the Blessed Mother here but the statue seemed to fade into the white wall behind. We need it to be a focal point.

retreat entrance
Statue needed to be featured

In response, I decided to raise it up and center it more in the space and create a faux painted wood panel to be installed behind it. This helped the statue of The Blessed Mother become a prominant feature without making it look “churchy”. I pulled the colors from the Blessed Mother and layered them when staining the wood panel.

retreat statue
Layering paint creates this beautiful faux wood panel to bring out the colors in the statue.

Hiding Wires

Then, there was the challenge of hiding the modem wires and finding a place for the grandchildren’s toys. She loved the modern touch that this buffet and the additional needed storage it provided.

Build in storage

A simple solution to hiding the TV and modem wires was these covers from the local hardware store. They worked wonderfully.

Hidden wires can help make a room feel less cluttered.

Paying attention to sight lines added to the Retreat Atmosphere

As a matter of fact, the living room wall happened to be the wall she saw from her bed. Therefore it needed to be addressed with a focal point. If you want to learn more about “sight lines” and “focal points” I talk more about them in the Love Your Layout Workshop. What you see from other rooms is important to consider when curating your home.

sight line in retreat
The placement of pictures can inspire!

Subsequently, she bought this print by Steve Henderson entitled “Ocean Breeze” [from greatbigcanvas.com]. Simply put, it was a delightful find that was an emotional lift at the start of each new day.

Uplifting painting added to the retreat atmosphere
A Fresh New Day!

Additionally, she wanted to feature another inspiring painting that was created by her nephew when he was, also, going through a traumatic time in his life. The painting, entitled “Eternal Hunger”, represented a nursing child finding solice in his mother’s arms.

Retreat Image of mother and child
Mother and Child

And then it was just a matter of tying together her existing decor to create a cohesive color scheme that was calm and relaxing.

Retreat Guest Room Color Scheme

In the guest room, using the colors in a picture she treasured from a friend, we then took the soft teal from the ocean in the picture and repeated it throughout the room by painting the oak frame and hand painting the pillow to coordinate.

Working from things she loves
Retreat Guest room Pillow

Focal Point for Dining Room

Lastly, we needed to create a focal point behind the dining room table. Since, it was an open floor plan with the living room, the colors needed to be cohesive. And due to the muted colors of soft greys and cream throughout these rooms , she found delight in the colors in this grouping. We centered them over the dining room table to draw the eye as if to call you to sit down.

A home is all about surrounding yourself with things that you love and inspire you.

It was, indeed, an honor to be a part of her journey to help her create a retreat to refresh and reflect and rejoice in God’s love for her.

Nancy and Sandra in retreat
Love her!
Verified by ExactMetrics