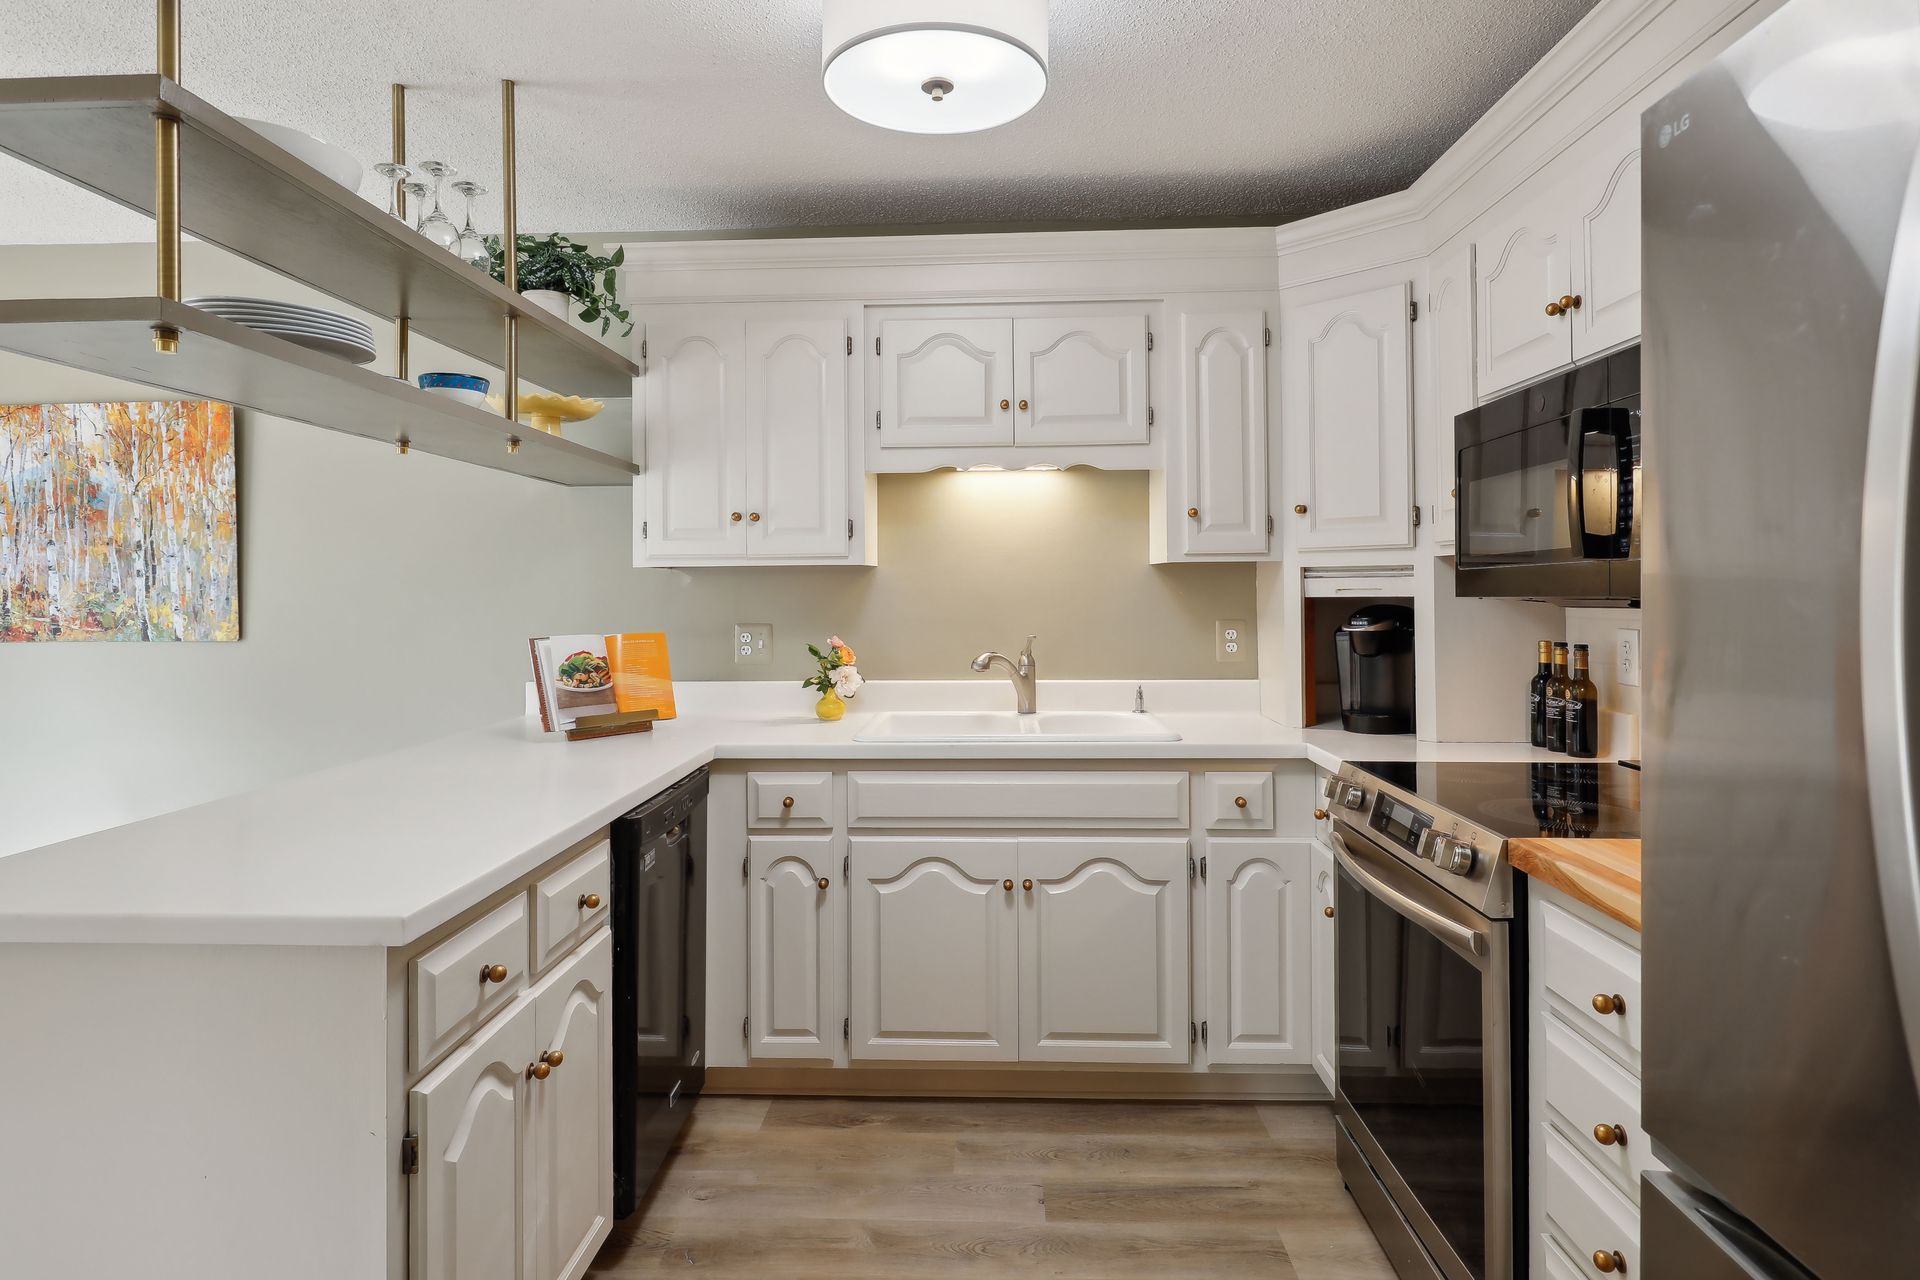
Guide to Choosing Countertops

Choosing countertops is often a daunting task because of the many choices of materials.  I am going to break it down for you so you have all the information you need to make a wise decision. Knowing the pros and cons of each material will help you narrow down the choices to fit your specific needs and limitations.

In my research I found that information from different sources are often conflicting.  I recommend that you confirm the following information with the manufacturer so you can care for your new countertops correctly.

The following characteristics will be compared to help in choosing countertops:

  • Heat Tolerance
  • Stain Resistance
  • Disinfecting
  • Scratch Resistance
  • Fade Resistance
  • Maintenance
  • Ease of Repair
  • Edge Options
  • Thickness Options

This post will be updated periodically if there is new information that would be helpful to include.  Last updated 10/15/2024

Here are my notes….

Finishes

Honed – A honed surface appears matte or is non-reflective because it has been ground smooth. It has a velvety and satin-like feel.

Polished – surface offers a beautiful glossy shine

When choosing countertops, we will be looking at the properties of the following countertop materials:

Marble

Marble  is a natural stone known for its veining. God has created it in many color choices and no one can make anything more beautiful than He can. 😊

marble from radhestonex.com
Radhestonex.com

Granite

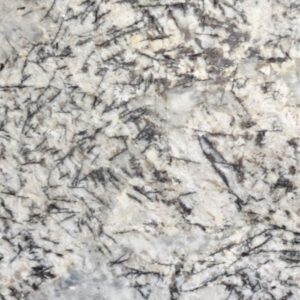
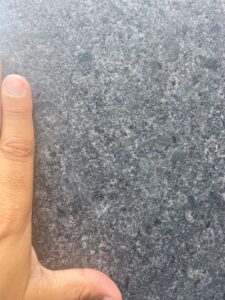
Granite is a natural stone made of multiple materials giving it a granular appearance. It is formed from melted rock or magma. You can read more about how it is formed HERE.

radhestonex.com/indian-granite
gray granite
stonetrash.com

Soapstone

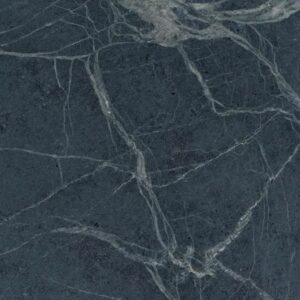
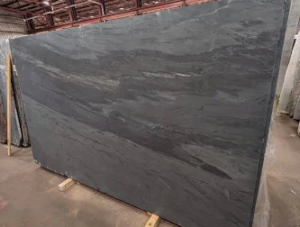
Soapstone is a metamorphic rock composed mainly of talc combined with other minerals giving it a smooth velvety feel.

soapstone
MSI Surfaces
soapstone slab
stonetrash.com

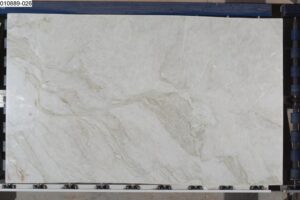
Natural Quartzite

Natural Quartzite is a also a natural stone formed from quartz-rich sandstone.

natural quartzite
stonestrash.com Taj Mahal leather quartzite

Quartz (Engineered Quartz)

Quartz is a man-made material often referred to as “Quartz”.  A couple well-known brands are Cambria, Silestone and Caesarstone. It is made up of 90-95% ground quartz particles combined with resins, polymers and pigments to bind them together.

quartz
stonetrash.com Trends in quartz Tumbled Rock

Dekton

Dekton is made of a blend of raw materials, including porcelain, glass and quartz using sinterized particle technology.

Solid Surface

Solid Surface describes a group of materials that include terms like Corian and Wilsonart. These materials are composed of about 1/3 acrylic resin and 2/3rds natural materials.

Butcher Block

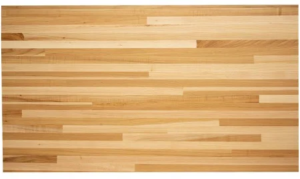
Butcher block is made from straight cuts of wood glued together to form a thick slab.  It can be made from all types of wood including maple, oak, walnut and cherry.

butcher block countertop
hardwood lumber company

Porcelain

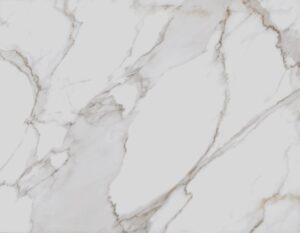
Porcelain is made from a type of ceramic composed of fine clays and other natural materials.

porcelain
precisionedesigns.com
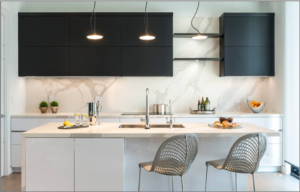
porcelain in white kitchen
easternsurfaces.com

Concrete

Concrete is made from a mix of cement, sand, gravel and water.  Pigments are added for color and then polished and sealed.

concrete countertop
stonetrash.com Sleek Concrete

Laminate

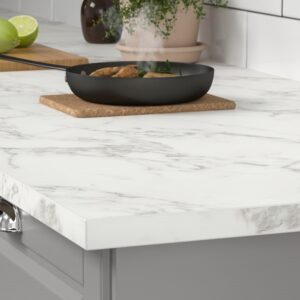
Laminate is a material often described synonymously with the brand of Formica.  It is made from layers impregnated with resins and topped with a decorative paper layer and then finished with a clear melamine overlay.

laminate counter
Ikea.com Ekbacken laminate

Choosing Countertops for Heat Tolerance

Marble – Good heat tolerance but not as high as granite. begins to crack at 329 degrees

Granite – Very high heat tolerance but trivets are still recommended

Soapstone – Good heat tolerance up to around 450 degrees. Take care to use mats, trivets under hot objects.

Natural Quartzite – Very high heat tolerance like granite. Heat will damage if high % resin. Take are to use mats, trivets under hot objects

Quartz – heat will damage if high % resin. Take care to use mats, trivets under hot objects

Solid Surface – low heat tolerance. Use trivets and pads under hot objects.

Dekton – high heat resistant but use trivet for hot items

Butcher Block – will char. Take care to use mats, trivets under hot objects.

Porcelain – It can handle freezing and thawing temperatures as well as high temperatures.  High heat tolerance.

Concrete – high heat tolerance but a sudden temperature change can affect the sealer.

Laminate – very low heat tolerance. Take care to protect against heat.

In summary, most countertops benefit from using protection against hot objects.  The natural stone materials have better heat tolerance where materials that have built in polymers and resins could scorch and get damaged from heat. Laminate is the lowest tolerance being made of paper and resins. Porcelain and Dekton which is made from porcelain and stone are very high heat tolerant. 

Choosing Countertops for Stain Resistance

Always check with the manufacturer before applying any kind of stain remover.  The following are common solutions that can be applied to countertops to remove stains. Removing stains can be trial and error. 

  • Vinegar is an acid and works on stains like coffee, tea or juice
  • Baking Soda and water paste is effective for oil-based stains
  • Hydrogen Peroxide and baking soda paste is effective to remove wine stains. Let it sit overnight and then wipe away.
  • Hydrogen Peroxide and dishwashing liquid mixture. Let sit overnight and then wipe away.
  • Diluted Bleach for cola and fruit juices
  • Salt
  • Baking Soda
  • Club Soda
  • Rubbing Alcohol is a nearly neutral pH and is a great homemade cleaner
  • Dishwashing Liquid
  • Bar Keepers Friend Liquid
  • Ammonia products are alkaline and good for grease, oil and coffee stains


Marble and Granite are natural stone which tend to be porous. Oil-based products and acid liquids can cause stains. Acidic substances like wine, coffee, vinegar, tomato and lemons can dull the surface. Avoid acidic cleaners that contain the following: ammonia, citrus, bleach, vinegar. These may damage or dull as well. So, what is best to use to clean stains? The number one way to fight stains on natural stone surfaces like marble and granite is to avoid them and wipe up right away with a mild soap and water solution.  If a stain occurs, use a poultice or paste to draw out the stain.  A pH-neutral, non-abrasive cleaner is best to be used.  Hydrogen peroxide is often used or a baking soda and water paste for tough stains. Sealing the clean stone is a good preventative measure to make it easier to wipe and clean stains.

Soapstone is non-porous and will not stain from coffee, milk, wine, tomato and other common liquids that stain other types of countertop materials.  If a liquid causes a discoloration it will fade over time.  Soapstone doesn’t allow liquids to penetrate the surface.  It will not be damaged by harsh chemicals but the cleaner you use may affect the mineral oil sealant that is giving it it’s beautiful leather texture. It can be easily maintained with mild cleansers. Avoid abrasive cleaners to avoid damaging its soft surface.

Natural Quartzite – is a natural stone which tends to be porous.  Please don’t confuse this with “quartz” which is an engineered product.  Both oil-based and water-based foods may cause discoloration.  To remove these stains, one must draw the stain out of the pores of the stone through the use of a poultice or paste. You are in luck if you like to use vinegar or lemon juice to clean because generally, the surface of quartzite isn’t damaged by common acids but some slabs can react with acids if they contain calcium carbonate. Therefore, I recommend that you should avoid cleaners that contain acids like ammonia, citrus, bleach or vinegar which may dull the surface. Hydrogen peroxide is often used or a baking soda and water paste to draw out the stain. Sealing the stone with a water-based seal

Quartz – White quartz is notorious for getting stained. Wipe up colored liquids as soon as you can with soap and water.  Liquids that sit on the surface like from dirty dishes, a stain may form.  If a stain does form, use a baking soda and water paste and let sit for a few minutes and then wipe away. Avoid abrasive cleaners and both harsh acidic and alkaline cleaners to prevent damage to the surface of the countertop. Acids like vinegar, lemon juice can damage the resin within it. Even though quartz isn’t as porous as natural stone, the resins within it can be damaged by harsh chemicals.

Solid Surface is stain-resistant but not stain proof. Soap and water works for most cleaning needs.  Countertop cleaners like Bar Keepers Friend or an ammonia-based cleaner like glass and multi-surface cleaners work well too.  A possible solution that is an effective cleaner is the following mixture: ratio 1:24:1 rubbing alcohol: water: dish soap

Dekton is non-porous and very stain resistant. In the case a stain is created, avoid harsh chemicals like bleach and ammonia to prevent damage.

Butcher Block can stain easily therefore care should be taken to wipe up spills immediately.  A warm soap and water solution is used for daily cleaning and vinegar is a good solution for cleaning and sanitizing. Use pads to protect from moisture rings and burns from hot objects.

Porcelain is non-porous with superior stain resistance and moisture proofing. Cleaners with oil can leave a residue. Daily cleaning with warm soapy water works for normal cleaning. Porcelain can handle harsher chemical cleaners like but they will dull the surface over time so use sparingly.

Concrete is porous and will absorb liquids therefore it is vulnerable to stains like wine, citrus and vinegar. A method to remove mild stains is to sand stain out and then re-seal and wax. A mild soap and water is the best daily cleaner.

Laminate is resistant to stains. It is safe to use warm soapy water solution with vinegar for daily cleaning. Avoid scrubbing to avoid dulling the surface. A baking soda and water paste soak is a good stain remover. Do not use bleach which will cause damage.

Choosing Countertops for Bacteria Resistance

Rubbing alcohol (hydrogen peroxide) can be used daily to kill germs. Spray it on and then wipe away with a wet cloth. This is safe for all countertop materials.

Marble, Granite and Soapstone have a natural resistance to bacteria growth. A good antibacterial soap and warm water is a good daily solution. The polished surfaces can be damaged by hydrogen peroxide, bleach and vinegar so is not recommended for daily cleaning and disinfecting.

Natural Quartzite is bacteria resistant so antibacterial soap and water solution is sufficient for daily cleaning.  Hydrogen peroxide can be used as well to kill germs.

Quartz – bacteria resistant

Solid Surface – relatively bacteria free. Use isopropyl alcohol (rubbing alcohol 70-90% concentration) to kill germs or diluted household bleach.

Dekton can be disinfected with a variety of products like vinegar and water, hydrogen peroxide or warm soapy water.

Butcher Block harbors bacteria and needs to be washed with vinegar daily to kill bacteria or use hydrogen peroxide for 10 minutes, wipe and let air dry.

Porcelain is not porous so highly bacteria resistant. Wash regularly with antibacterial soap and water solution.

Concrete countertops can be cleaned with a soap and water solution for daily cleaning. Isopropyl alcohol is a good disinfecting solution.

Laminate can be disinfected safely with an isopropyl alcohol spray and then wiping clean with a dry rag. Vinegar and water solution is also a safe solution and of course, a warm soapy water solution.


Choosing Countertops for Scratch Resistance

Marble can scratch and etch easily

Granite chips easily

Soapstone will dent and scratch

Natural Quartzite resists scratches

Quartz is durable but not completely resistant to scratches. Take care to use mats, trivets to avoid scratches. Quartz can be damaged from the impact of heavy objects if dropped on it. Avoid abrasive sponges

Solid Surface resists scratches. Avoid abrasive cleaners.

Dekton is fabulous against scratches but is brittle and prone to cracking and chipping

Butcher Block is prone to scratches but high impact resistant

Porcelain will scratch, chip and crack with impact. It may show etching or metal marks if using metal pans and utensils.

Concrete will scratch and even chip with high impact.

Laminate can develop scratches, gouges and chips.

Choosing Countertops for Fade Resistance

Will any part of your countertop be exposed to direct sunlight? This is especially important in the case of outdoor kitchens and patios. Consider whether the material will fade over time.

Marble is fade resistant but dark colors may fade over years

Granite fades over an extended period if in direct sunlight

Soapstone is fade resistant. It darkens naturally with time.

Natural Quartzite is fade resistant. Natural light won’t darken or fade it.

Quartz may fade if exposed to direct sunlight for long periods of time due to the resins within it.

Solid Surface dark countertops will lighten in direct sunlight and whites will begin to yellow over time. Protect against direct sun.

Dekton does not fade in sunlight.

Butcher Block – may fade with direct sunlight

Porcelain is fade resistant

Concrete countertops with pigment may fade in the sun

Laminate does fade over time if exposed to sunlight

Choosing Counteretops for Maintenance Needs

It is important to consider whether you realistically will keep up with the required maintenance of your countertop to keep it looking beautiful.  

Marble – Only use soap and water. Do not use chemicals including vinegar. Wipe up spills immediately. Needs to be sealed yearly

Granite – Wipe with isopropyl alcohol regularly and use a sealing product yearly to protect.

Soapstone – Recommend daily cleaning with soap and water. Apply mineral oil every month or two and rub in to build a protective layer against stains.

Natural Quartzite –Use only soap and water or a stone cleaner made for natural quartzite. Do not use harsh chemicals. Needs to be polished monthly and sealed yearly to help repel liquids

Quartz – Use soap and water or isopropyl alcohol solution to disinfect. Avoid using ammonia-based cleaners which may weaken the bond between the materials

Dekton is easy to clean and maintain.

Solid Surface is easy to clean and maintain. Use soap and water. Safe to use ammonia-based cleaners. Avoid abrasive cleaners on glossy finishes

Butcher Block – Protect against standing water. Apply tung or mineral oil monthly to preserve the wood from drying out and cracking. Oil increases the water resistance as well.

Porcelain – is easy to clean and maintain. Use soap and water and avoid abrasive cleaners.

Concrete can tend toward developing hairline cracks over time. Seal yearly to create a protective layer to stains and damage.

Laminate is easy to clean and maintain. Use soap and water and avoid abrasive cleaners.

Choosing Countertops for Ease of Repair

If you have an active family and your counter tops take a beating, there is inevitably going to be a chip or crack. How easy is it to get repaired?

Marble – resealing and repolishing can make like new

Granite – repair by professional with granite dust and epoxy resin

Soapstone – scratches can be sanded out with fine sandpaper.

Natural Quartzite – chips can be repaired with an epoxy resin that matches the finish

Quartz – There is an epoxy resin that can be used to fill chipped areas and then sand and polish. Here is a link to a step by step how to repair a quartz countertop from graniteselection.com

Solid Surface – scratches and dents can be sanded out and repaired by contacting a certified installer

Butcher Block – easy to sand scratches, wax and finish

Porcelain – Chips and cracks are difficult to repair if patterns are on the surface. But solid colors may be repaired using color matched epoxies by a fabricator.

Concrete – contact a professional

Laminate – there is a laminate repair paste that can be used to fill in holes and broken edges.  Then paint to match surface.

Choosing Countertops for Edge Options

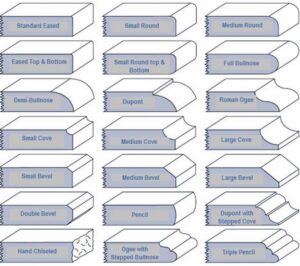
There are really many, many options but here is a selection that I grabbed from Deavita.net. Ask your fabricator if you have a special one in mind.

countertop edge options
marble-concepts.com

Marble – multiple options

Granite – multiple options

Soapstone – multiple options

Natural Quartzite – multiple options

Quartz – multiple options

Solid Surface – multiple options

Butcher Block – generally straight edge

Porcelain – limited edge styles /only square or mitered edges

Concrete – more limited in the options based on the forms available

Laminate – more limited in the options

Here is a link to an article How to Choose Your Edge Profile from Granite & Marble Specilties if you want to learn more about the options.

Choosing Countertops for Thickness Options

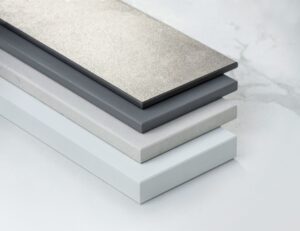
Dekton Thickness options
cosentino.com Dekton

Marble – standard options are ¾” and 1.25” (2 cm or 3 cm)

Granite – standard thickness is 1.25” (3 cm)

Soapstone – standard thickness is 1.25”

Natural Quartzite – standard options are ¾” and 1.25” (2cm or 3cm)

Dekton – 8mm, 12mm, 30mm and 30mm

Quartz – standard options are ¾” and 1.25” (2cm or 3cm)

Solid Surface – the thicknesses is dependent on the Brand

Butcher Block – the standard thickness ranges from 1.5” to 2” thick

Porcelain – standard options range as thin as ¼” to ½” creating a very modern, sleek look

Concrete – standard is 1.5” but can be as think as 1.25” and as thick as 3”

Laminate –  standard options range from .6” to 1.25”

WATERFALL OPTION

This is a countertop that continues over the edge and down to the floor therefore looking like a waterfall.  This look is achieved by adhering another vertical counter at a right angle to the horizontal counter.

Marble – yes

Granite – yes

Soapstone – yes

Natural Quartzite – yes

Quartz – yes

Solid Surface – yes

Butcher Block – yes

Porcelain – yes

Concrete – yes

Laminate – yes but the seam is noticeable

IDEAS FOR DECORATING IN TRADITIONAL STYLE

Traditional Style

Traditional Design Styles

Rustic Farmhouse

simple functional homes of rural areas. cozy and warm atmosphere. natural materials. weathered look

Rustic

English Cottage

Coastal Mediterranean

Victorian

Bohemian

Vintage Cottage

Arts and Crafts

Late 1800s. Lots of wood with craftsmanship

Traditional Style Color Palette

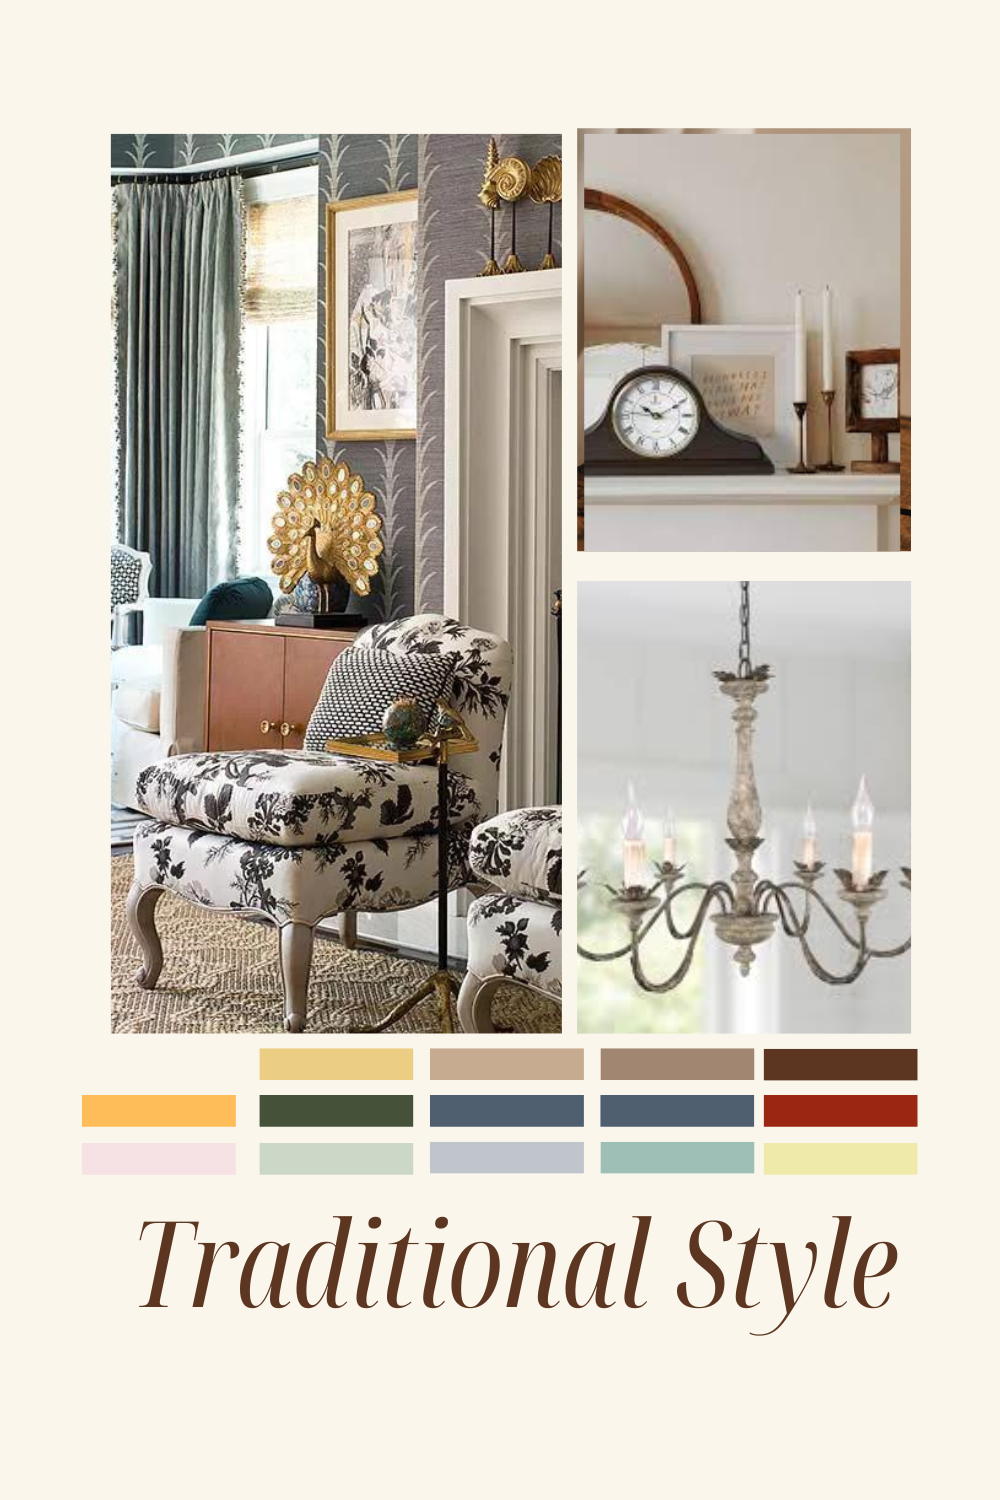
The Traditional Style color palette is warm.  Warm neutrals, off white, tans, beige and ivory are the foundation to the Traditional Style.  Rich warm hues of deep reds, blues, and greens are introduced in a balanced and thoughtful way. Even the soft pastels are often used in this style.

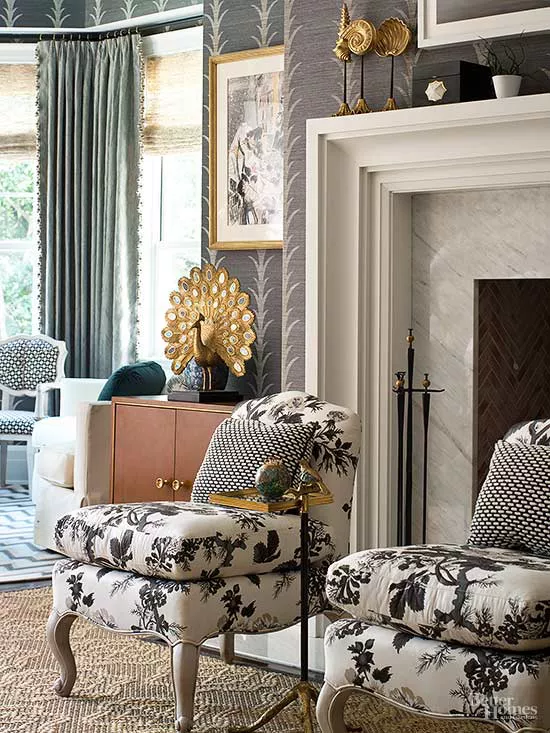
Traditional Style Furniture
Photo Source: Better Homes and Gardens

Furniture in the Traditional Style

Some features of Traditional Style furniture might include:

  • Upholstered seating with carved or turned wood frames
  • Skirted upholstery
  • rolled arms with decorative trim or nails
  • button tufting
  • dark woods like mahogany and cherry

Examples of Traditional Style Furniture:
(Look for the above features in the following pieces)

  • upholstered wing back chairs
  • upholstered chaise lounges
  • upholstered loveseats
  • upholstered club chairs
  • upholstered sofa
  • wood framed occasional chairs
  • secretaries
  • hutches
  • chests
  • wooden benches
  • wooden stools
  • vintage pieces

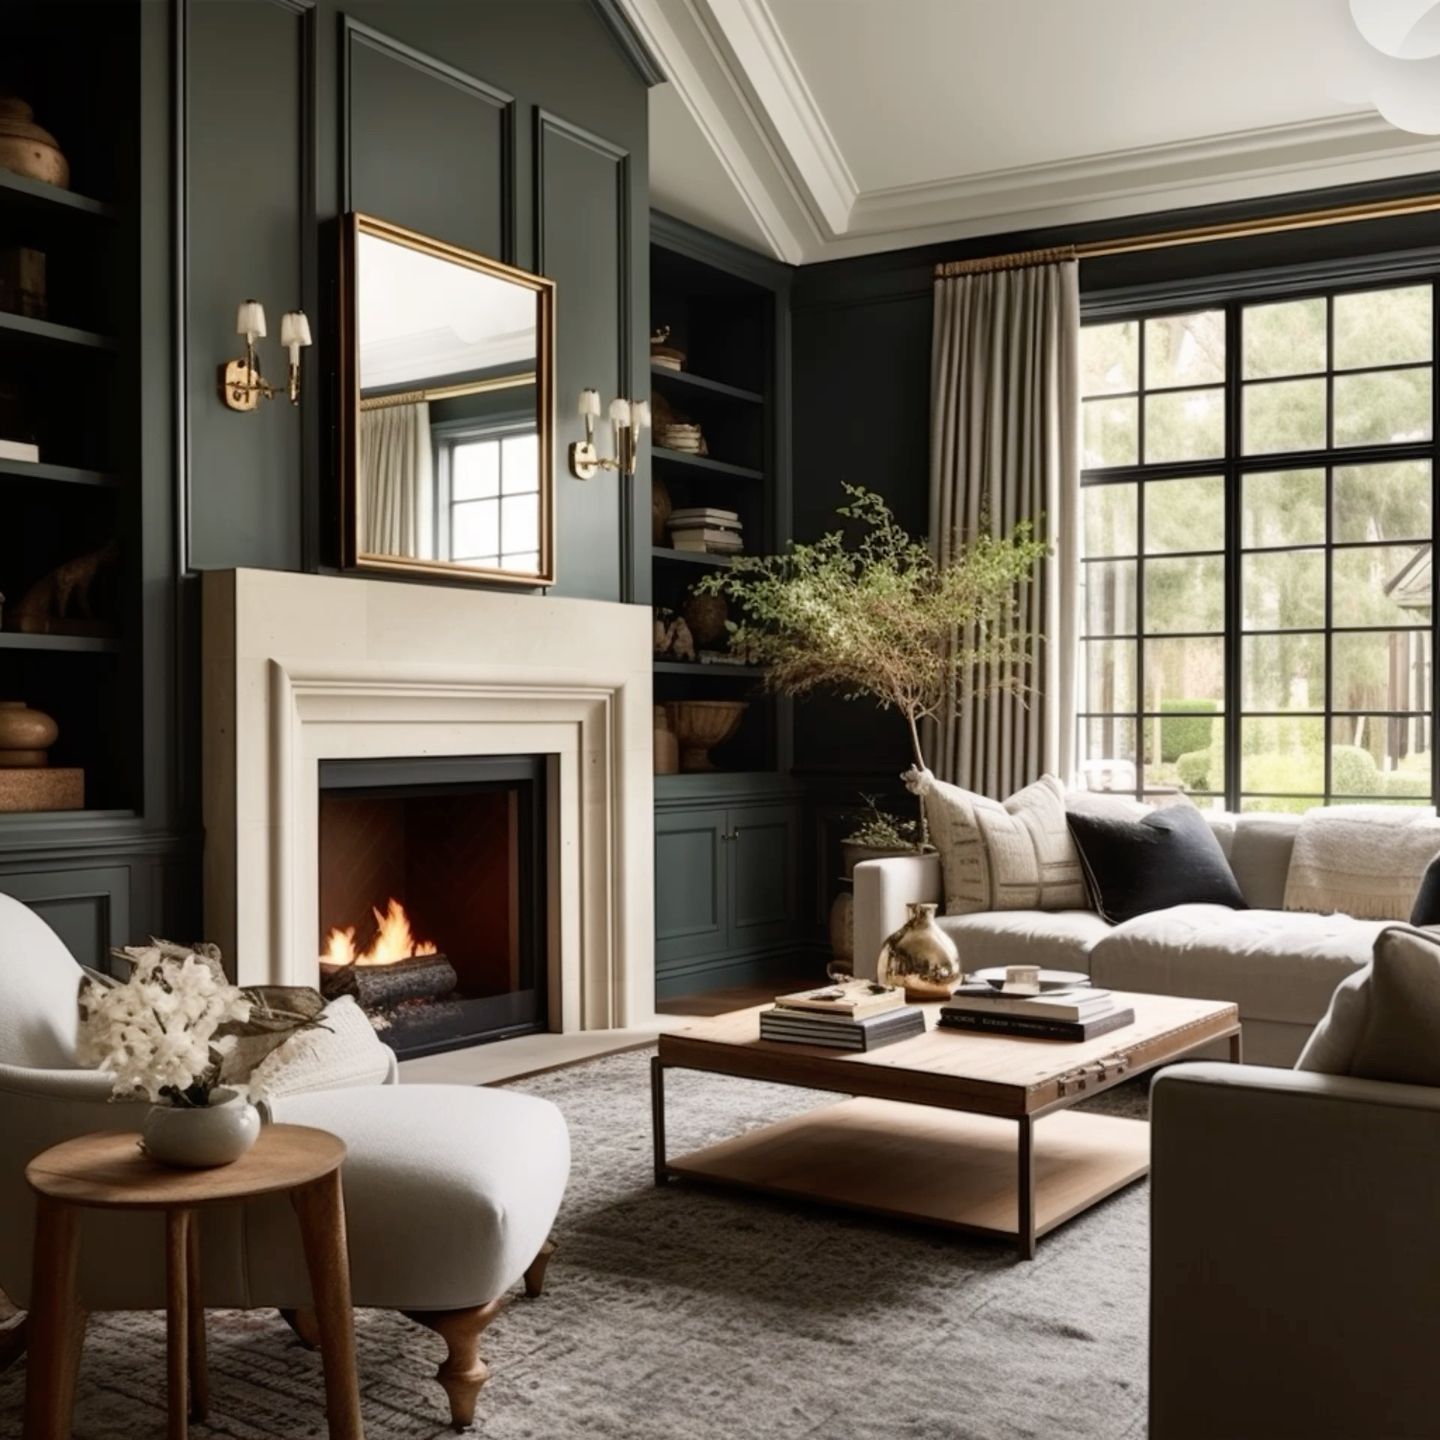
Architectural Influences in the Traditional Style

Photo Source: The Brass Pine

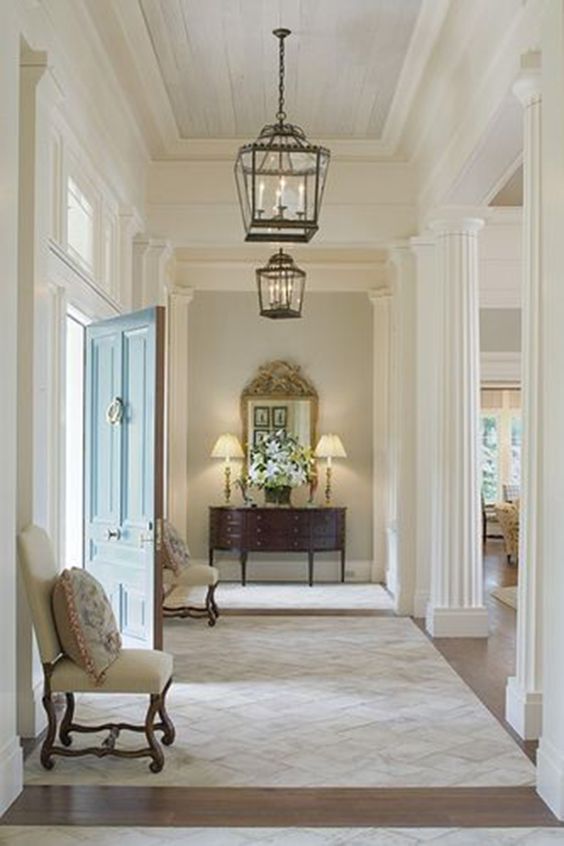
Archiectural Features abound and may include:

  • Built ins
  • paneling and wainscoting
  • crown molding and trim moldings
  • hardwood floors of oak, walnut, cherry, maple or mahogany
  • coffered ceilings
  • arches
  • chair rails
  • columns and pillars
  • detailed ballusters
  • defined rooms rather than an open floor  plan
  • strong symmetry in window placement
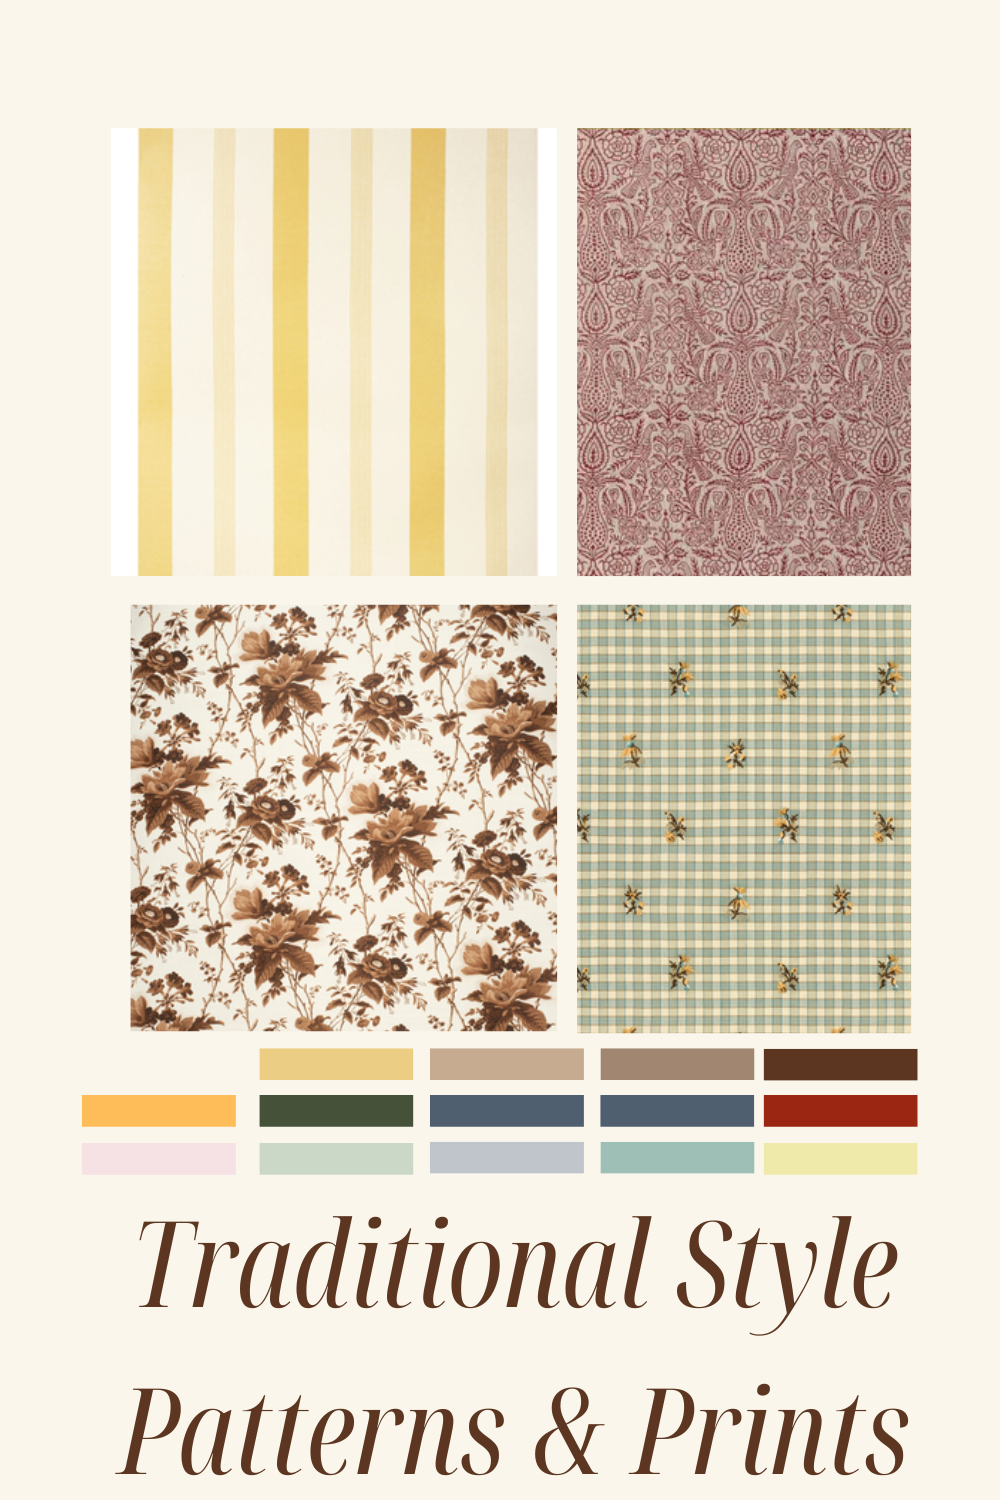
Patterns & Prints in the Traditional Style

Patterns and Prints in the Traditional Style

Look for these patterns and prints in the Traditional warm color palette

  • Florals
  • Solid Colors
  • Stripes
  • Plaids
  • Small prints
  • damasks
  • brocades
  • chevron
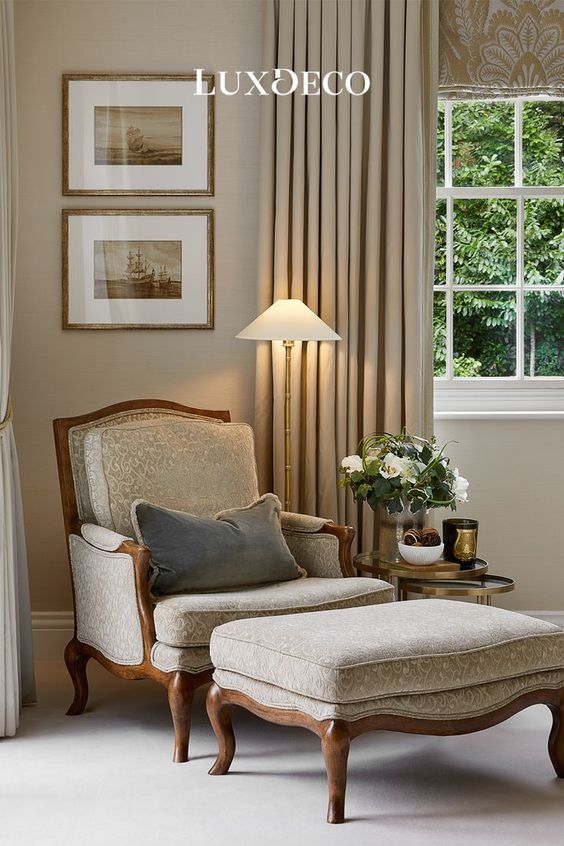
Photo Source: Luxdeco

Form & Line

This picture from Luxdeco demonstrates the soft curved lines in Traditional Style furniture seen in the stuffed upholstery, furniture arms and carved wooden legs often contrast with the crisp linen lamp shades and straight lines of the room’s architectural features.  The tall vertical lines in the draperies and architecture draw the eye up and give a sense of grandeur.  The symmetrical placement of furniture also offers straight lines toward a focal point.

The Traditional  style is all about balance of  form and line.

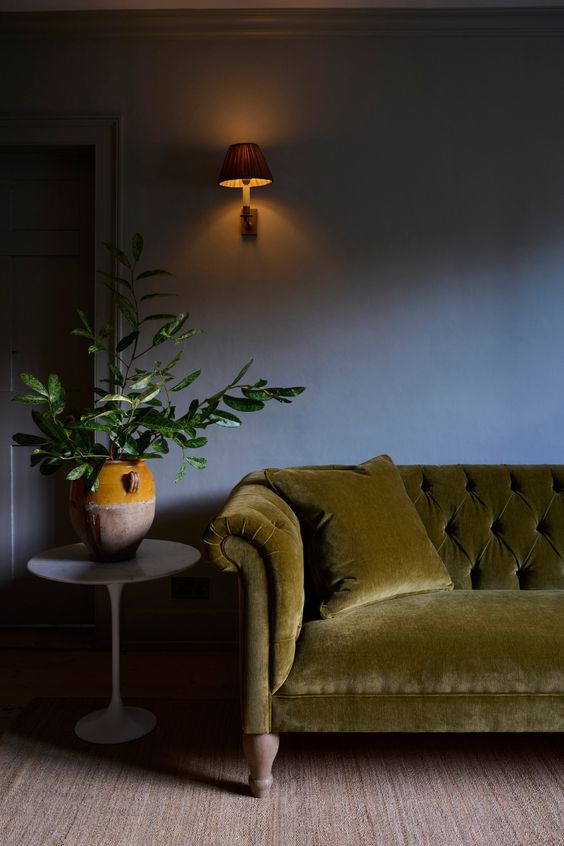
Photo Source: sofaandstuff.com

Textures, Materials & Finishes

Look for using natural materials, smooth textures, warm metal finishes and finishing details

  • natural materials like wood, brick, glass and stone
  • dark polished woods
  • button tufting and piping
  • brass
  • nickel
  • bronze
  • copper
  • glossy ceramic
  • antique finishes like gilded frames
  • polished surfaces
  • smooth and luxurious
  • braided trims
  • tassels

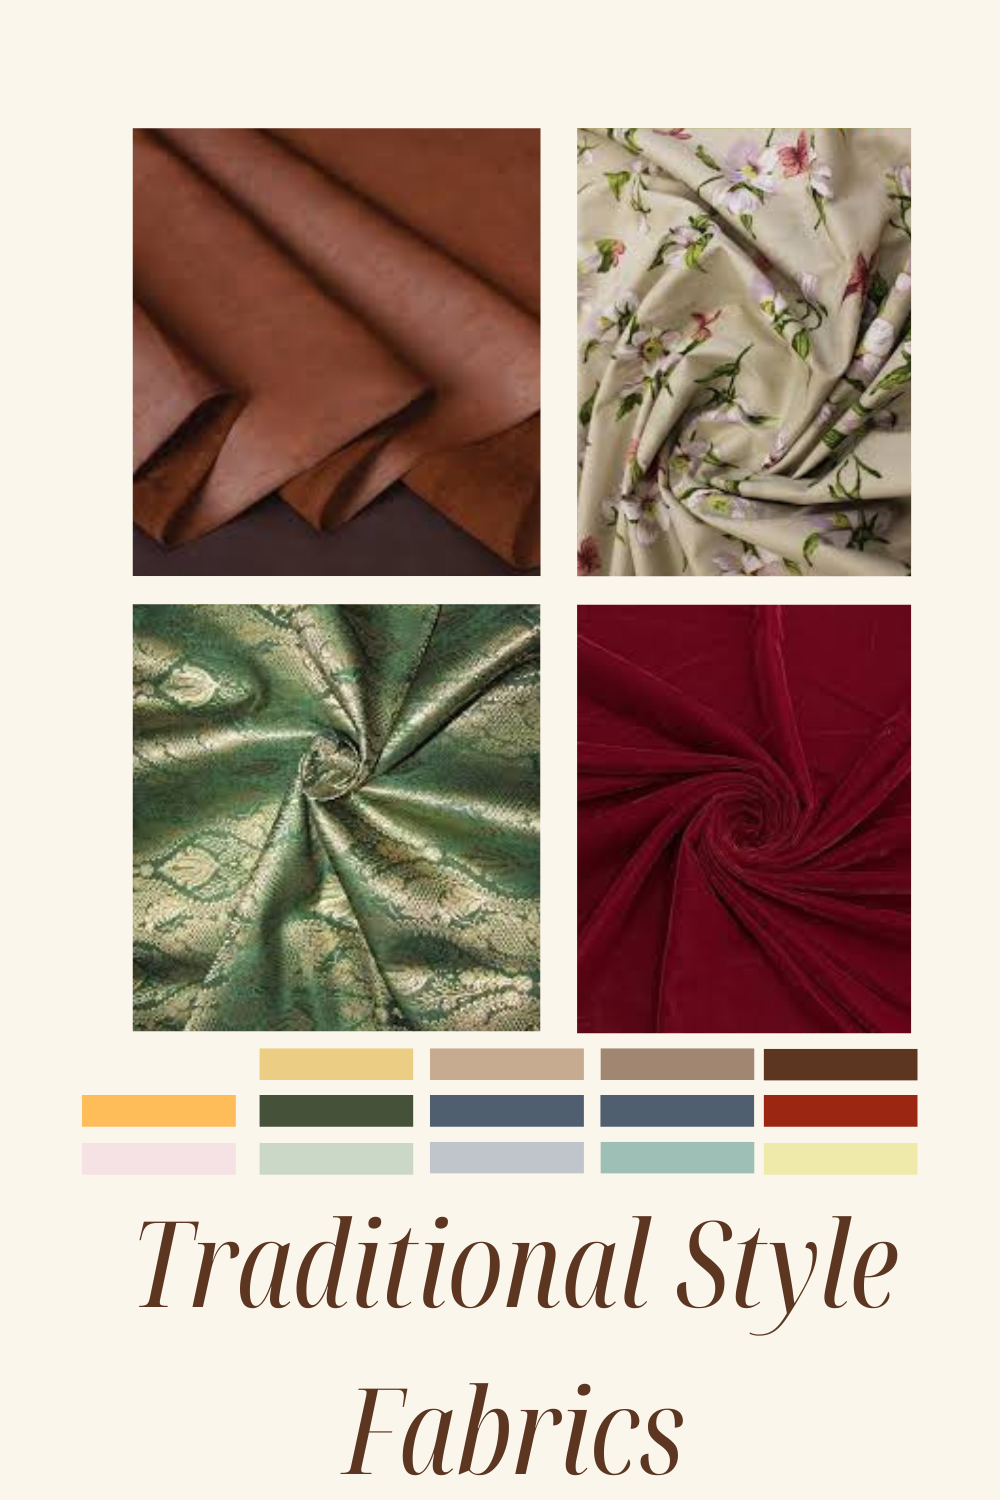
Fabrics

Fabrics in the Traditional Style are made from natural fibers with smooth lustre finishes like chintz, brocade and toile

  • velvet
  • silk
  • linen
  • cotton
  • wool
  • chintz
  • toile
  • leather
  • brocade
  • lace
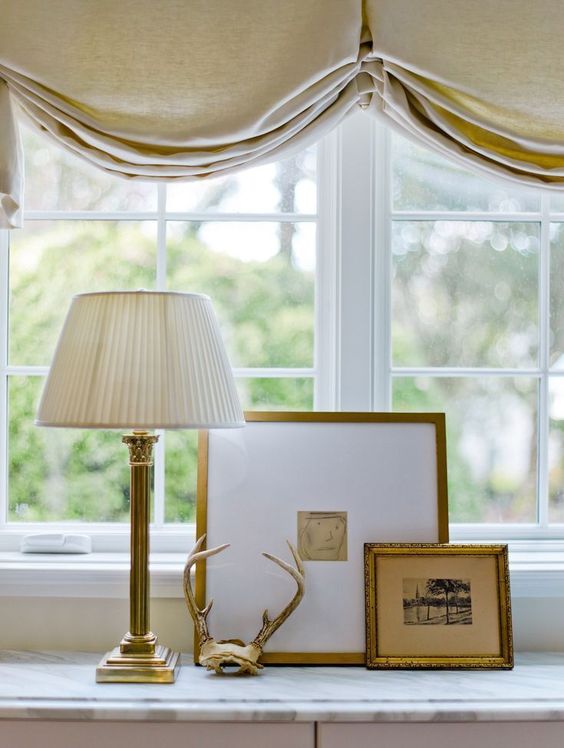
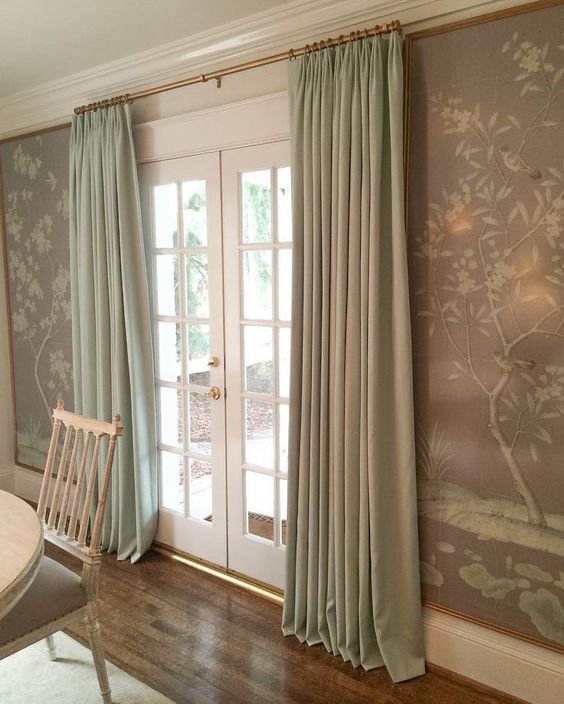
Photo Source: Anne Wagoner Interiors

Window Treatments

Look to use the Traditional Style fabrics in the following treatments:

  • pinched pleated full length draperies
  • valances
  • cornices
  • light weight sheer curtains
  • fabric roman shades
  • wooden plantation blinds
  • use of trim embellishments like pull backs, tassels and ribbon
Photo Source: The Ivory Lane

Lighting

  • crystal chandeliers
  • candelabras
  • lantern style
  • picture lights
  • fabric lamp shades
  • urn table lamps
  • candlestick table lamps
  • wall sconces
Photo Source: Anne Wagoner Interiors

Art and Decor

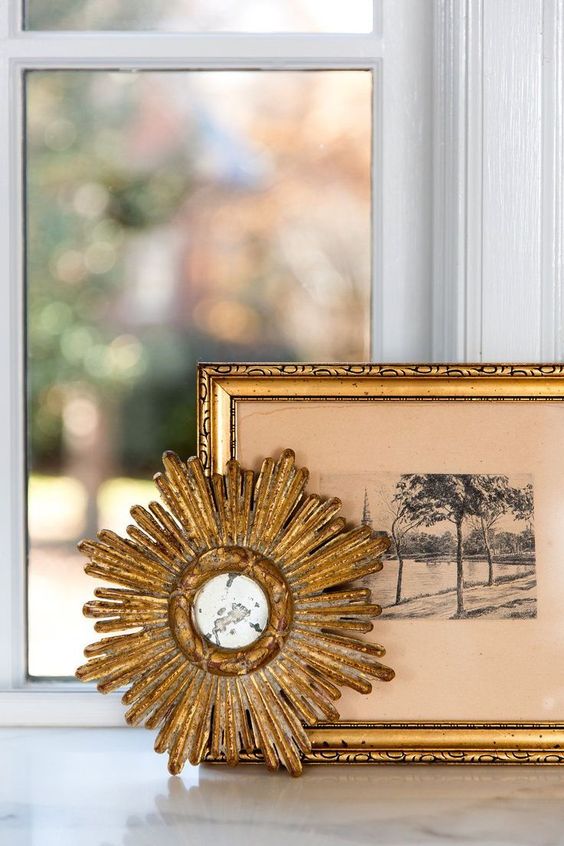
Look for antique finishes like gilded frames  or carved wood for your artwork

  • Vintage pieces
  • sculptures
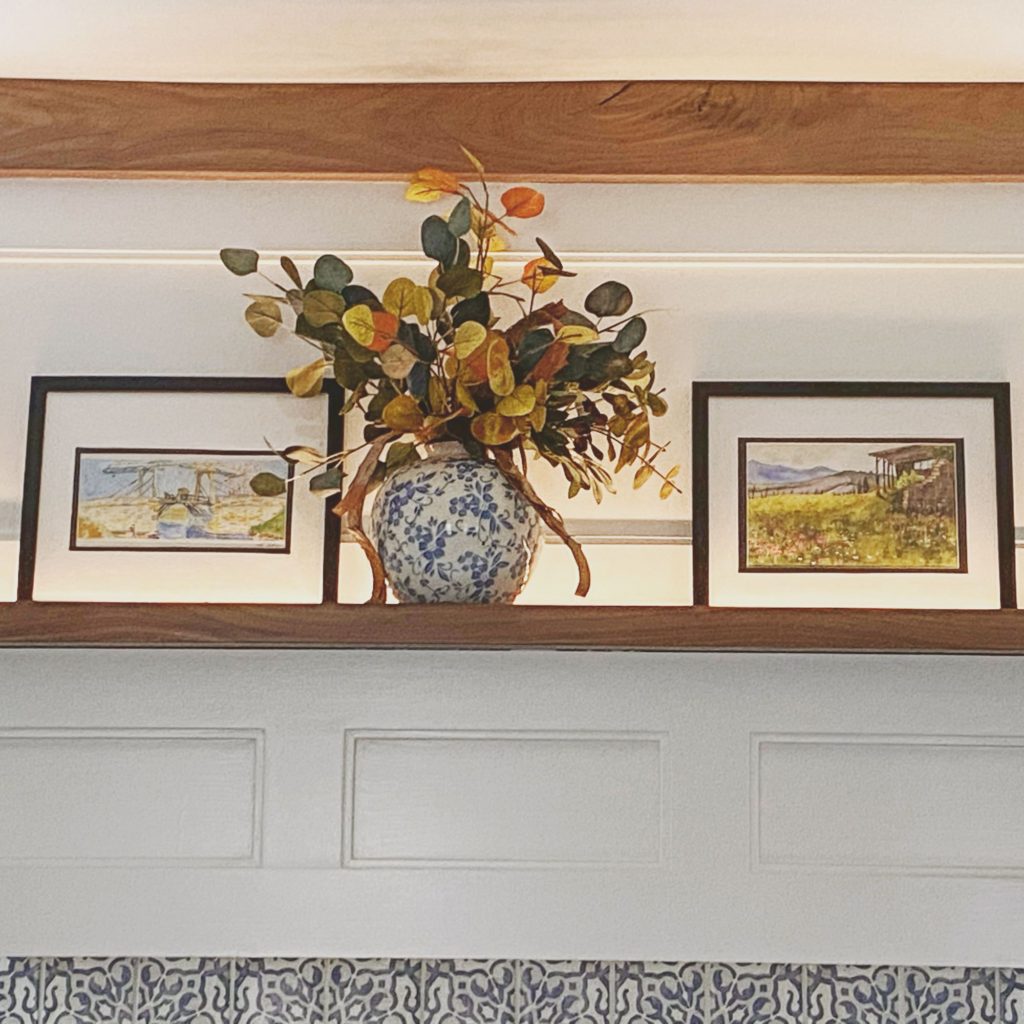
  • framed botanicals
  • gilded frames
  • porcelain pieces
  • mantle clock
  • decorative globe
  • leather bound books
  • boxwood topiary
  • fiddle leaf fig
  • english roses
  • hydrangeas
  • orchids
  • china
  • carved wood
  • abundant pillows
  • plants and flowers
  • landscape art
  • floral art
  • collections
  • portraits
  • still life paintings
  • oriental rugs
  • tapestries
  • wall to wall carpet
  • sunburst mirror

… Variations of the Traditional Style

Do you like the balanced and layered look of the Traditional Style but don’t like the colors? Or perhaps you like other materials or finishes?

Check out some of the styles within the Transitional Category.  They combine traditional and contemporary or more modern styles.

Designing a Custom Range Hood

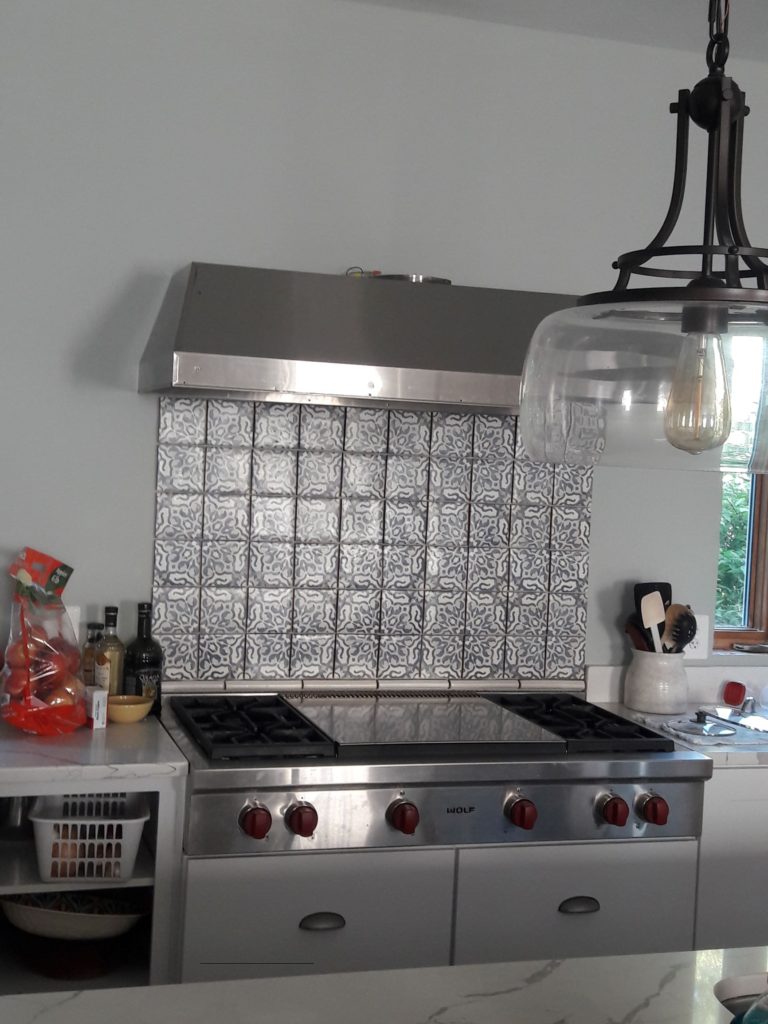
custom range hood finished cover

This custom range hood was a beautiful finishing touch to these cement tiles. The range hood in combination with the backsplash often acts as a focal point to the entire kitchen.

Taking great care in its design can make or break a kitchen design.  Here I chose to build a box to add to the traditional aesthetic but a modern touch with the addition of a walnut shelf to compliment the rich walnut flooring.

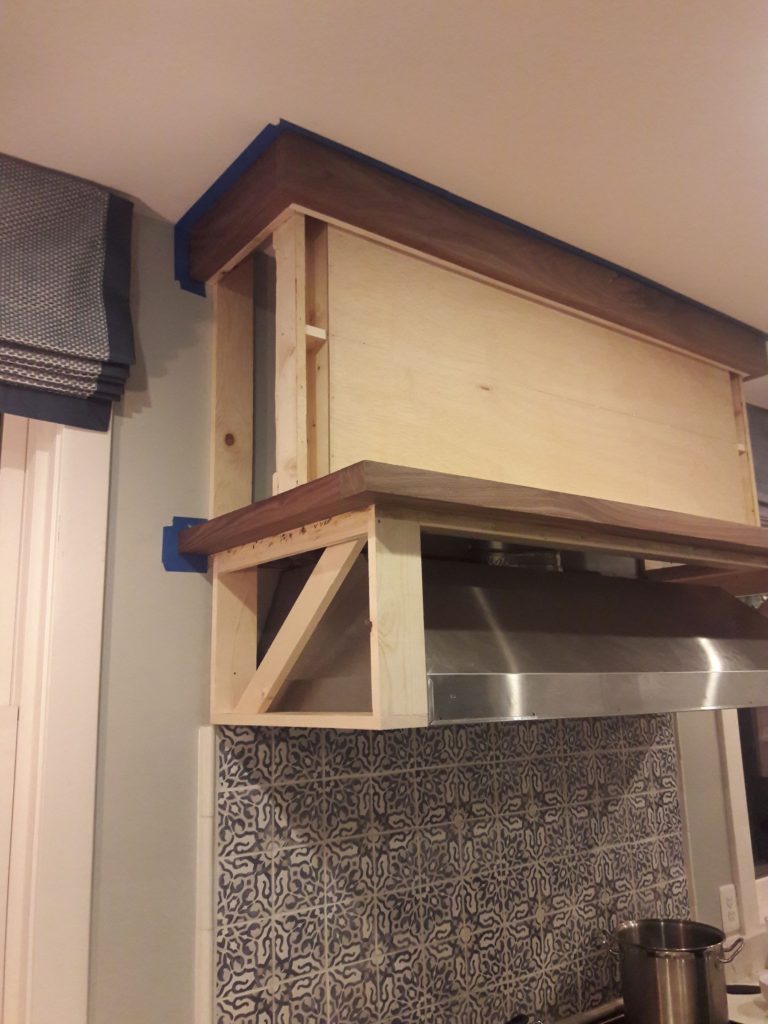
unfinished stove hood

What Size Should a Range Hood Be?

To Determine the Proper Width for Your Custom Range Hood

Width:  It is recommended to have your range hood protrude 3” beyond each side of your range.  This allows the ability to capture the particulates coming up from your pans that naturally spread out a bit before reaching the hood. The width should not be narrower than your actual range measurement width.

To Determine the Proper Distance from the Cooktop

Height:  Typically, the common installation height or distance from the cooktop to the base of your custom range hood is 24”-36” from a gas cooktop and “ – 24” for an electric cooktop.  

Considerations: Take into consideration your tile size and whether you want to have your tile cut.  If you install your range hood before designing your tile placement, you may end up having to cut a row at either the top or bottom to fit.  Don’t forget to consider the space the grout will take up as well as the height of your tile.

My range was a 48” wide range and the burners measured 44”.  The recommended size of range hood was this 52 1/2” which was a bit shy of the recommended 6” wider.  To accommodate the 4 ½” tile and bullnose, the distance from the cooktop ended up being 30” which is appropriate for a gas cooktop. 

To Determine the Proper Depth of a Custom Range Hood

Depth:  For a standard 30” range, the hood should be 6” to 9” less in depth.  If you have ever hit your head on a range hood, you will understand the reason for this. 

We chose a Vent-A-Hood Liner Insert so we could cover it with a wooden frame to give it a more traditional look.

custom range hood frame

Lighting

Before we closed up the box frame it was important to add the wiring to the planned lighting strip for the front of the hood.  Since we added a 12V LED dimmable strip along the front shelf, a 12V Magnitude Dimmable Power Supply had to be installed along with a switch.  

building the stove hood

Design Considerations

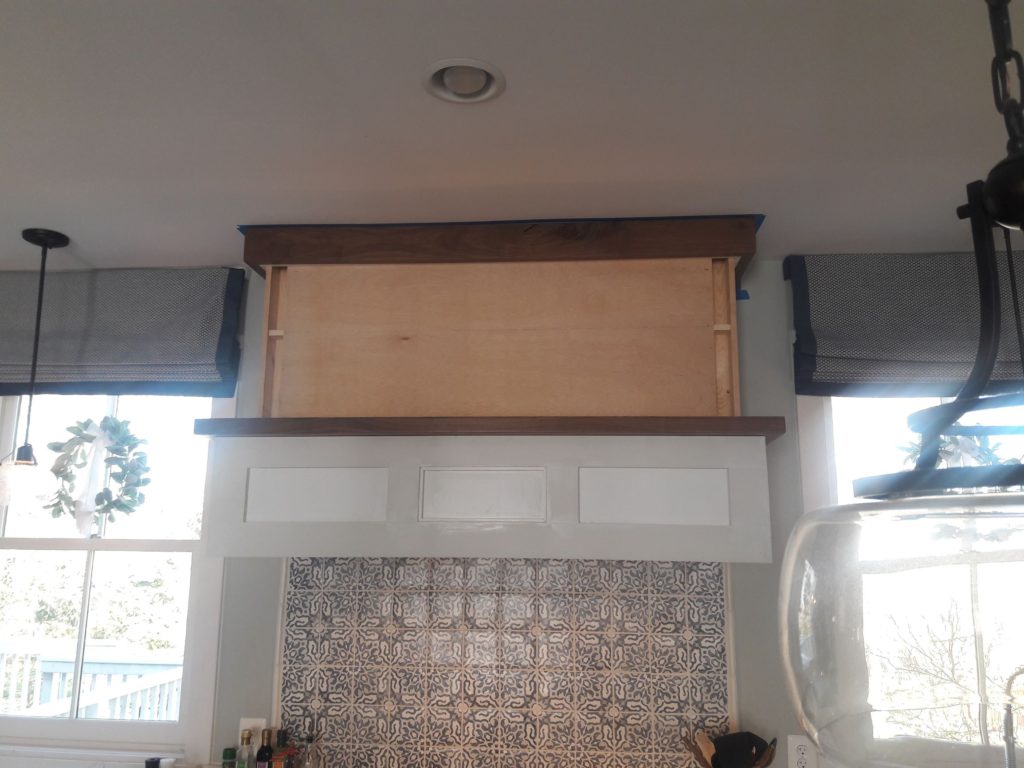
When designing a custom range hood, it is all about style and proportion.  Now it was important to make it beautiful and in keeping with the rest of the kitchen.  We were working with simple Shaker door panel styles on the white cabinets so we wanted to stay with that look.  There is walnut floors and a planned walnut island.  The cover extended all the way to the ceiling. 

custom range hood finished cover

The Design Materials

To break up that height, I chose to create a 2 step look.  We also choose to extend the box another 4 ½” on each side beyond the vent liner We choose 3 repeating rectangles on the bottom shelf front and 1 large rectangles on the top face.  Each topped off with a beautifully finished walnut wood board. This gave a modern clean look combined with the European pattern tile in the backsplash.  This is truly the focal point to the kitchen. 

Now, A trip to the lumber yard to decide what wood widths were available to accomplish the modern European look we were going for. We chose natural walnut and apainted white wood cabinet.

custom range hood detail

Attention to Details

This is an example of a detail involved in a beautifully executed design.  Here the edge tile lined up with the edge of the range hood cover.  A skilled tradesman in combination with a beautiful design can accomplish this level of detail. Notice that Steve didn’t just cut off the tile trim when it hit the wood trim detail of the hood but notched out the tile to fit snugly around the hood trim.   

You can have your kitchen designed by Sandra Forbes Interiors.  It will be custom designed to your style, needs and desires.  Learn more about Sandra Forbes Interiors at SandraForbesInteriors.com.

Updating My Dining Room Chairs

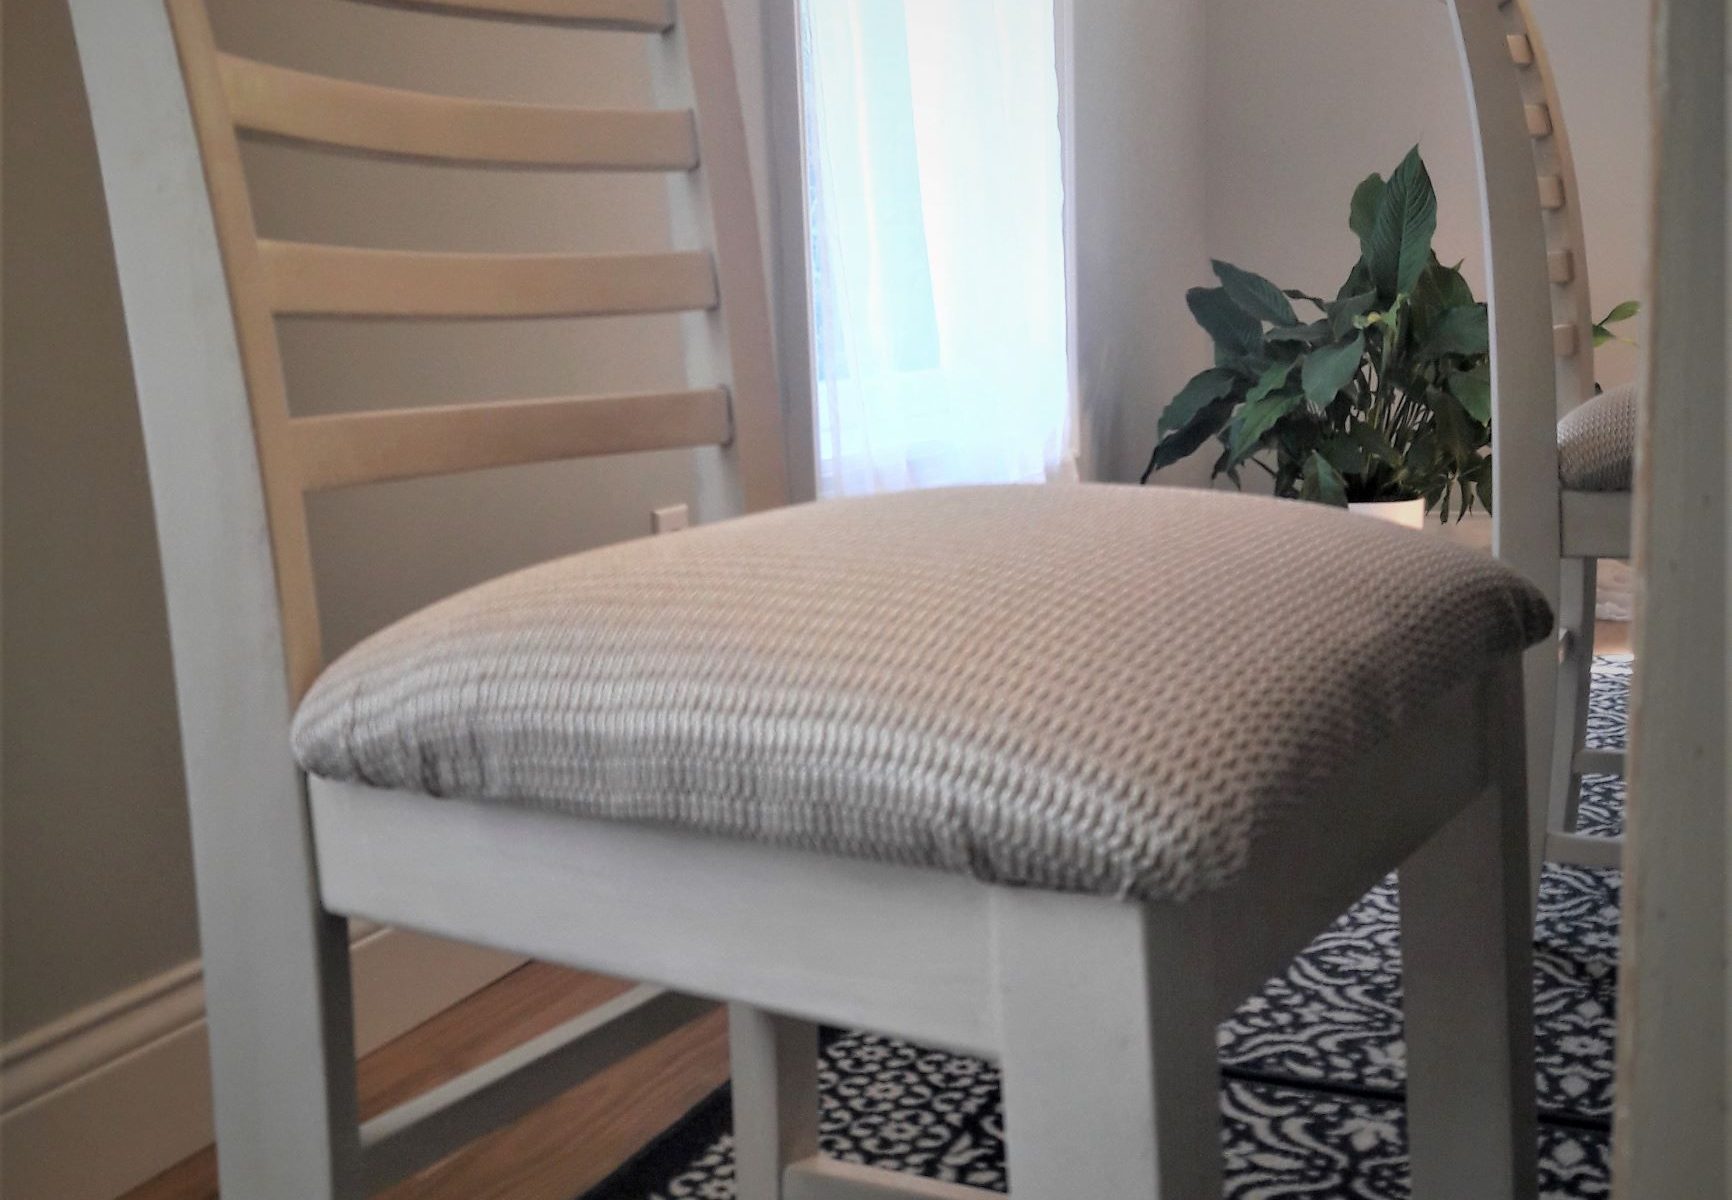
Reupholstered Chair

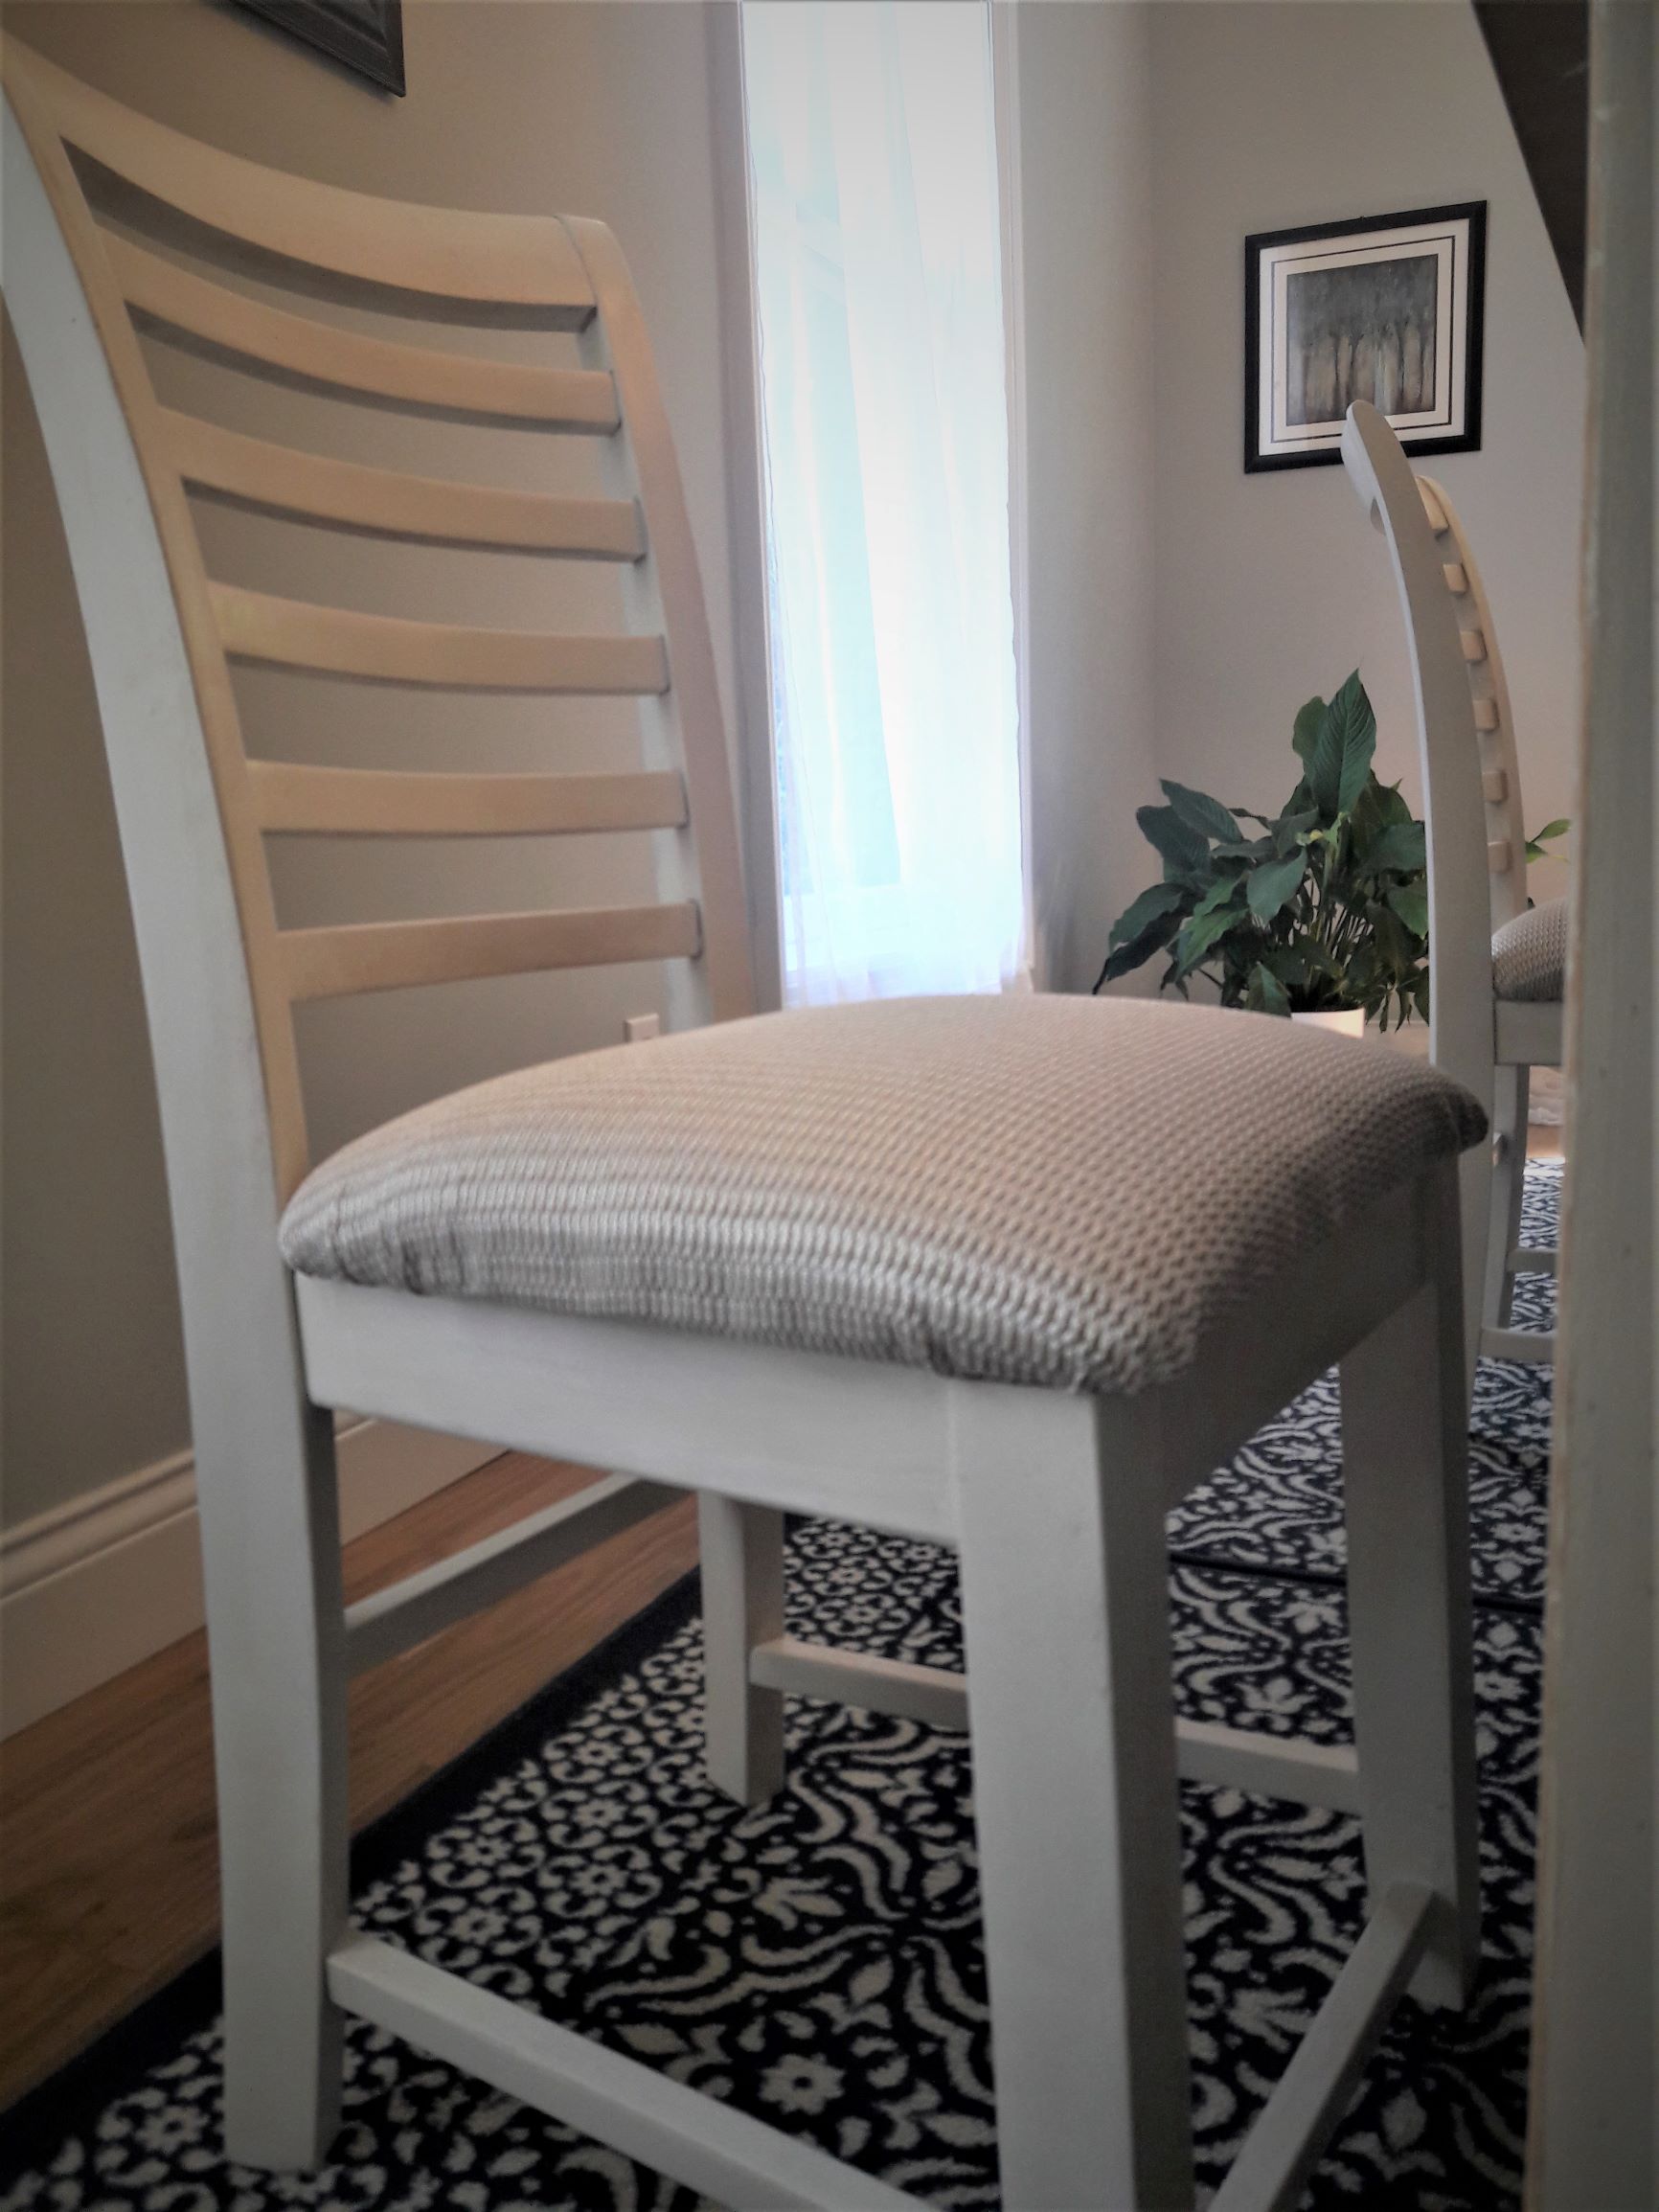
Updating my dining room chairs was the right solution since they were still in good condition.

Since we are holding up in our house more right nowbecause of COVID, I decided to finish an ongoing project. I have been updating my dining room tables and chairs.

I am happy to say that I am done!  It has been a long project.

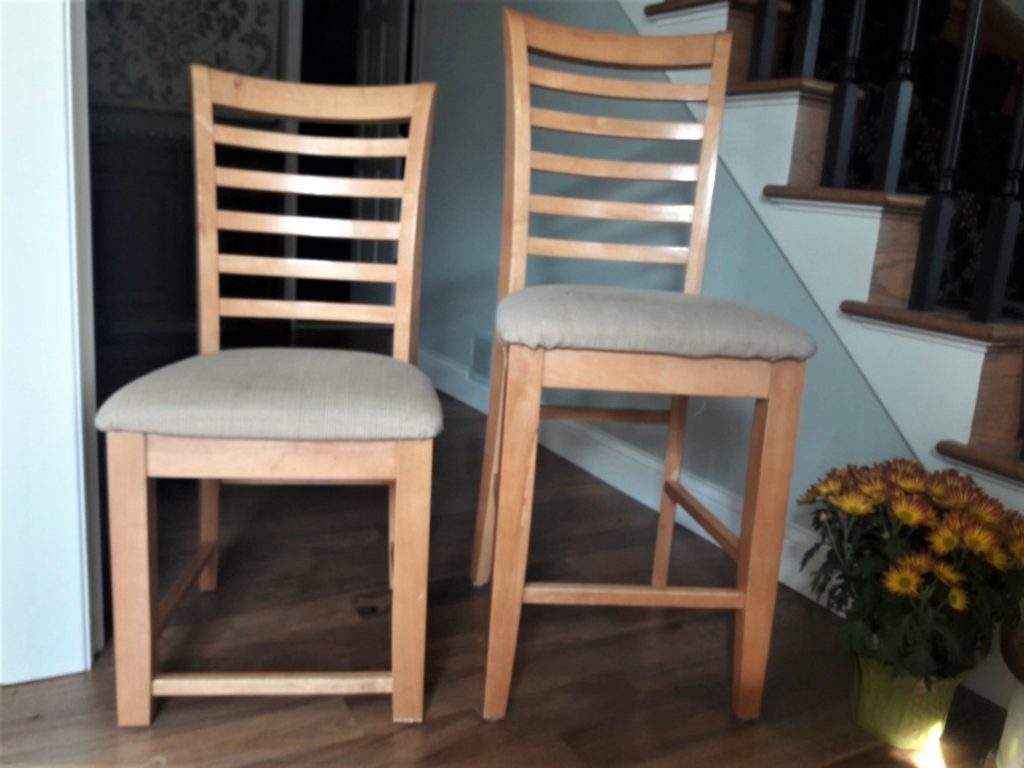
It all started because our tables and chairs were bar height and the wrong wood tone.  We found that the tall height was hard on some of our backs and this height was a less formal look than what I was looking for.

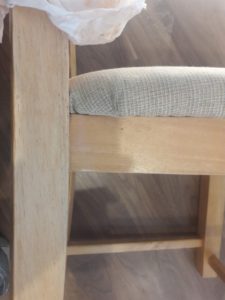
The first thing we did was to cut our table legs down and the chair legs down.  As you can see from this picture, the cross bar ended up to be pretty low to the floor but we were willing to live with that.  It was far easier (we thought) to refinish the chairs and to use what we had rather than buying a new table and chairs.

Updating my dining room chairs - Comparing bar height and regular height chairs

Updating my Dining Room Chairs to Compliment My Existing Furniture

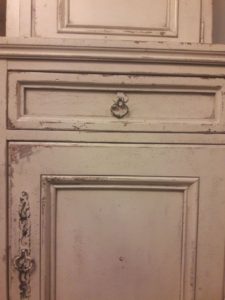
I have a large buffet piece that we love has moved along with us from home to home.  It has found a home in 5 houses including a trip across the country from Virginia to Minnesota.  It was important to me that the dining room table and chairs coordinate with this piece.  The table and chairs were blonde wood which didn’t compliment the buffet or our walnut floors.  The buffet is a painted piece with a distressed finish.

Updating my dining room chairs - distressed finish
Distressed finish
closeup of buffet door pull

My table and chairs, on the other hand, were not very expensive but they serve us well.  We love their versalit! Depending on how we arrange them, we can accomodate groups of all different sizes.  We have two 5′ square tables that allow us to sit up to 16 people when set apart.  Each has a leaf that can change the table size to seat either 6 or 8 people.  When we put them together we can seat 12 all around one large table.   We rearrange them depending on the number of people we are hosting.

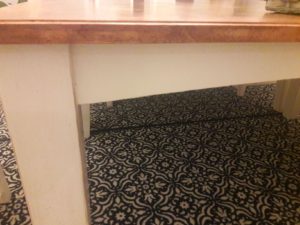
So, I decided to first refinish and update the table first.  I don’t have any pictures of this process but it is pretty much what I did on the chairs. I primed and painted the table legs and apron the same color as the buffet.  Then proceeded to distress them by hammering small indentations with a tip of a nail and sanding them a bit.  I finished with a glaze.

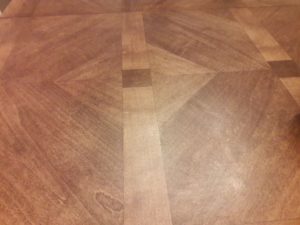
I then sanded and stained the tabletop to compliment the walnut floors. In the picture on the left of my son’s birthday, you can see when the table top was blonde compared to the picture on the right after I stained it a darker color to compliment the floors in our new house.

Blonde Wood Table Top
Blonde wood tabletop
stained table top
Tabletop stained and finished with polyeurethane
painted table leg and apron
Painted blonde wood legs

Whew!  That was fun but I was not looking forward to finishing the chairs.  THERE ARE 16 OF THEM!

Updating My Dining Room Chairs

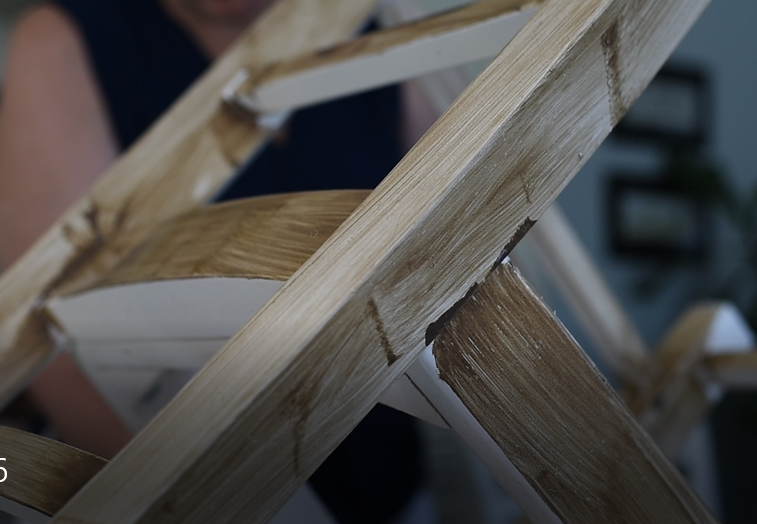
I started by sanding off the polyeurethane finish and then staining them just like I did the table top.  I was hoping to match the table top.  The soft wood soaked up the stain unevenly though.

Ultimately, I didn’t like the finished look.

closeup of unfinished chair
chair being stained
Wiping on stain

PLAN B… I decided to paint them instead.

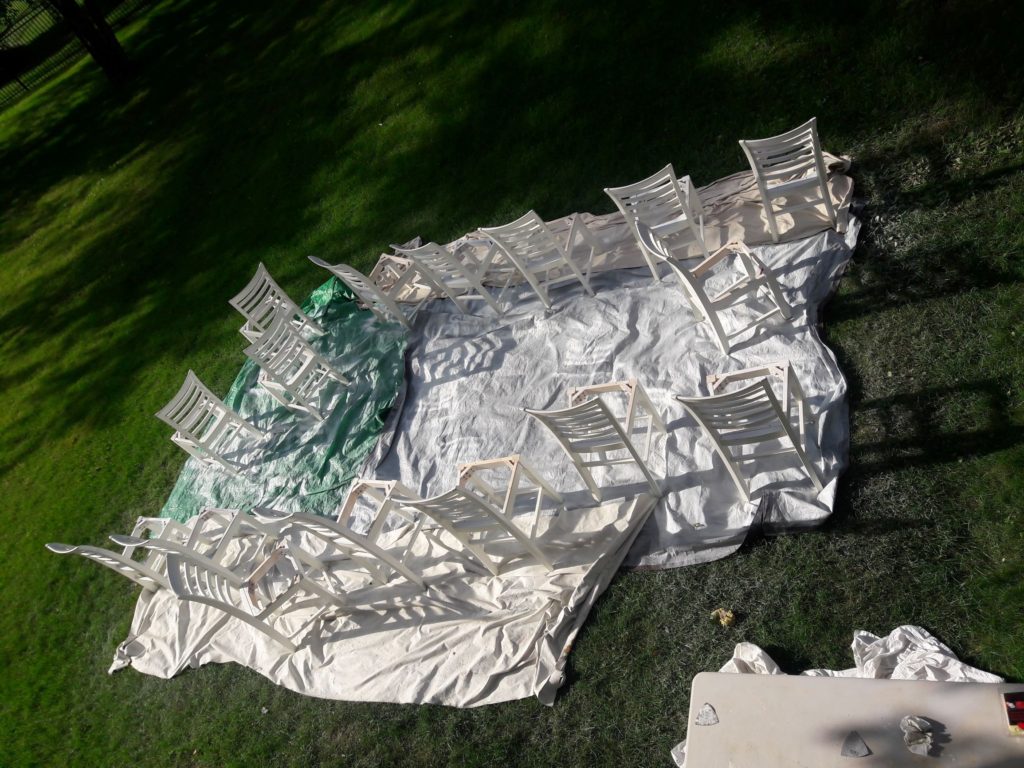
Lots of chairs
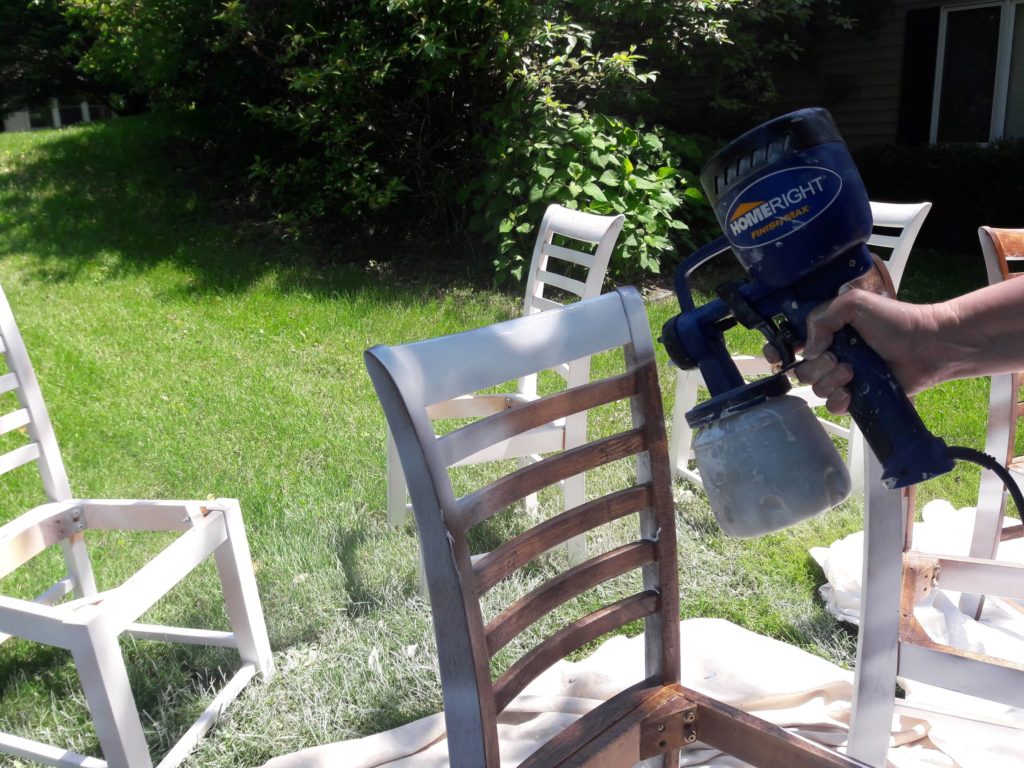
Updating dining room chairs - spray painting

I spent several days priming and painting the chairs.

Thankfully, I had a hand-held sprayer that I bought for a client project.  Each was lightly sanded and then primed and painted.

The painted chairs looked great but they looked too new when compared to the distressed finish on the buffet and newly refinished table.  Each chair needed to be glazed to create a more antique look.

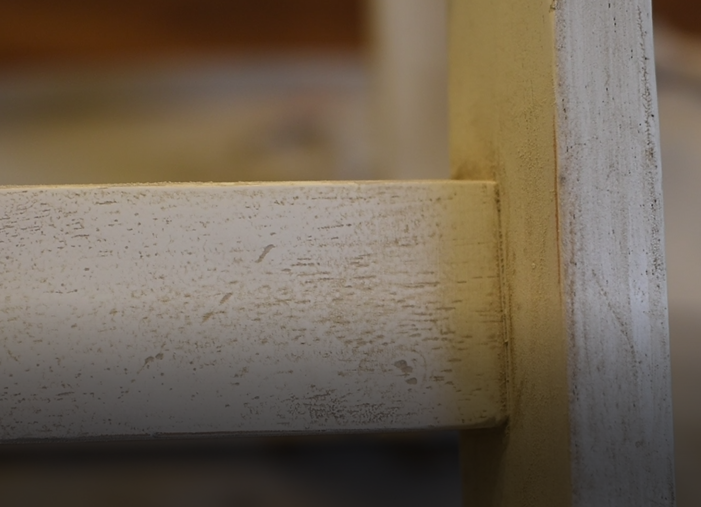
I was able to achieve this by wiping a glaze on each and then wiping it back off with a damp cloth leaving a small residue in grain lines.

chair being glazed
Painted glaze on with a brush
closeup of glazed chair leg
glaze remained in the wood grain
closeup of chair leg

Recovering the Dining Room Chair Pads

Lastly, each chair seat needed to be recovered.  The pads that came with the chairs were not very comfortable. They were not very dense and not very thick.  The fabric was very stained as well from many years of use.

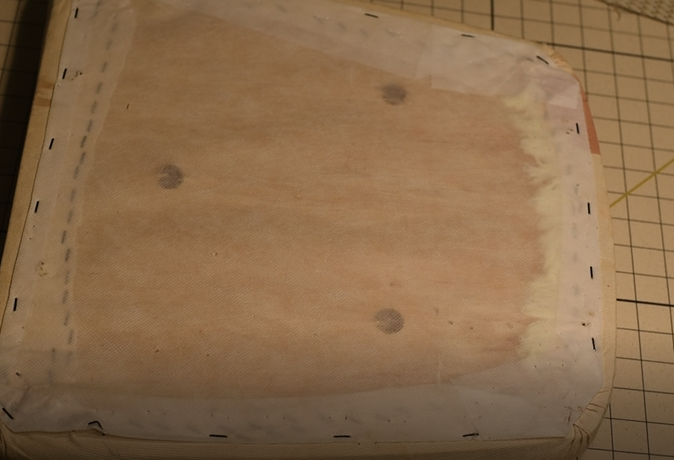
I took this opportunity to take apart the covers and replace the pads with a more dense and thick foam to help cushion. To do this, I needed to remove all the staples from the cover fabric so I could get at the padding.  First there were approximately 20 staples on the facing fabric and then over a hundred staples holding the fabric on each cushion!

Updating my dining room chairs - underside of seat cushion
100 staples on back of cushion

It was just too difficult to remove them so I ended up cutting away the fabric around the staples and just leaving the staples in the base board.  It was taking me 15 minutes to remove just 8-10 staples.  The staples were so flush with the board that I couldn’t get under them to pull them out.  I ended up just turning over the board and placing the staples on the top side under the padding.  Sometimes we just got to do what we got to do:)

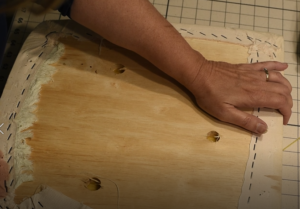
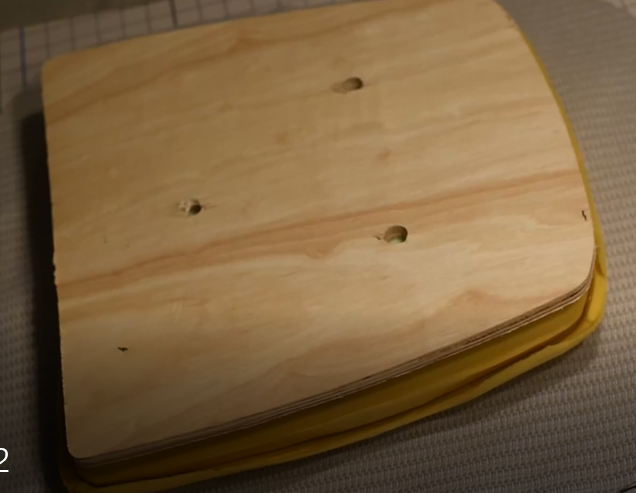
Updating my dining room chairs - laying out chair seat cushion

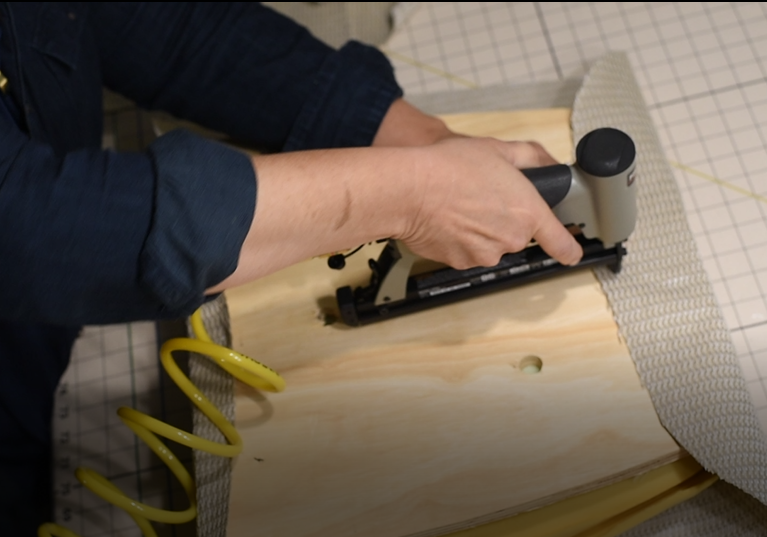
I then stretched the new fabric cover over the padding and base board.  Then stapled it tight making sure the corners were smooth.  I was able to achieve this by creating small folds on the underside gathering up the excess fabric.

Updating my dining room chairs - stapling seat cushion fabric

Ta Da! Finished!

As all projects go… there is always more to do…

On to the walls!

My style is a mix of traditional and modern, otherwise known as Modern European.  I plan on painting them with a specialty limewash paint from Portola Paints.  This will create a mottled finish similar to suede.  I think it will look fantastic as a textured finish next to my buffet and modern accents.

Stay tuned for a how-to post on that.

Finished chair

Traditional and Vintage Nursery Design

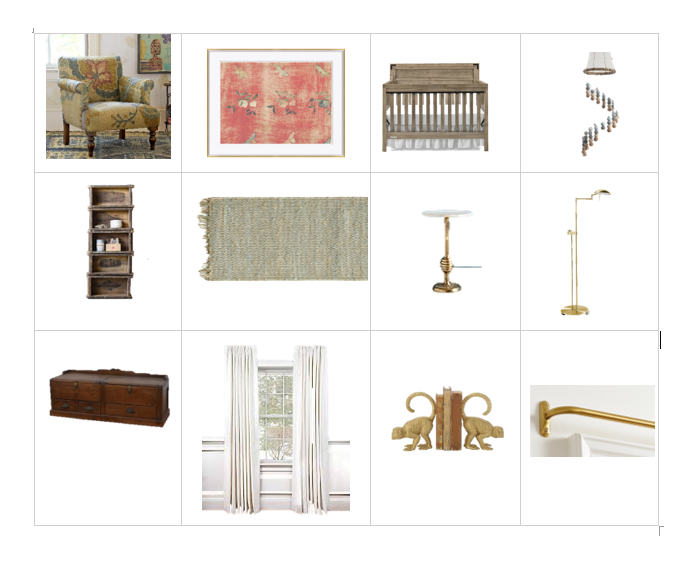
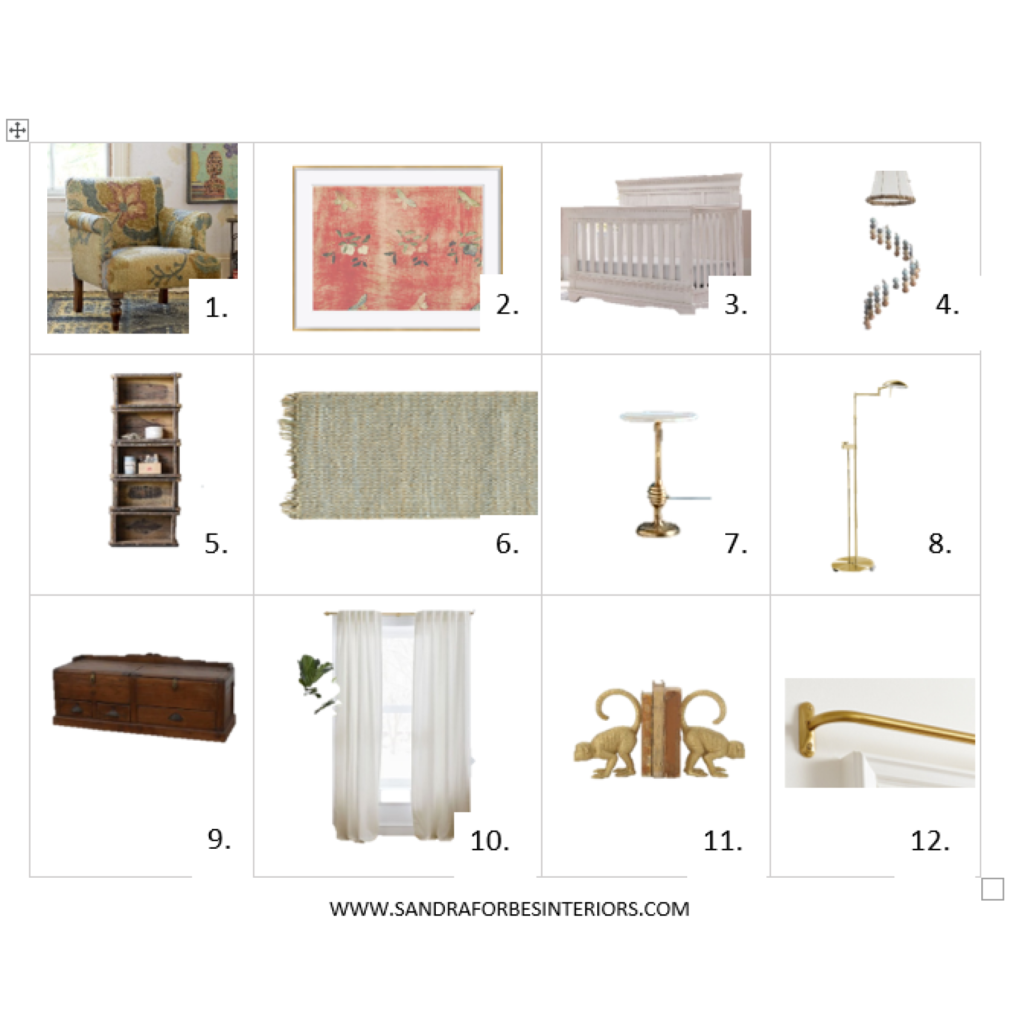
images of shopping items

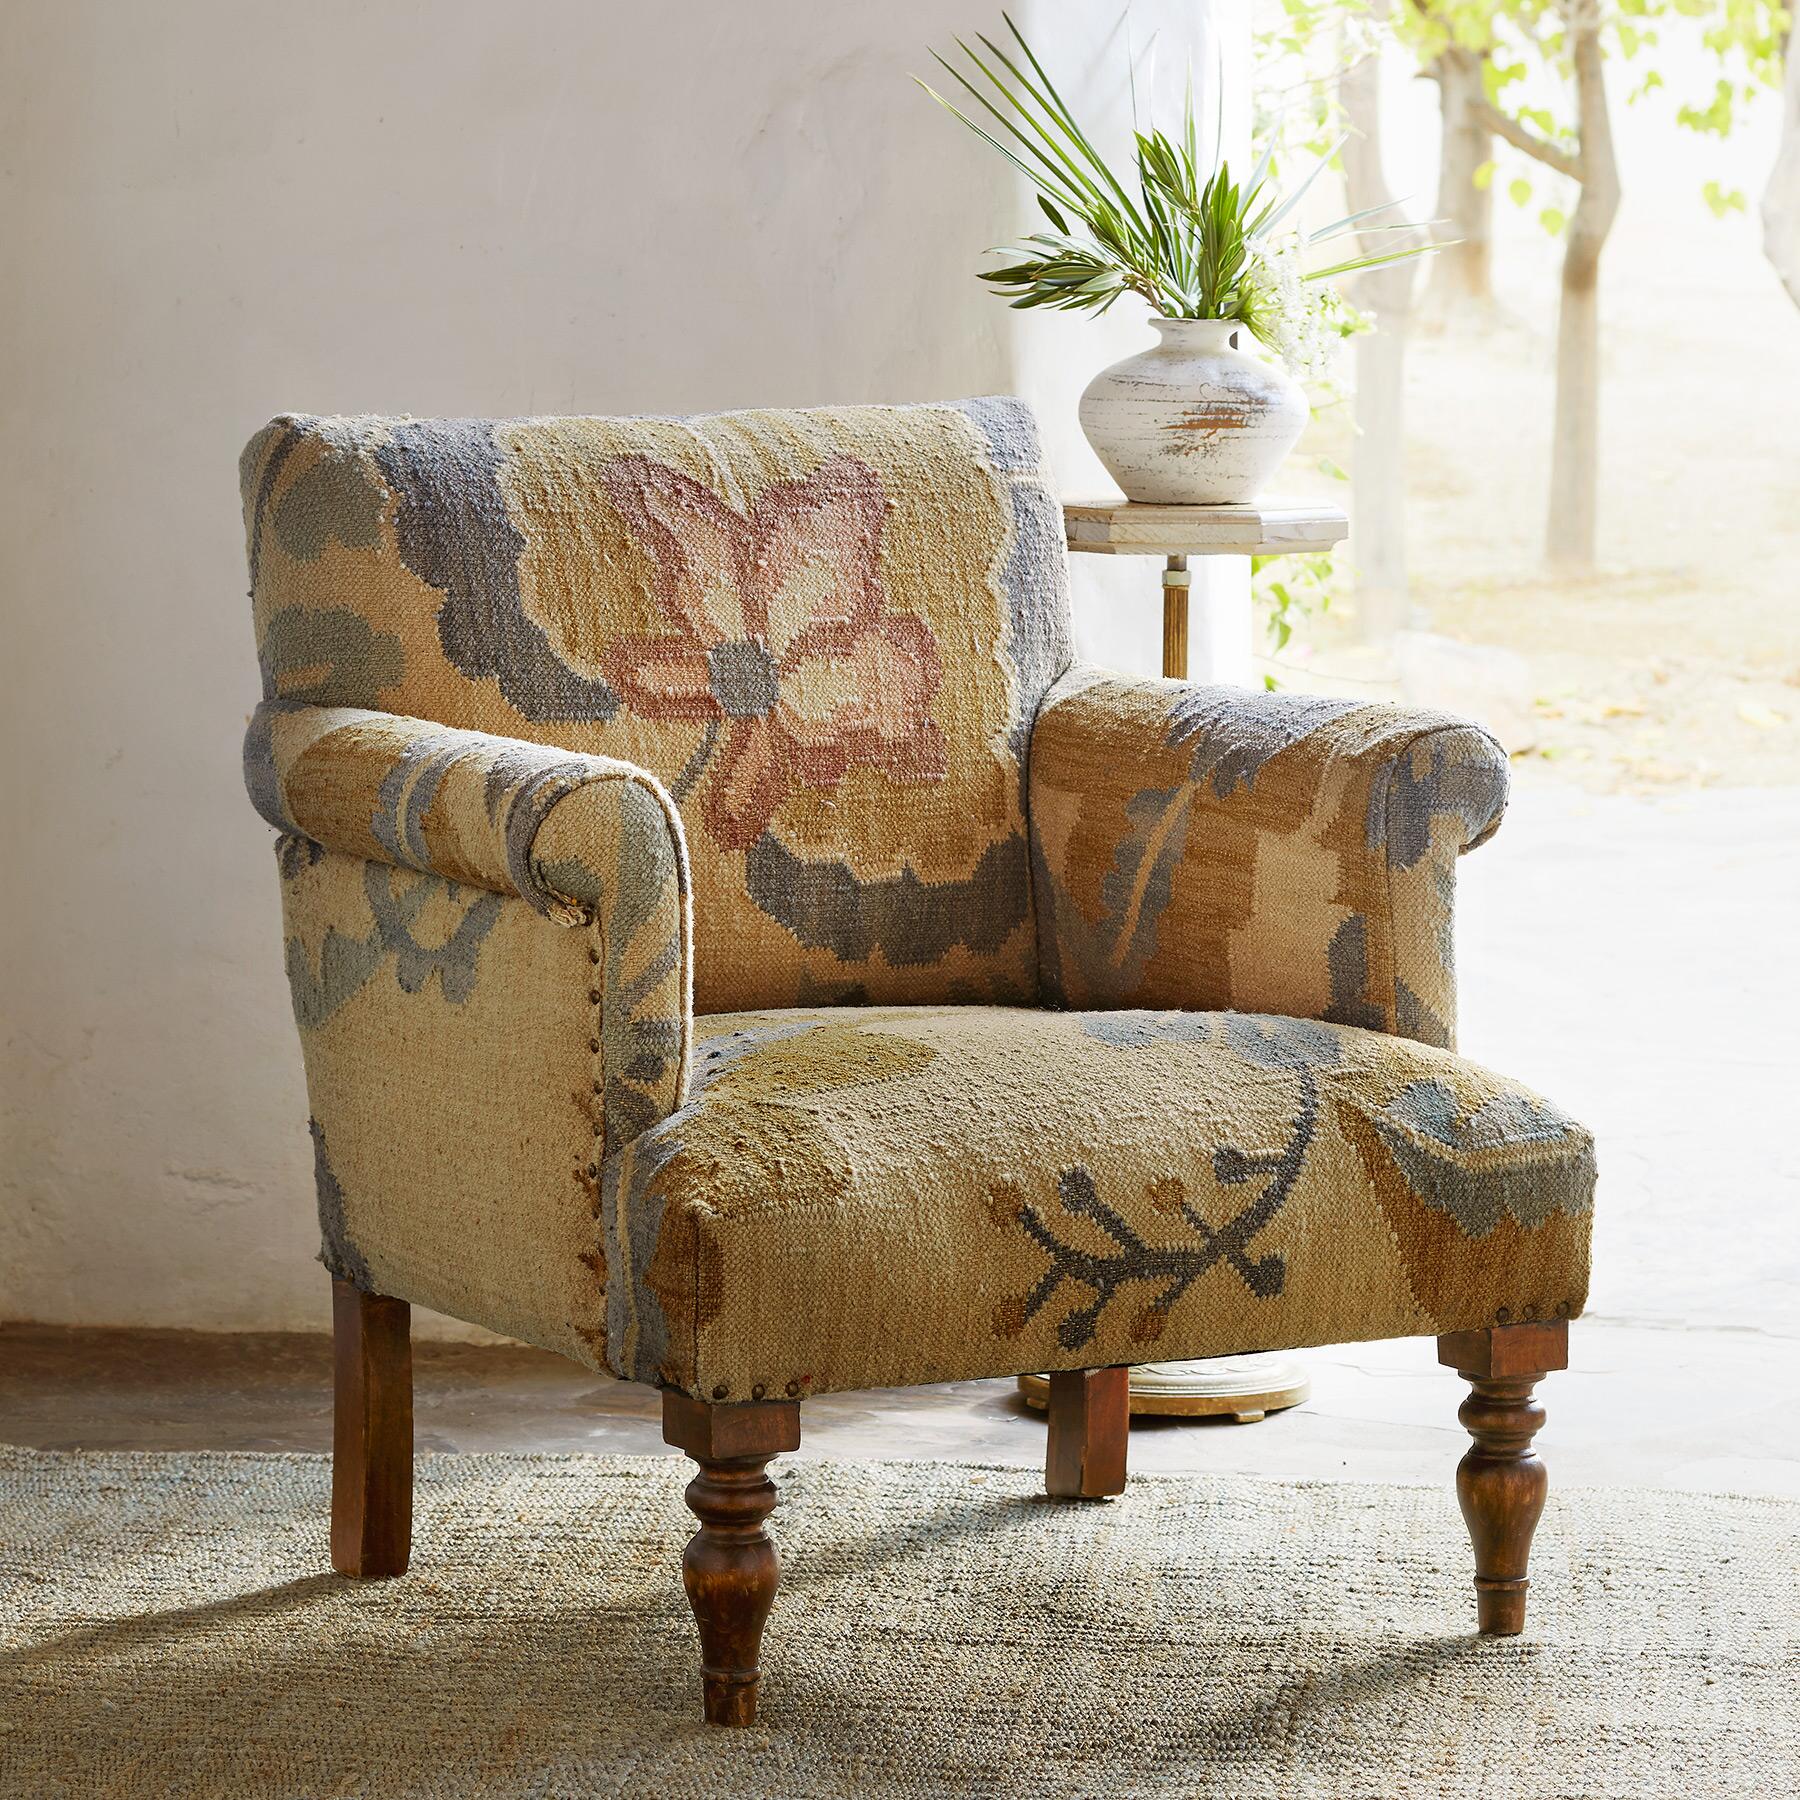
This chair was my inspiration.  I love this chair made from a Kilim rug fabric.  It is traditional with a fun twist.  Just what I like in a statement piece.

Kilim Chair

I love to put a statement piece in every room and this fits the bill.

I decided to design a nursery using this chair as a stepping off point.  Stay tuned to see another design using this chair in a sitting room in a more traditional design. This is the style I really enjoy.  A mix of traditional and contemporary.  

I don’t know about you but I am tiring of white.  Don’t get me wrong.  I love white. In fact, it has always been my favorite color!  I know – weird.  Right?!

White is a combination of all colors in light so it isn’t surprising that I love all design styles too.  That’s why I love design.  There are so many different directions to go.

So many of us have furniture that has been passed down to us from our family members and we want to incorporate those pieces but want to have a more up to date look.  White is more difficult to blend with traditional dark wood pieces and still create a muted, understated and mellow environment in a bedroom.

This one fits the bill.  It is a combination of traditional with 70s boho.  Here’s what I came up with… Let me know what you think and comment below.

Shopping Images
Collage of room elements

Here’s everything with a link if you find something you like.

Happy Shopping!

numbered shopping list
  1.  Passion Flower Kilim Club Chair – Sundance
My inspiration.  Great for a contemporary nursery and move into any room when it is no longer needed in the nursery.

2.  Japanese Textile Design Print on Paper – Perigold

The gold frame pulls in the warm tones in the drapery rod and table and the print brings in the tones from the chair.

3.  Simmons Kids Tivoli Pine Wood Convertible Crib – Amazon (White or Chestnut)

Both the chestnut and white should work with this design.  It also converts to a bed as they grow.
  1. Spiral Felt Ball Mobile – Neutral – Etsy MatthewAndMae
I love how this mobile brings in the neutral and muted colors.
  1. Authentic Vintage Brick Mold Bookshelf – Farmhouse Fresh

Incorporate tall shelving with this vintage bookshelf or with something like this, which has a similar look but with soft curves to match the desk and chair.

  1. Hemp Woven Rug Color: Sage – Sundance
Can’t lose with a neutral rug.
  1. Bumblebee End Table – Anthropologie (Love the bee accents!)
The bumble bee accents will be loved by the kids and it brings a contemporary feel to the nursery.
  1. Brushed Brass Bernie Series LED Floor Lamp – Lamps Plus
This floor lamps brings a contemporary feel to an otherwise traditional space.
  1. A Most Unusual Old Teak Floor Desk with 3 Drawers – Jugs Furniture
I love this idea of a low desk with a vintage vibe.
  1. Belgian Linen Curtain, Natural – West Elm
Stay with a soft white curtains
  1. Monkey Bookends – Grace Hill Design
Choose décor to accent the colors in the chair and you can’t lose!
  1. Antique Brass French Curtain Rod – Target
Hint:  Use a French curtain rod to close that gap on the sides in combination with a black out shade to minimize light during nap times!

Remember that you can still get the look with expensive and less expensive pieces.  You just have to look around.  Let me know if you have any questions or if you have a piece you want to build around.

If you like this kind of post, leave a comment and I will do more!

* post contains affiliate links – at least I hope to😊

The Woodbury Retreat – Creating a Curated Home

retreat statue

A Private Place to Reflect

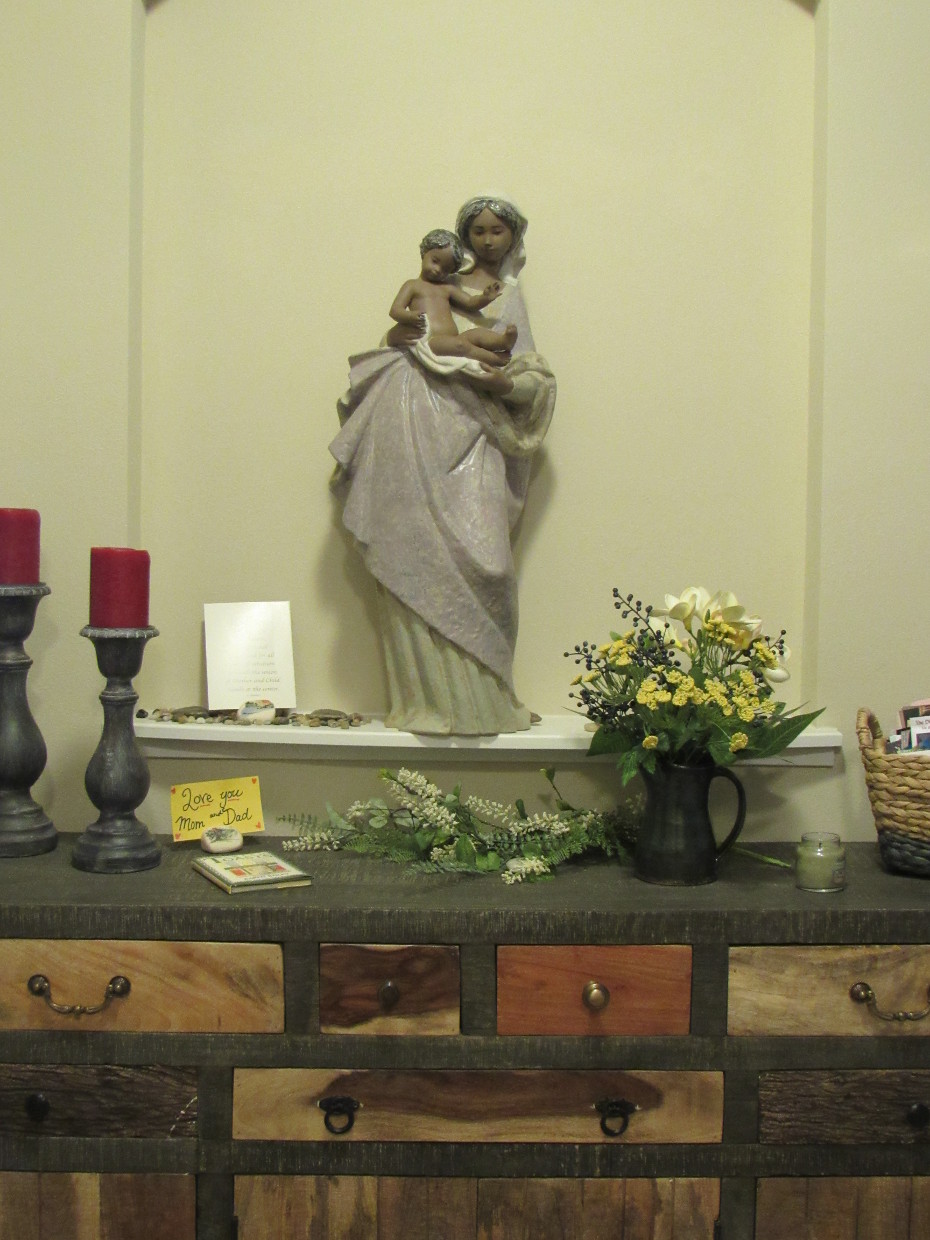
She wanted to rest and retreat from the stress in her life. This focal wall as you entered her apartment set the stage to what you would experience throughout her home. A restful retreat. This statue was purchased at one of St. Thomas Academy’s annual auctions. It is now a comforting feature in my client’s home.

After selling her long time home in St. Paul which I helped her stage, she asked me to help turn her new apartment into a home.

She needed a place to get away and reflect. She was entering a new stage in life.

Feature Wall

The first thing she asked me to do was to help with this feature wall that greeted you as you first entered her new apartment retreat. She wanted the statue of the Blessed Mother here but the statue seemed to fade into the white wall behind. We need it to be a focal point.

retreat entrance
Statue needed to be featured

In response, I decided to raise it up and center it more in the space and create a faux painted wood panel to be installed behind it. This helped the statue of The Blessed Mother become a prominant feature without making it look “churchy”. I pulled the colors from the Blessed Mother and layered them when staining the wood panel.

retreat statue
Layering paint creates this beautiful faux wood panel to bring out the colors in the statue.

Hiding Wires

Then, there was the challenge of hiding the modem wires and finding a place for the grandchildren’s toys. She loved the modern touch that this buffet and the additional needed storage it provided.

Build in storage

A simple solution to hiding the TV and modem wires was these covers from the local hardware store. They worked wonderfully.

Hidden wires can help make a room feel less cluttered.

Paying attention to sight lines added to the Retreat Atmosphere

As a matter of fact, the living room wall happened to be the wall she saw from her bed. Therefore it needed to be addressed with a focal point. If you want to learn more about “sight lines” and “focal points” I talk more about them in the Love Your Layout Workshop. What you see from other rooms is important to consider when curating your home.

sight line in retreat
The placement of pictures can inspire!

Subsequently, she bought this print by Steve Henderson entitled “Ocean Breeze” [from greatbigcanvas.com]. Simply put, it was a delightful find that was an emotional lift at the start of each new day.

Uplifting painting added to the retreat atmosphere
A Fresh New Day!

Additionally, she wanted to feature another inspiring painting that was created by her nephew when he was, also, going through a traumatic time in his life. The painting, entitled “Eternal Hunger”, represented a nursing child finding solice in his mother’s arms.

Retreat Image of mother and child
Mother and Child

And then it was just a matter of tying together her existing decor to create a cohesive color scheme that was calm and relaxing.

Retreat Guest Room Color Scheme

In the guest room, using the colors in a picture she treasured from a friend, we then took the soft teal from the ocean in the picture and repeated it throughout the room by painting the oak frame and hand painting the pillow to coordinate.

Working from things she loves
Retreat Guest room Pillow

Focal Point for Dining Room

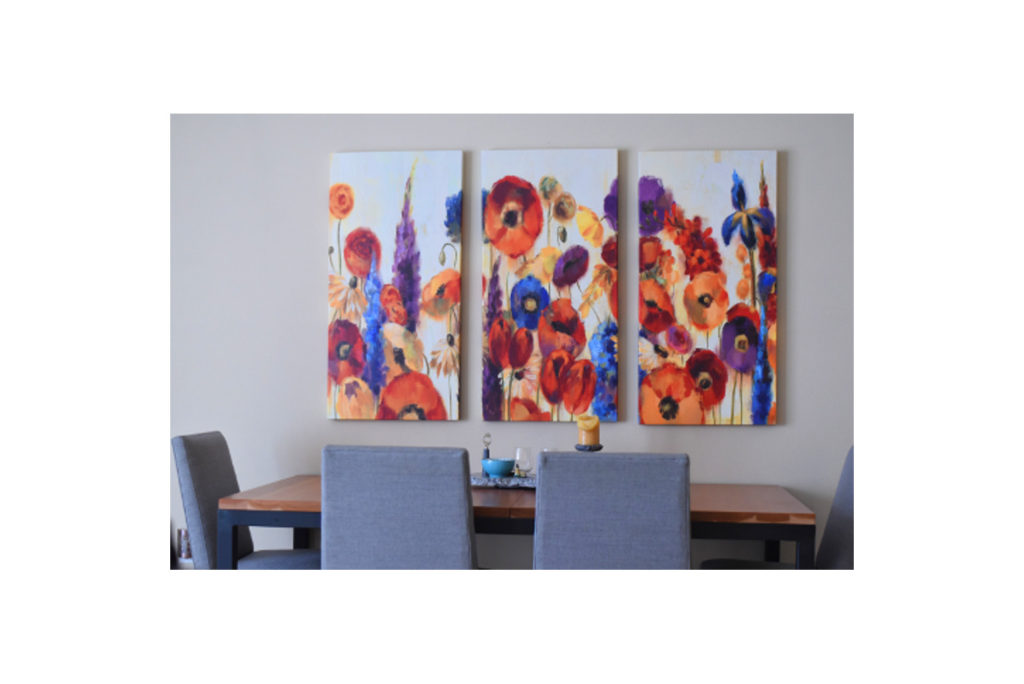
Lastly, we needed to create a focal point behind the dining room table. Since, it was an open floor plan with the living room, the colors needed to be cohesive. And due to the muted colors of soft greys and cream throughout these rooms , she found delight in the colors in this grouping. We centered them over the dining room table to draw the eye as if to call you to sit down.
A home is all about surrounding yourself with things that you love and inspire you.

It was, indeed, an honor to be a part of her journey to help her create a retreat to refresh and reflect and rejoice in God’s love for her.

Nancy and Sandra in retreat
Love her!
Verified by ExactMetrics