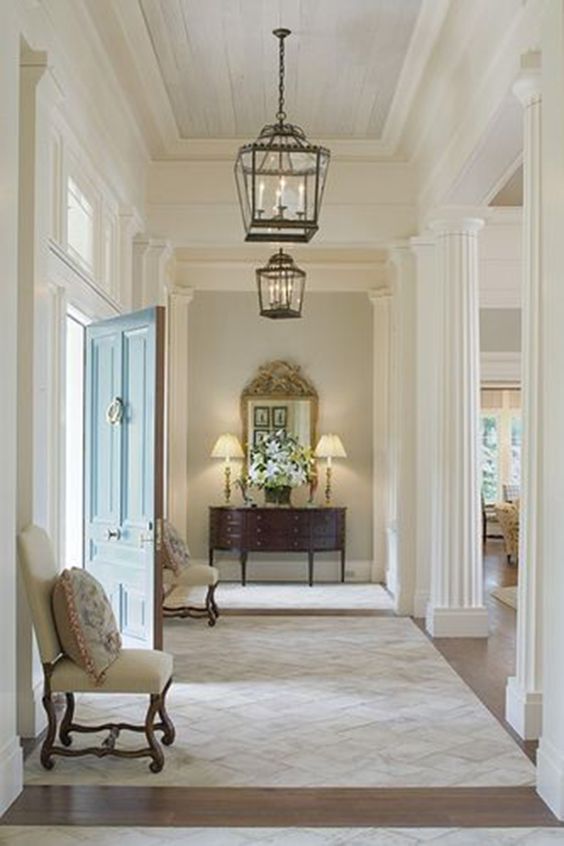
The color palette varies slightly depending on the region around the Mediterranean. Italy loves the earthy color palette of warm tones of brown and terracotta and greens where Greece’s color palette is more connected to the sea and its various hues of blue. There is a strong Moroccan influence in this design style as well. All these areas use vibrant hues along with either pure crisp white or warm neutral walls.
Mediterranean Forms & Line
The bulbous round shapes of pottery
curved and organic
decorative ornamentation
simple
arches
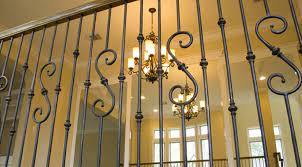
photo source: artfasad.com
Mediterranean Style Furniture
A variety of furniture styles can be paired with this design style. Think natural woods and comfort when choosing furniture. Low profile seating is often seen with this style for a comfortable and easy going aesthetic. Natural materials like this bamboo sofa frame and rattan pendant light pairs well as in this picture from artfasad.com. Wrought iron accents and vintage pieces are also often used.
photo source: pointstudio.co
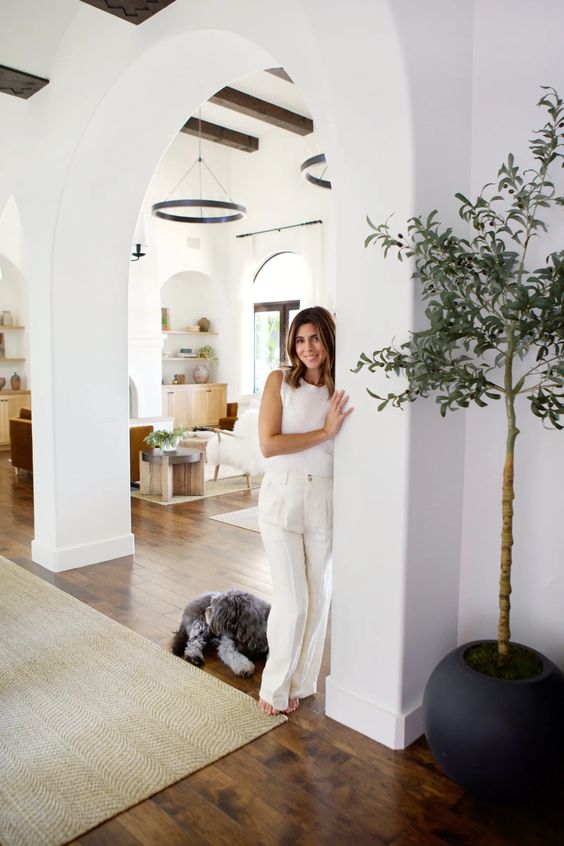
Mediterranean Style Architecture
There is a strong architectural statement in this style. Whether the walls are white or a creamy neutral, the textured stucco or plaster walls create a rustic and inviting atmosphere. The stone or hardwood floors are often distressed and earthy as if they have stood the test of time where generations have walked. Arched windows and doors abound with their gracious curves. Colorful tile is often seen in the kitchen and decorative ironwork may be seen.
terra cotta tile
arched doorways
natural exposed wood beams
decorative ironwork
french doors
natural stone
colorful tile
outdoor spaces for family living
photo source: lightwave laser
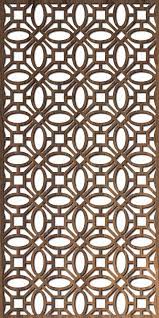
Patterns & Prints
This style loves its pattern. Even though Morocco is on the other side of the sea, it does have its influence. You may see this influence in the cut metal pattern in the light fixtures which create unique patterns of light on the stark walls. The prints are in delicate balance with the solid neutrals.
arabesque
moroccan
upholstery is often a solid neutral but the pillows can bring in pattern and color
repeating geometric
photo source: cheapstairparts.com
Textures, Materials and Finishes
The textures of nature abound in this style offering a cozy atmosphere.
natural textures and materials
patina
rattan
wicker
bamboo
wrought iron
terra cotta
distressed and weathered woods
mosaic and patterned cement, porcelain or ceramic tile
clay pots
dark metal finishes
Fabrics
Unfussy and natural fibers
natural fabrics like cotton, linen and wool
seagrass
rattan
photo source: shippmanndesign
Window Treatments
The architecture offers ample amount of light. Light and airy window treatments keep the rooms bright and airy. Choose fabrics from this style to create window treatments.
sheer curtains
wood shutters
wrought iron grillwork
lightweight shades
photo source: pointconcept.co
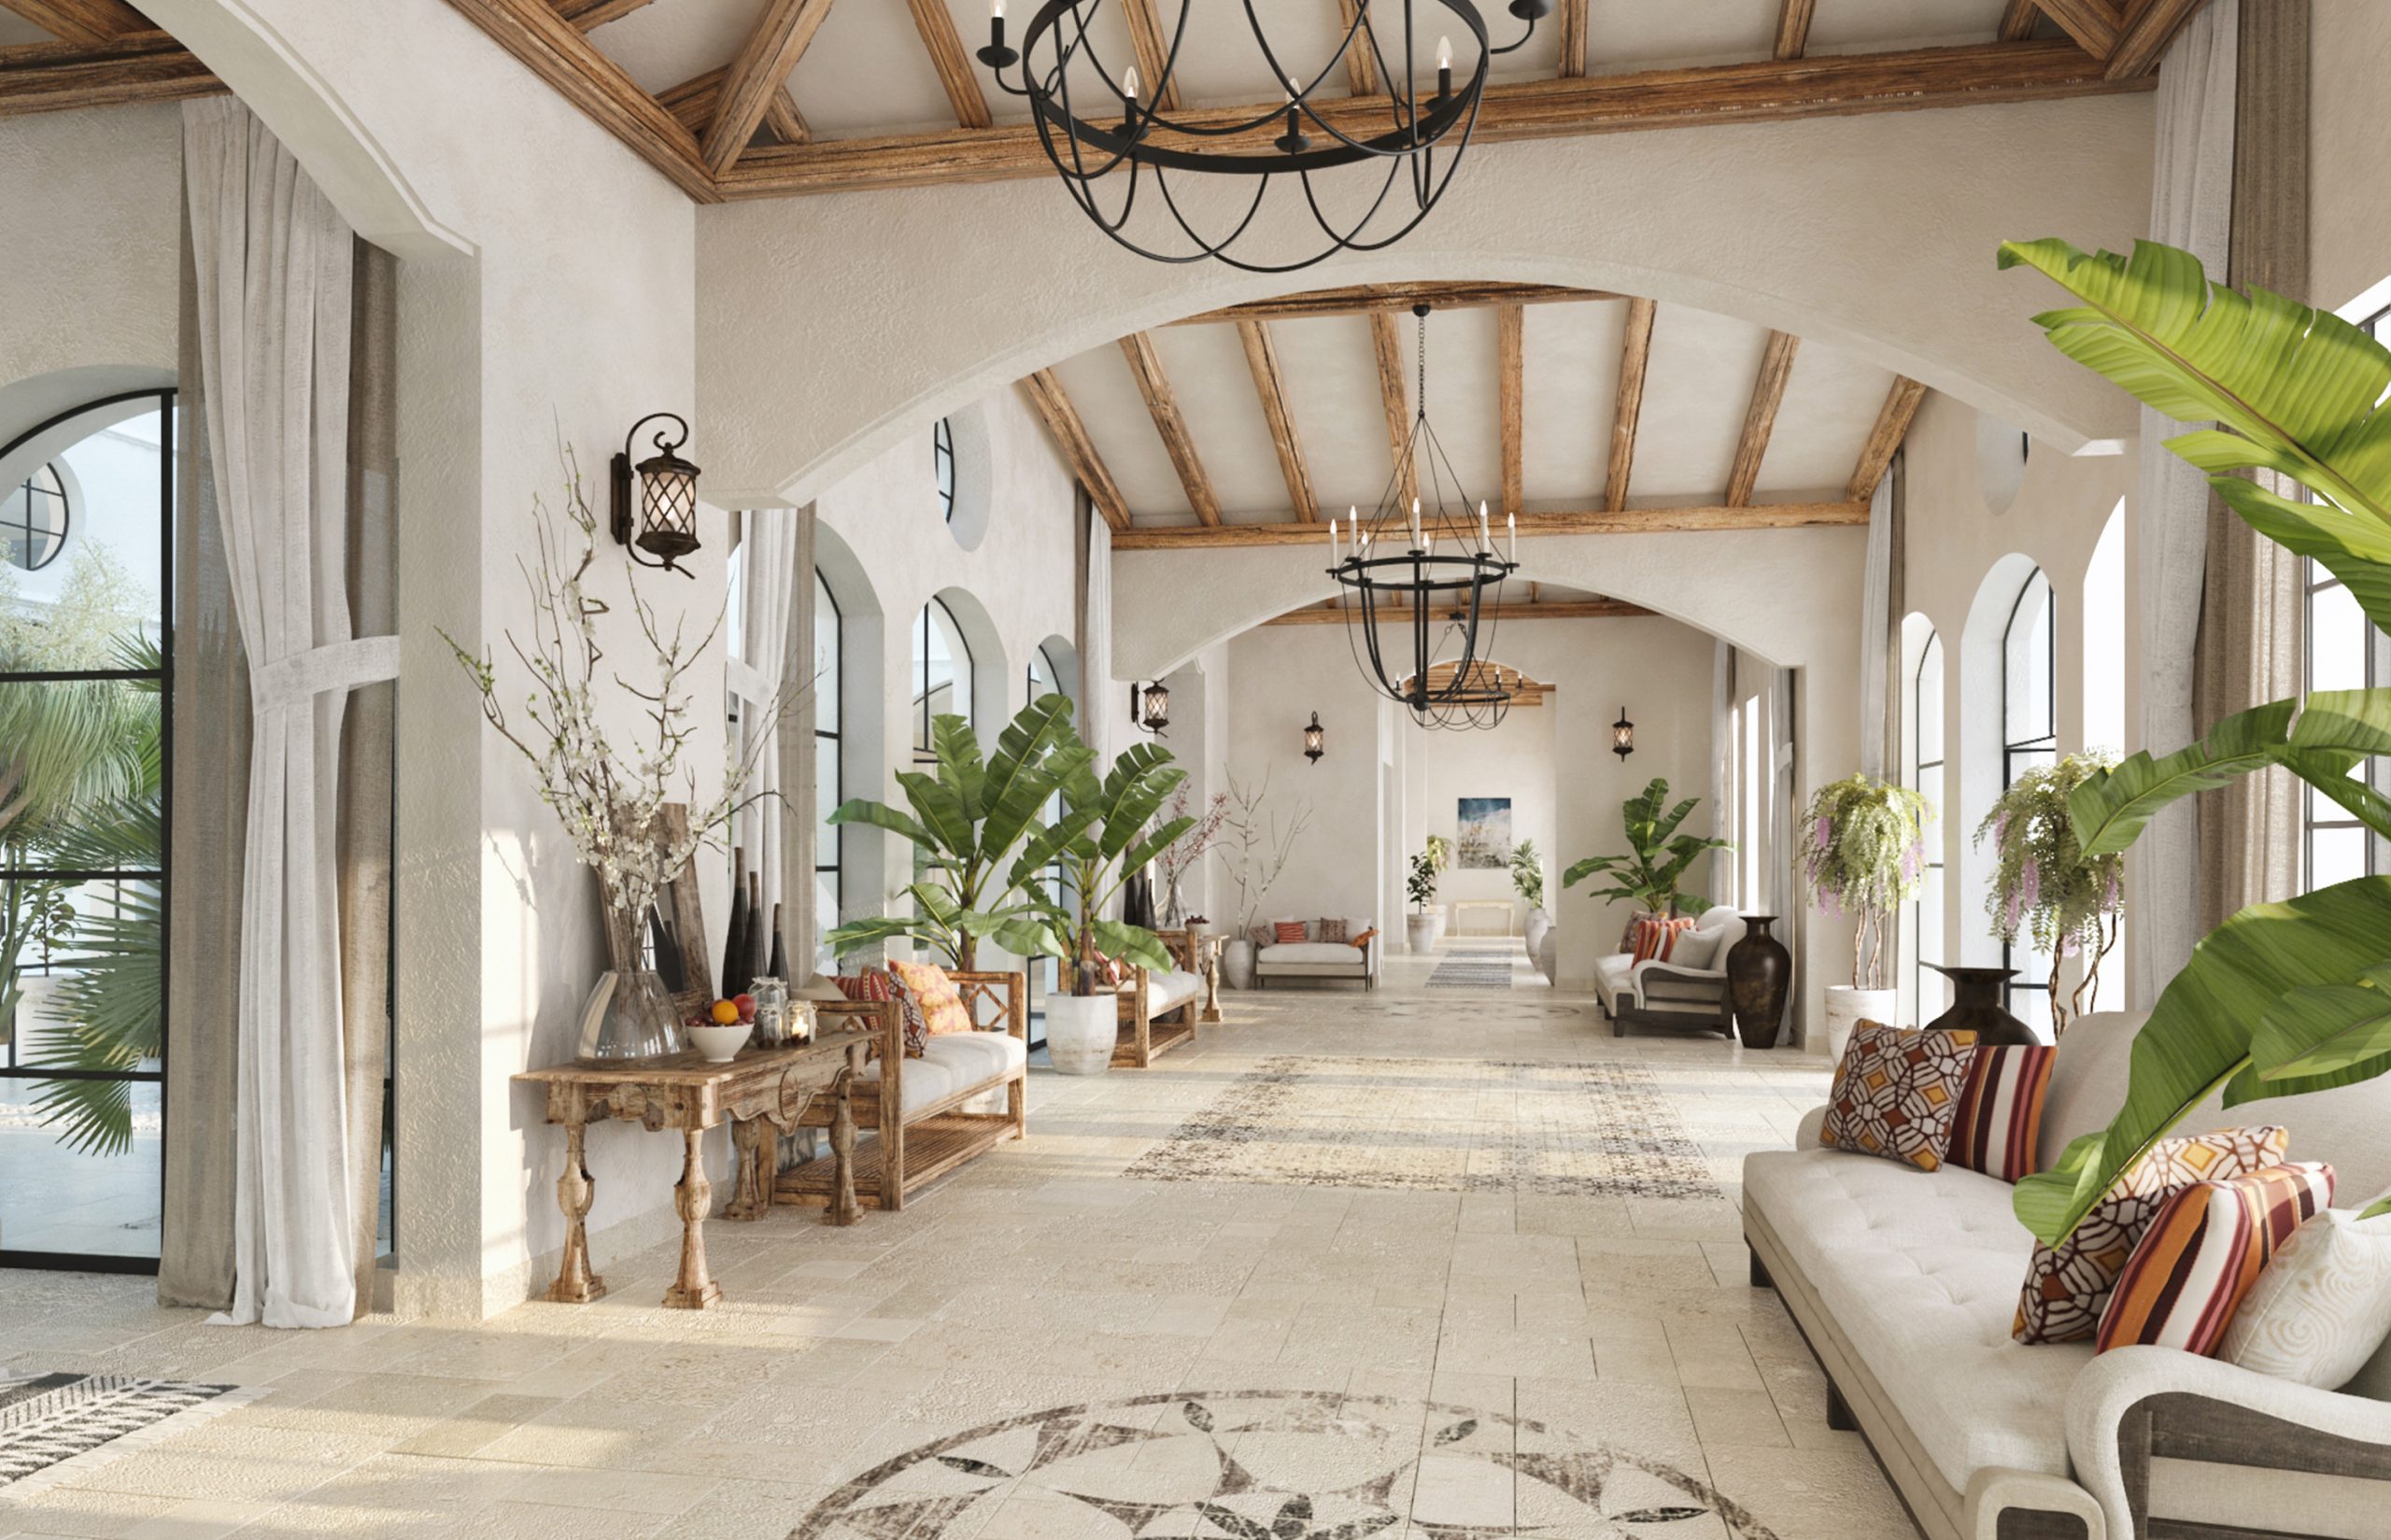
Lighting
Lots of natural light through large windows and doors.
wrought iron chandeliers and glass
lanterns
sconces
woven shades
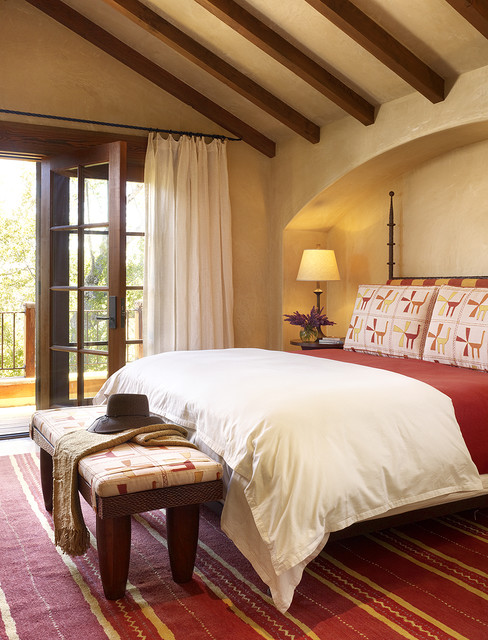
Photo source: artfasad.com
Art & Decor
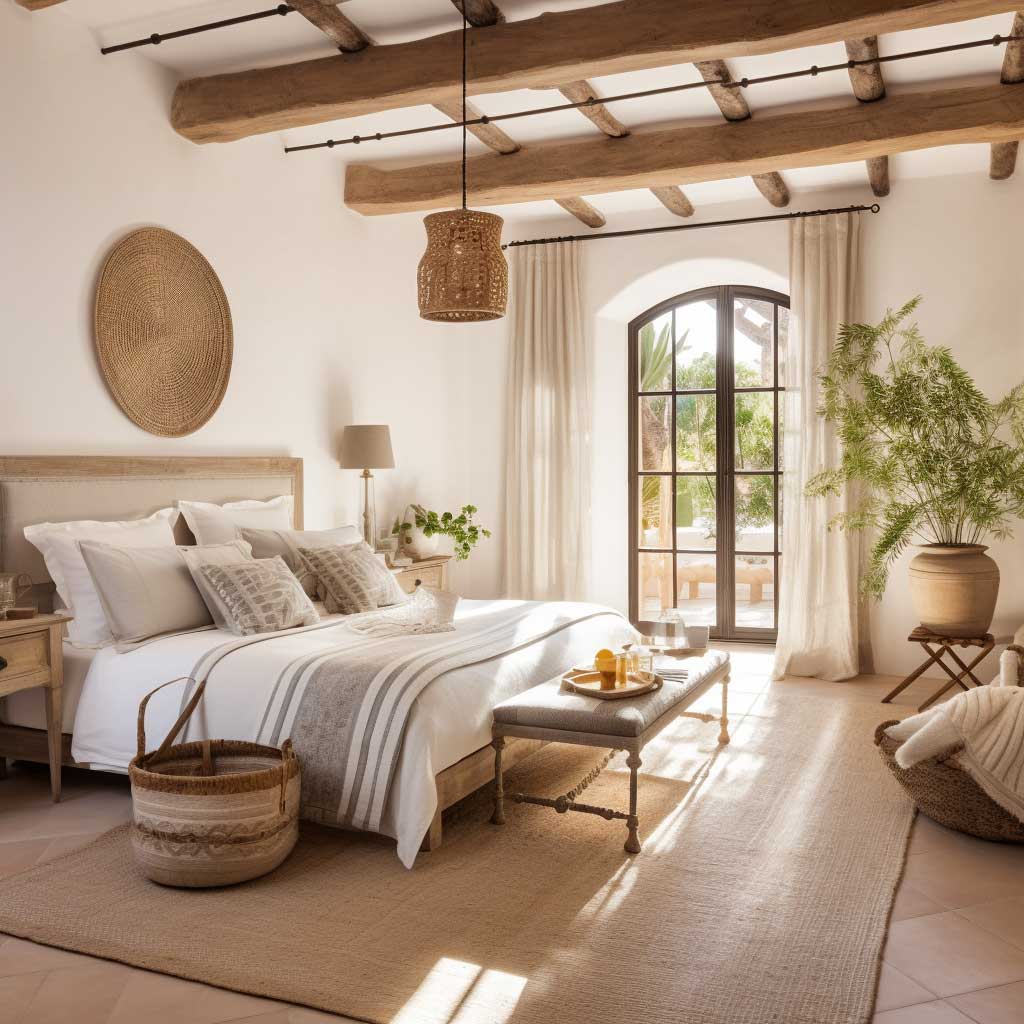
In keeping with the connection with the outdoors, green plants are used generously in these neutral rooms. in this example a large potted plant is used along with woven baskets on the wall and on the floor. A highly textured pillow is thrown on the floor which adds more high texture. The bed look as if it has natural cotton linens. A vibrant color was not chosen for this room but they let all the textures be the star. Even the rug is high in natural texture.
ceramics
mosaics
vibrant colored rugs
jute or sisal rugs
woven baskets
pottery
minimal wall decor
This video from Suzie Anderson Home does a fabulous job explaining the Mediterranean style with lots of pictures.
simple functional homes of rural areas. cozy and warm atmosphere. natural materials. weathered look
Rustic
English Cottage
Coastal Mediterranean
Victorian
Bohemian
Vintage Cottage
Arts and Crafts
Late 1800s. Lots of wood with craftsmanship
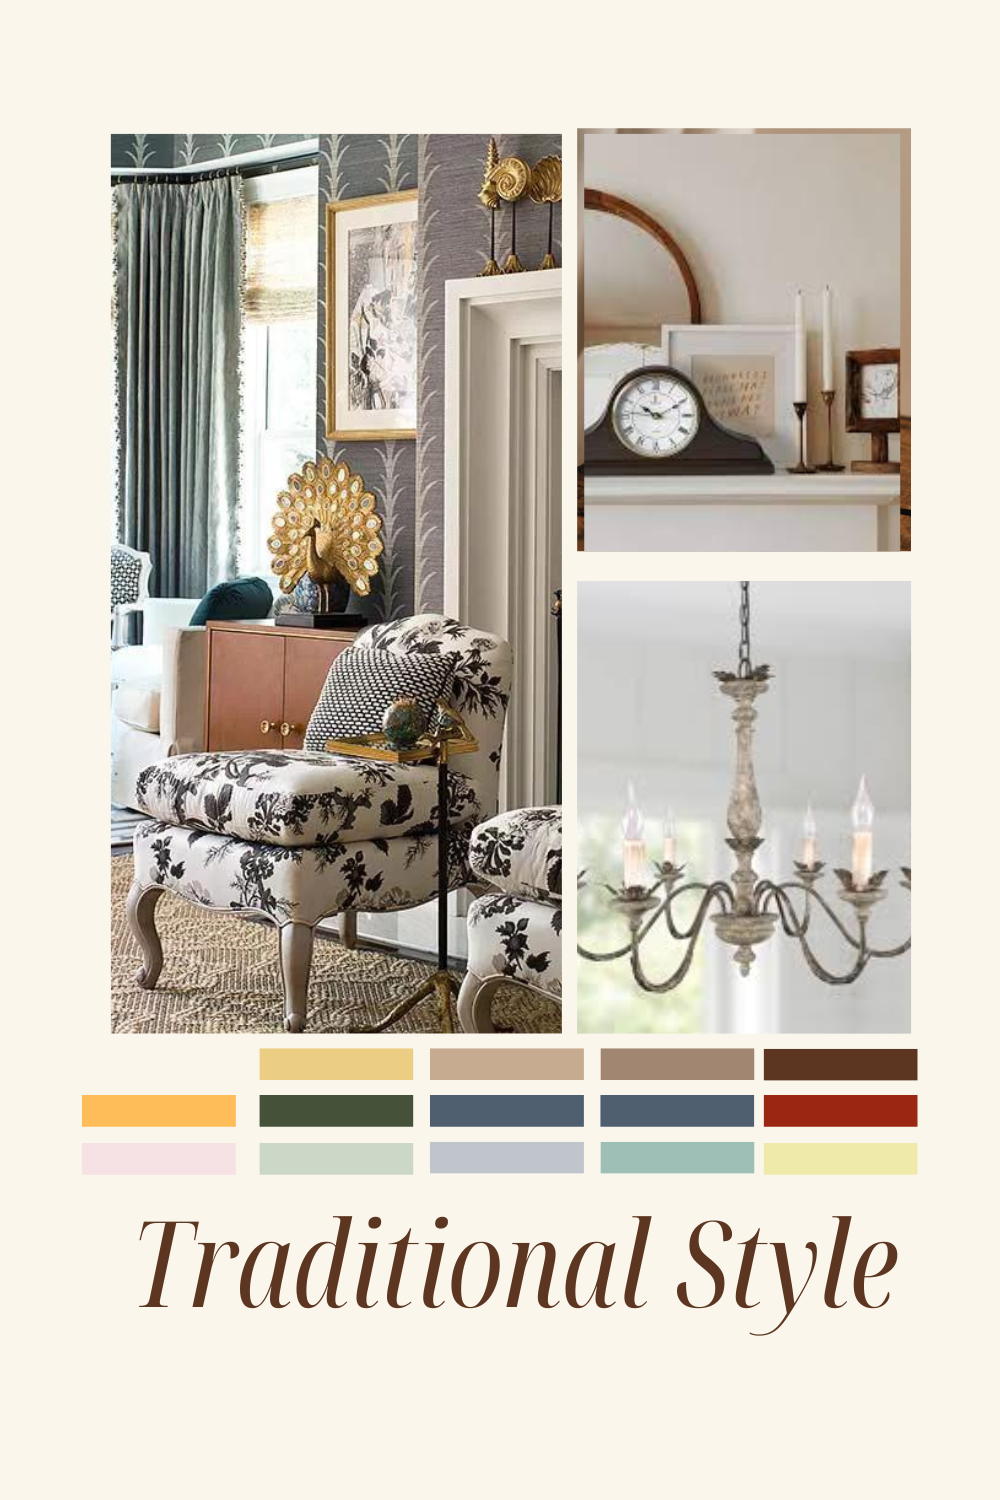
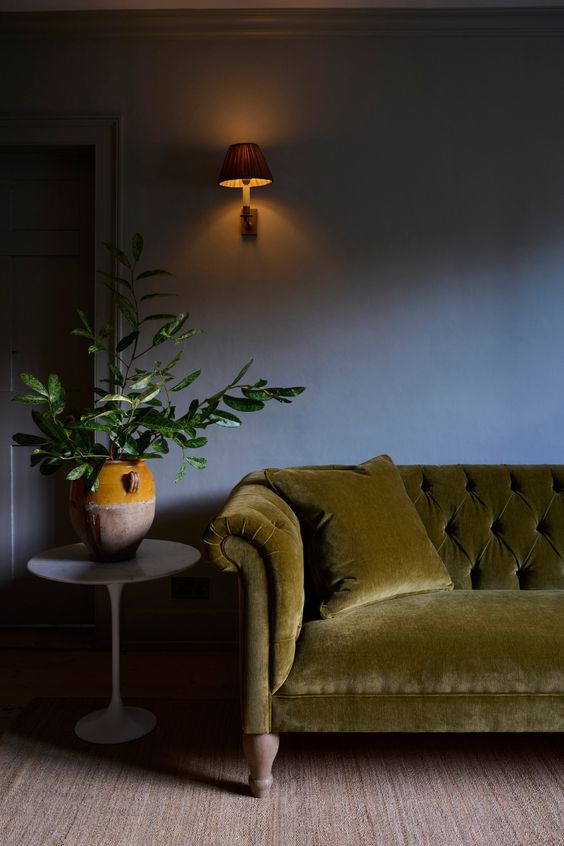
Traditional Style Color Palette
The Traditional Style color palette is warm. Warm neutrals, off white, tans, beige and ivory are the foundation to the Traditional Style. Rich warm hues of deep reds, blues, and greens are introduced in a balanced and thoughtful way. Even the soft pastels are often used in this style.
Photo Source: Better Homes and Gardens
Furniture in the Traditional Style
Some features of Traditional Style furniture might include:
Upholstered seating with carved or turned wood frames
Skirted upholstery
rolled arms with decorative trim or nails
button tufting
dark woods like mahogany and cherry
Examples of Traditional Style Furniture:
(Look for the above features in the following pieces)
upholstered wing back chairs
upholstered chaise lounges
upholstered loveseats
upholstered club chairs
upholstered sofa
wood framed occasional chairs
secretaries
hutches
chests
wooden benches
wooden stools
vintage pieces
Architectural Influences in the Traditional Style
Photo Source: The Brass Pine
Archiectural Features abound and may include:
Built ins
paneling and wainscoting
crown molding and trim moldings
hardwood floors of oak, walnut, cherry, maple or mahogany
coffered ceilings
arches
chair rails
columns and pillars
detailed ballusters
defined rooms rather than an open floor plan
strong symmetry in window placement
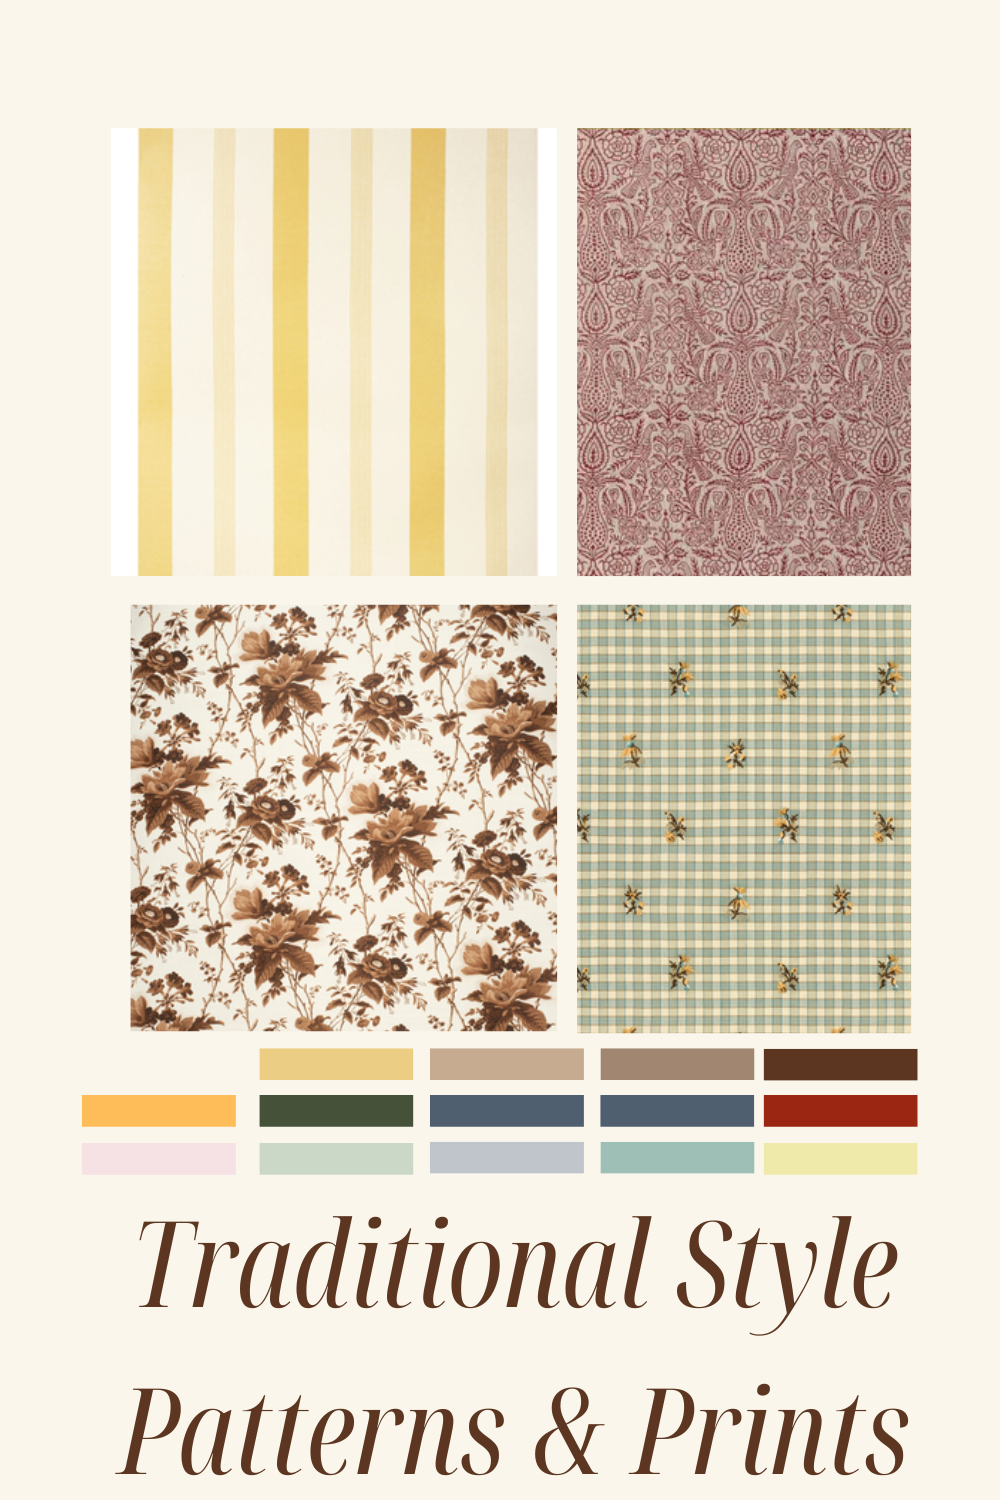
Patterns and Prints in the Traditional Style
Look for these patterns and prints in the Traditional warm color palette
Florals
Solid Colors
Stripes
Plaids
Small prints
damasks
brocades
chevron
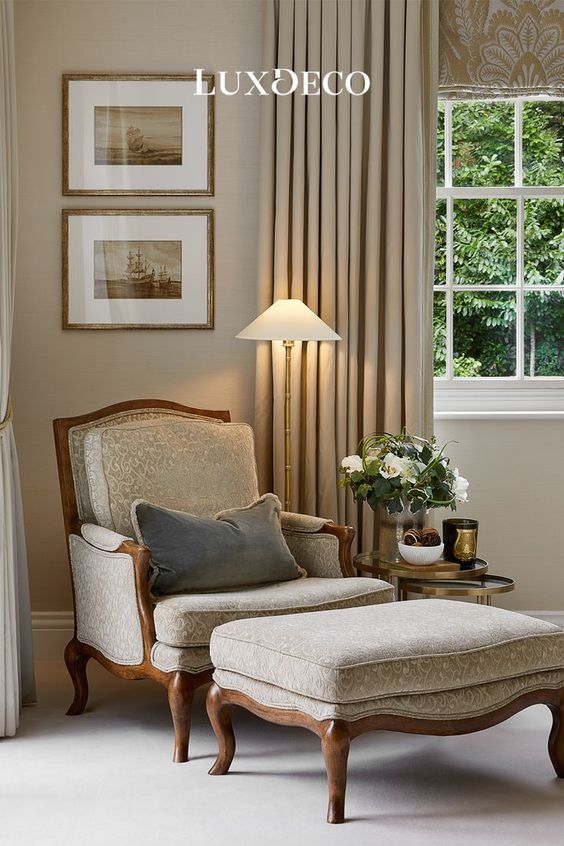
Photo Source: Luxdeco
Form & Line
This picture from Luxdeco demonstrates the soft curved lines in Traditional Style furniture seen in the stuffed upholstery, furniture arms and carved wooden legs often contrast with the crisp linen lamp shades and straight lines of the room’s architectural features. The tall vertical lines in the draperies and architecture draw the eye up and give a sense of grandeur. The symmetrical placement of furniture also offers straight lines toward a focal point.
The Traditional style is all about balance of form and line.
Photo Source: sofaandstuff.com
Textures, Materials & Finishes
Look for using natural materials, smooth textures, warm metal finishes and finishing details
natural materials like wood, brick, glass and stone
dark polished woods
button tufting and piping
brass
nickel
bronze
copper
glossy ceramic
antique finishes like gilded frames
polished surfaces
smooth and luxurious
braided trims
tassels
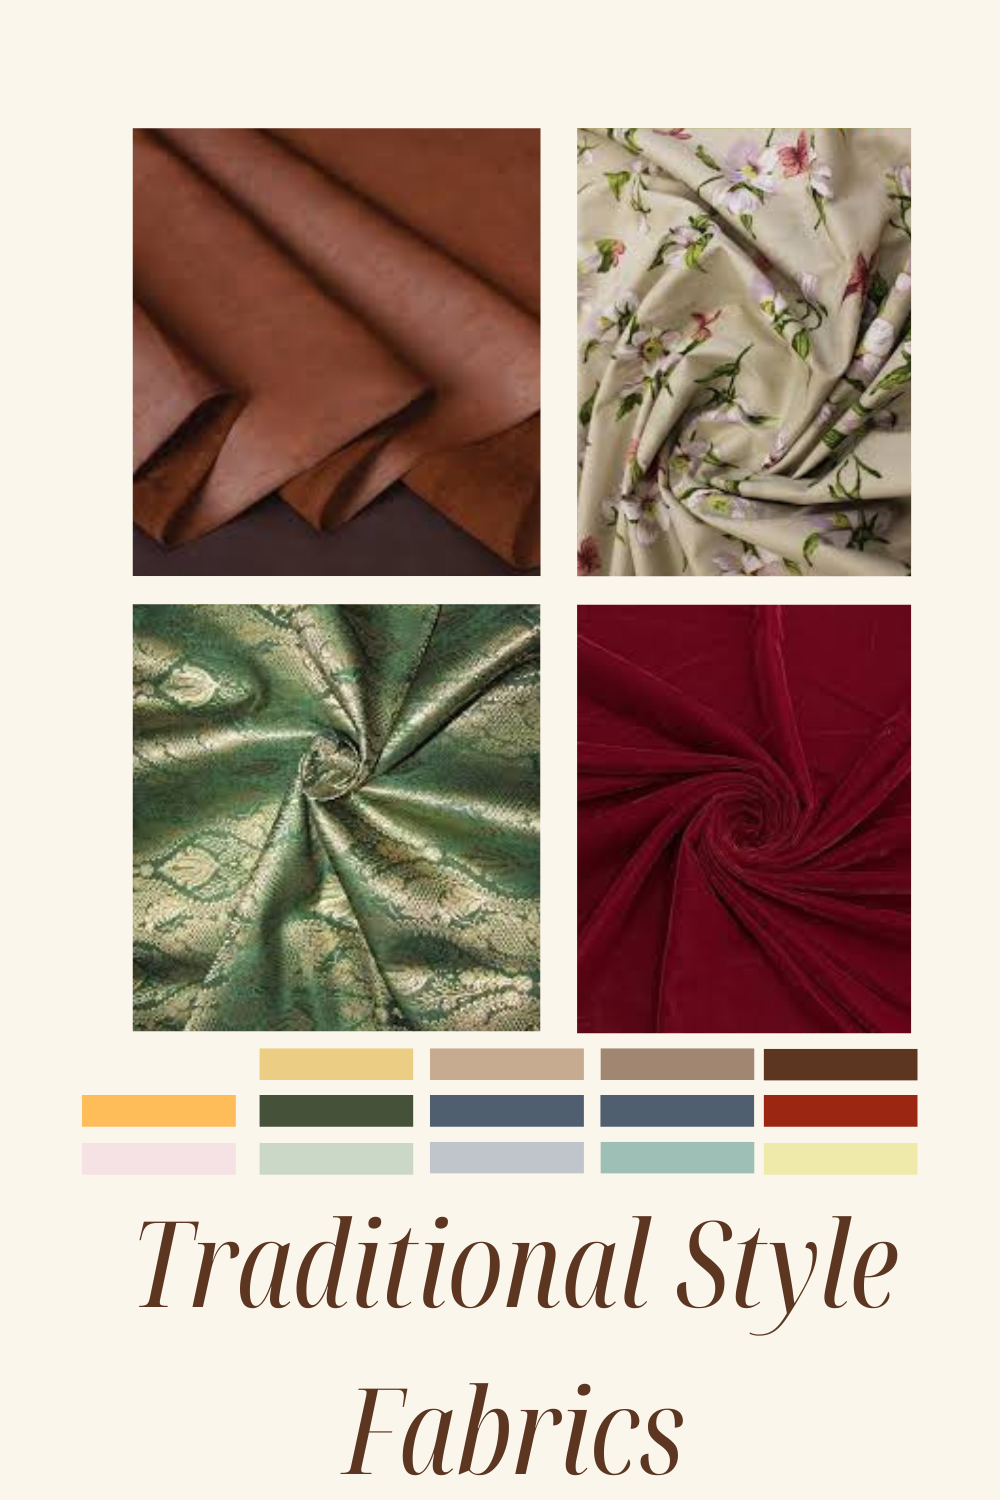
Fabrics
Fabrics in the Traditional Style are made from natural fibers with smooth lustre finishes like chintz, brocade and toile
velvet
silk
linen
cotton
wool
chintz
toile
leather
brocade
lace
Photo Source: Anne Wagoner Interiors
Photo Source: Anne Wagoner Interiors
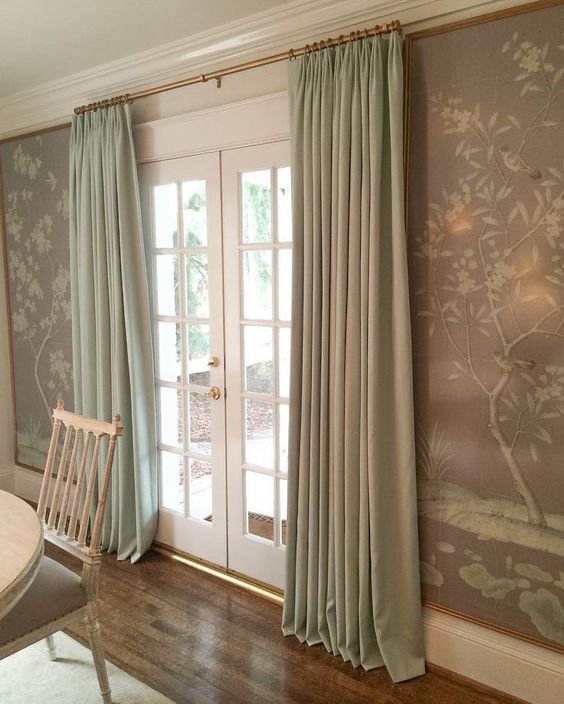
Window Treatments
Look to use the Traditional Style fabrics in the following treatments:
pinched pleated full length draperies
valances
cornices
light weight sheer curtains
fabric roman shades
wooden plantation blinds
use of trim embellishments like pull backs, tassels and ribbon
Photo Source: The Ivory Lane
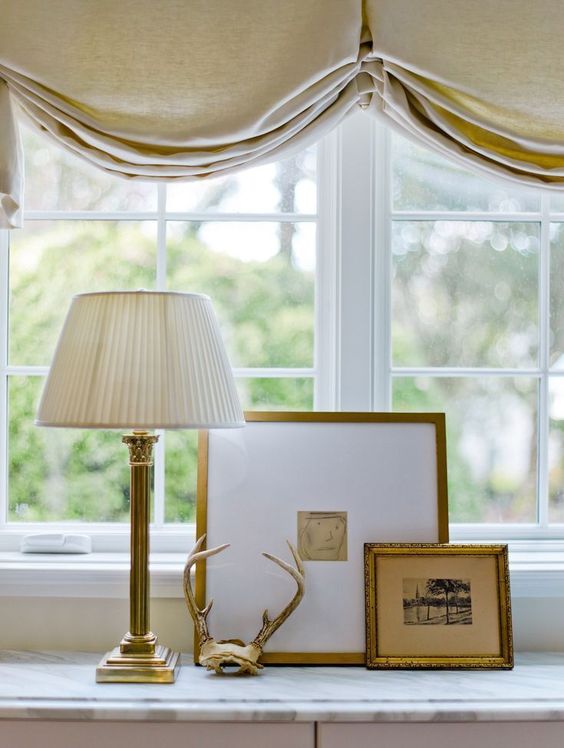
Lighting
crystal chandeliers
candelabras
lantern style
picture lights
fabric lamp shades
urn table lamps
candlestick table lamps
wall sconces
Photo Source: Anne Wagoner Interiors
Art and Decor
Look for antique finishes like gilded frames or carved wood for your artwork
Vintage pieces
sculptures
framed botanicals
gilded frames
porcelain pieces
mantle clock
decorative globe
leather bound books
boxwood topiary
fiddle leaf fig
english roses
hydrangeas
orchids
china
carved wood
abundant pillows
plants and flowers
landscape art
floral art
collections
portraits
still life paintings
oriental rugs
tapestries
wall to wall carpet
sunburst mirror
… Variations of the Traditional Style
Do you like the balanced and layered look of the Traditional Style but don’t like the colors? Or perhaps you like other materials or finishes?
Check out some of the styles within the Transitional Category. They combine traditional and contemporary or more modern styles.
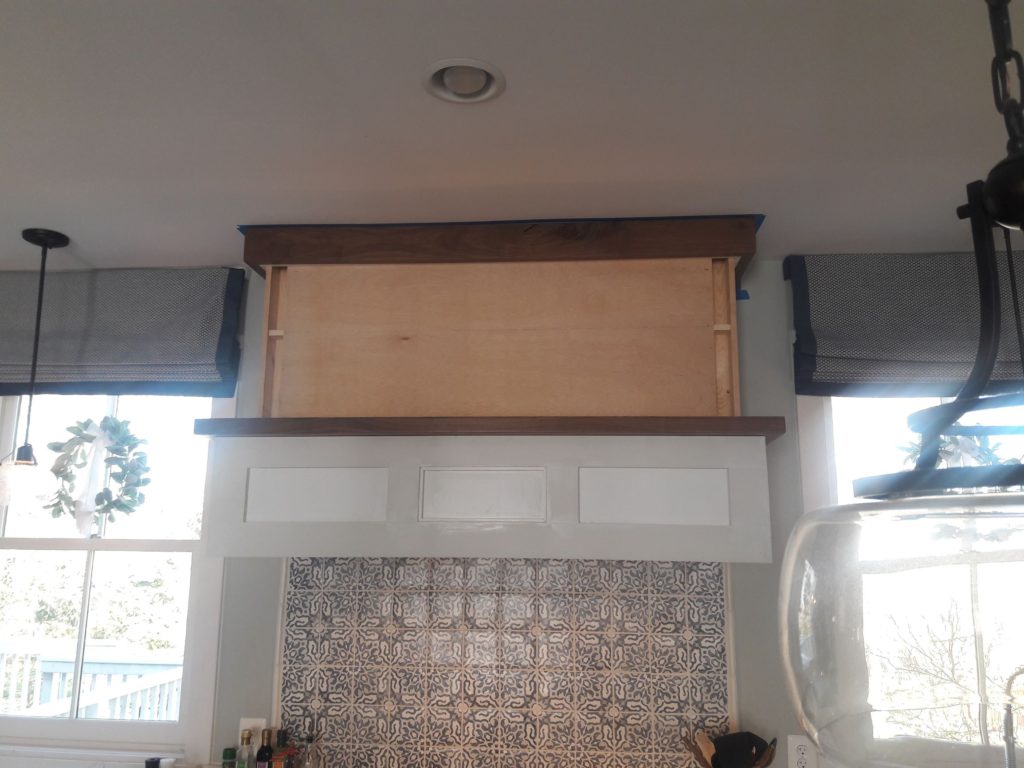
This custom range hood was a beautiful finishing touch to these cement tiles. The range hood in combination with the backsplash often acts as a focal point to the entire kitchen.
Taking great care in its design can make or break a kitchen design. Here I chose to build a box to add to the traditional aesthetic but a modern touch with the addition of a walnut shelf to compliment the rich walnut flooring.
What Size Should a Range Hood Be?
To Determine the Proper Width for Your Custom Range Hood
Width: It is recommended to have your range hood protrude 3” beyond each side of your range. This allows the ability to capture the particulates coming up from your pans that naturally spread out a bit before reaching the hood. The width should not be narrower than your actual range measurement width.
To Determine the Proper Distance from the Cooktop
Height: Typically, the common installation height or distance from the cooktop to the base of your custom range hood is 24”-36” from a gas cooktop and “ – 24” for an electric cooktop.
Considerations: Take into consideration your tile size and whether you want to have your tile cut. If you install your range hood before designing your tile placement, you may end up having to cut a row at either the top or bottom to fit. Don’t forget to consider the space the grout will take up as well as the height of your tile.
My range was a 48” wide range and the burners measured 44”. The recommended size of range hood was this 52 1/2” which was a bit shy of the recommended 6” wider. To accommodate the 4 ½” tile and bullnose, the distance from the cooktop ended up being 30” which is appropriate for a gas cooktop.
To Determine the Proper Depth of a Custom Range Hood
Depth: For a standard 30” range, the hood should be 6” to 9” less in depth. If you have ever hit your head on a range hood, you will understand the reason for this.
We chose a Vent-A-Hood Liner Insert so we could cover it with a wooden frame to give it a more traditional look.
Lighting
Before we closed up the box frame it was important to add the wiring to the planned lighting strip for the front of the hood. Since we added a 12V LED dimmable strip along the front shelf, a 12V Magnitude Dimmable Power Supply had to be installed along with a switch.
Design Considerations
When designing a custom range hood, it is all about style and proportion. Now it was important to make it beautiful and in keeping with the rest of the kitchen. We were working with simple Shaker door panel styles on the white cabinets so we wanted to stay with that look. There is walnut floors and a planned walnut island. The cover extended all the way to the ceiling.
The Design Materials
To break up that height, I chose to create a 2 step look. We also choose to extend the box another 4 ½” on each side beyond the vent liner We choose 3 repeating rectangles on the bottom shelf front and 1 large rectangles on the top face. Each topped off with a beautifully finished walnut wood board. This gave a modern clean look combined with the European pattern tile in the backsplash. This is truly the focal point to the kitchen.
Now, A trip to the lumber yard to decide what wood widths were available to accomplish the modern European look we were going for. We chose natural walnut and apainted white wood cabinet.
Attention to Details
This is an example of a detail involved in a beautifully executed design. Here the edge tile lined up with the edge of the range hood cover. A skilled tradesman in combination with a beautiful design can accomplish this level of detail. Notice that Steve didn’t just cut off the tile trim when it hit the wood trim detail of the hood but notched out the tile to fit snugly around the hood trim.
You can have your kitchen designed by Sandra Forbes Interiors. It will be custom designed to your style, needs and desires. Learn more about Sandra Forbes Interiors at SandraForbesInteriors.com.
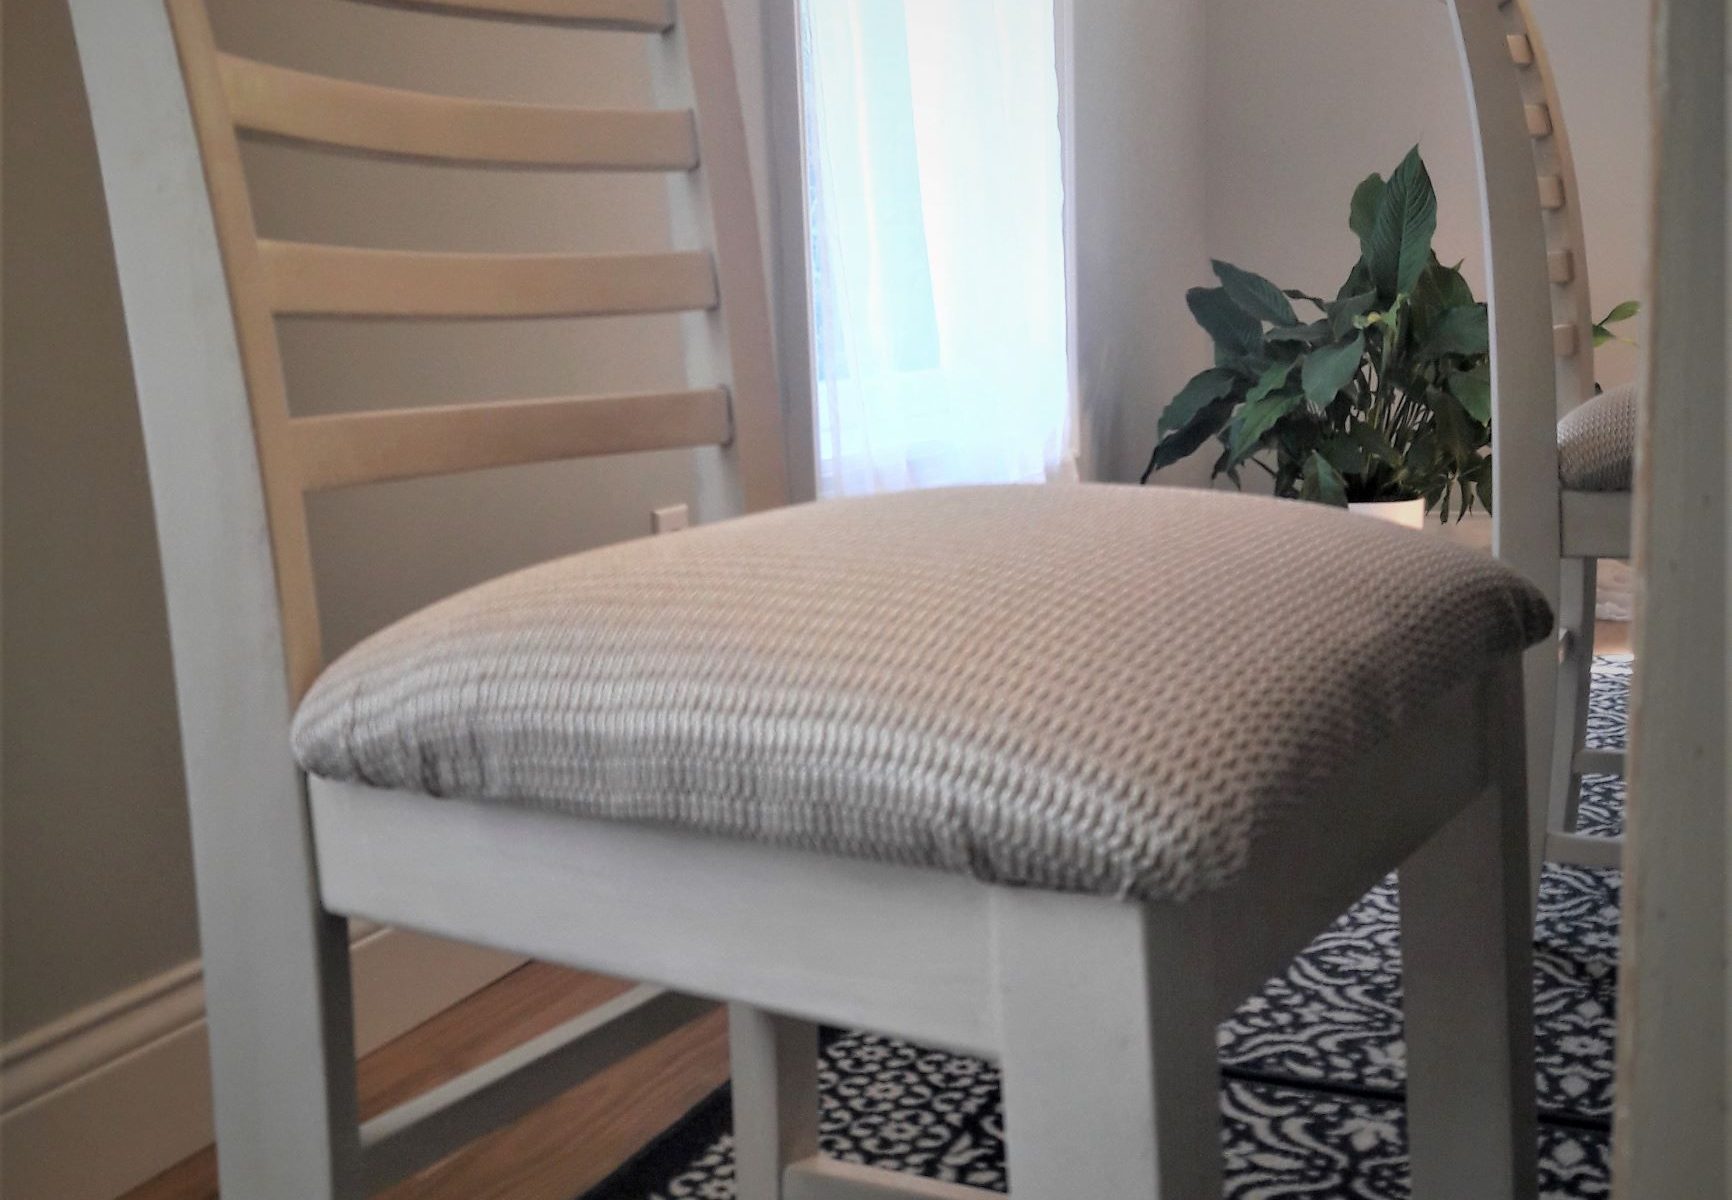
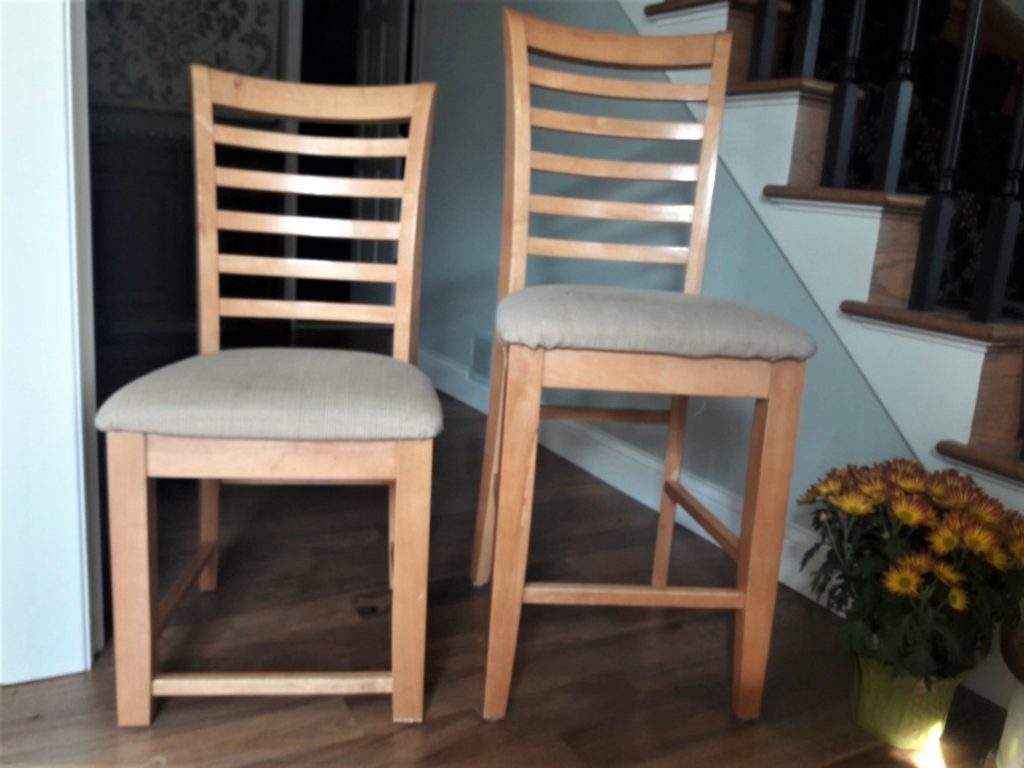
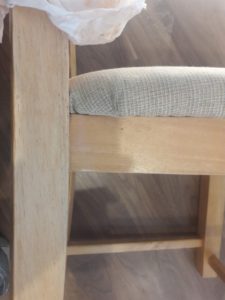
Updating my dining room chairs was the right solution since they were still in good condition.
Since we are holding up in our house more right nowbecause of COVID, I decided to finish an ongoing project. I have been updating my dining room tables and chairs.
I am happy to say that I am done! It has been a long project.
It all started because our tables and chairs were bar height and the wrong wood tone. We found that the tall height was hard on some of our backs and this height was a less formal look than what I was looking for.
The first thing we did was to cut our table legs down and the chair legs down. As you can see from this picture, the cross bar ended up to be pretty low to the floor but we were willing to live with that. It was far easier (we thought) to refinish the chairs and to use what we had rather than buying a new table and chairs.
Updating my Dining Room Chairs to Compliment My Existing Furniture
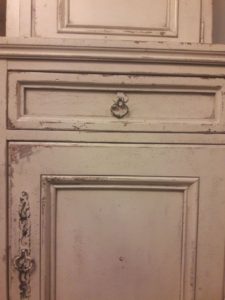
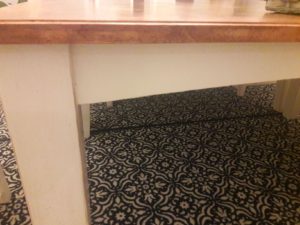
I have a large buffet piece that we love has moved along with us from home to home. It has found a home in 5 houses including a trip across the country from Virginia to Minnesota. It was important to me that the dining room table and chairs coordinate with this piece. The table and chairs were blonde wood which didn’t compliment the buffet or our walnut floors. The buffet is a painted piece with a distressed finish.
Distressed finish
My table and chairs, on the other hand, were not very expensive but they serve us well. We love their versalit! Depending on how we arrange them, we can accomodate groups of all different sizes. We have two 5′ square tables that allow us to sit up to 16 people when set apart. Each has a leaf that can change the table size to seat either 6 or 8 people. When we put them together we can seat 12 all around one large table. We rearrange them depending on the number of people we are hosting.
So, I decided to first refinish and update the table first. I don’t have any pictures of this process but it is pretty much what I did on the chairs. I primed and painted the table legs and apron the same color as the buffet. Then proceeded to distress them by hammering small indentations with a tip of a nail and sanding them a bit. I finished with a glaze.
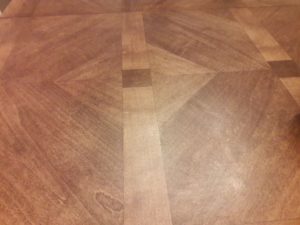
I then sanded and stained the tabletop to compliment the walnut floors. In the picture on the left of my son’s birthday, you can see when the table top was blonde compared to the picture on the right after I stained it a darker color to compliment the floors in our new house.
Blonde wood tabletop
Tabletop stained and finished with polyeurethane
Painted blonde wood legs
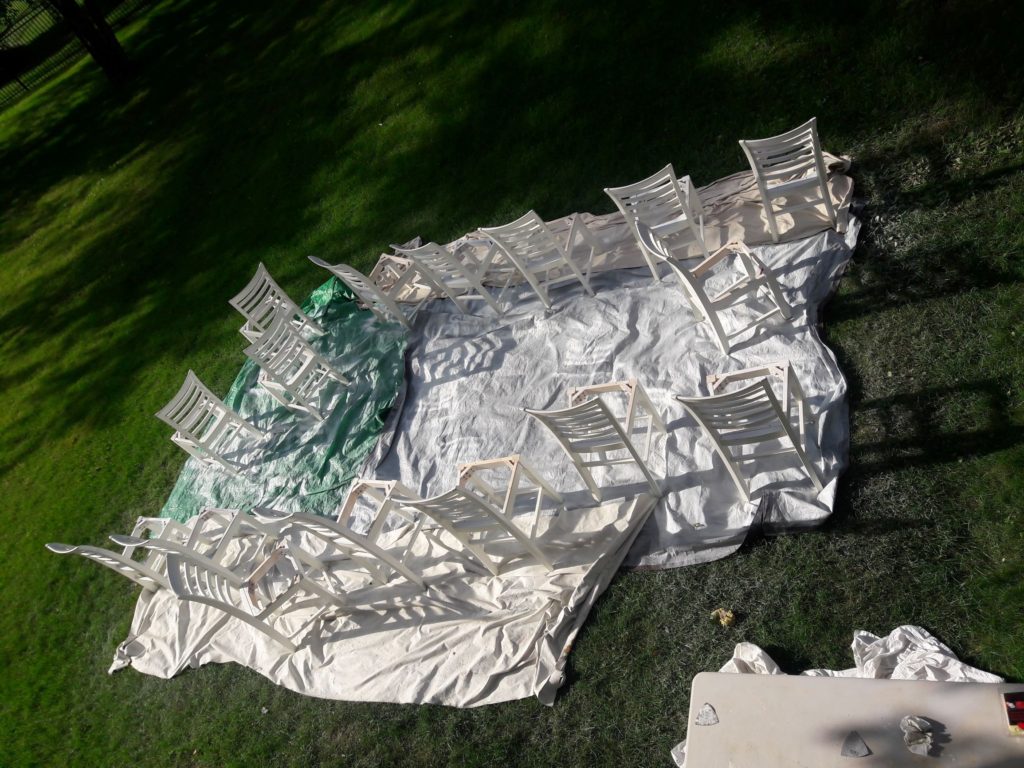
Whew! That was fun but I was not looking forward to finishing the chairs. THERE ARE 16 OF THEM!
Updating My Dining Room Chairs
I started by sanding off the polyeurethane finish and then staining them just like I did the table top. I was hoping to match the table top. The soft wood soaked up the stain unevenly though.
Ultimately, I didn’t like the finished look.
Wiping on stain
PLAN B… I decided to paint them instead.
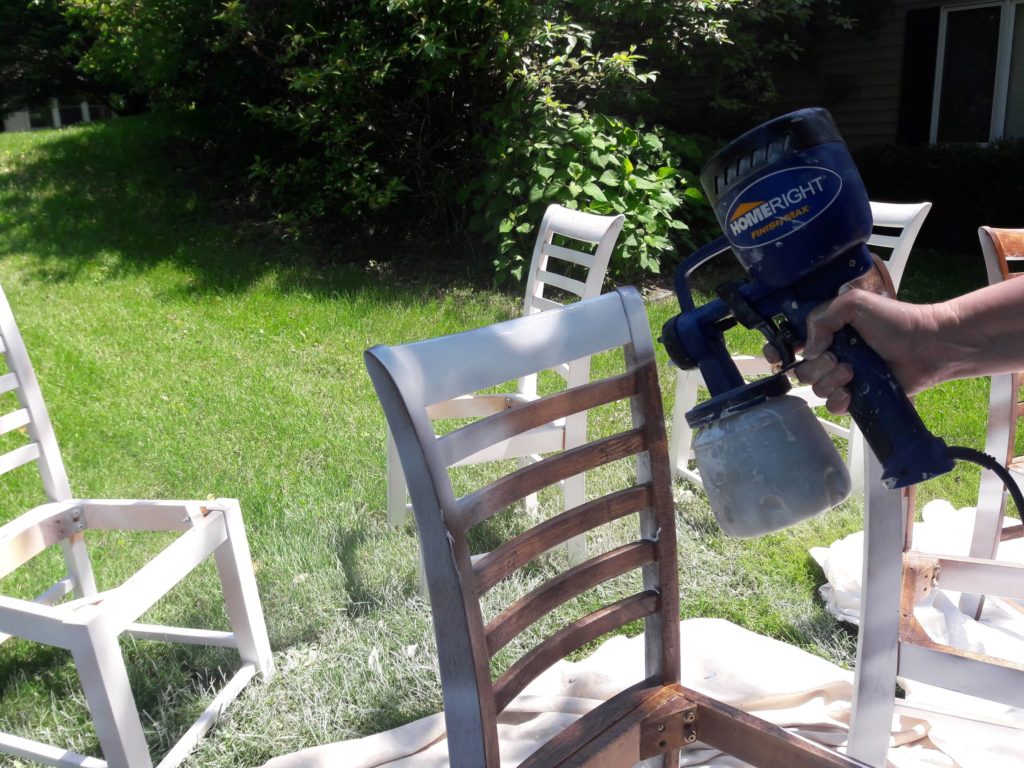
I spent several days priming and painting the chairs.
Thankfully, I had a hand-held sprayer that I bought for a client project. Each was lightly sanded and then primed and painted.
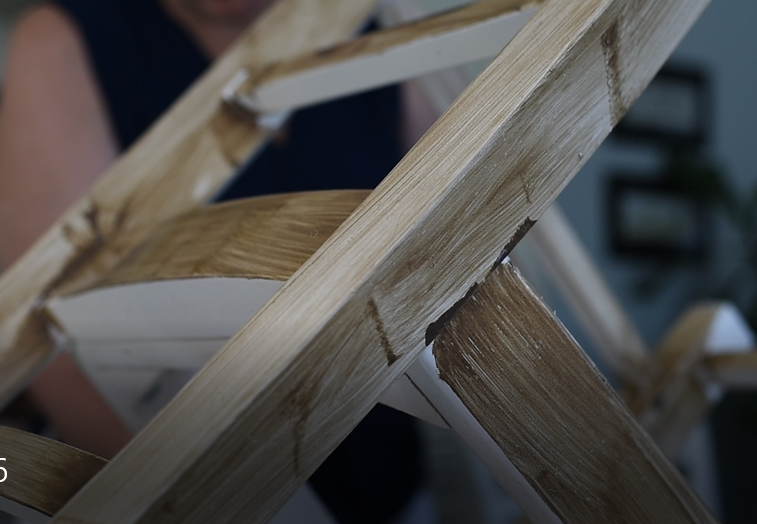
The painted chairs looked great but they looked too new when compared to the distressed finish on the buffet and newly refinished table. Each chair needed to be glazed to create a more antique look.
I was able to achieve this by wiping a glaze on each and then wiping it back off with a damp cloth leaving a small residue in grain lines.
Painted glaze on with a brush
glaze remained in the wood grain
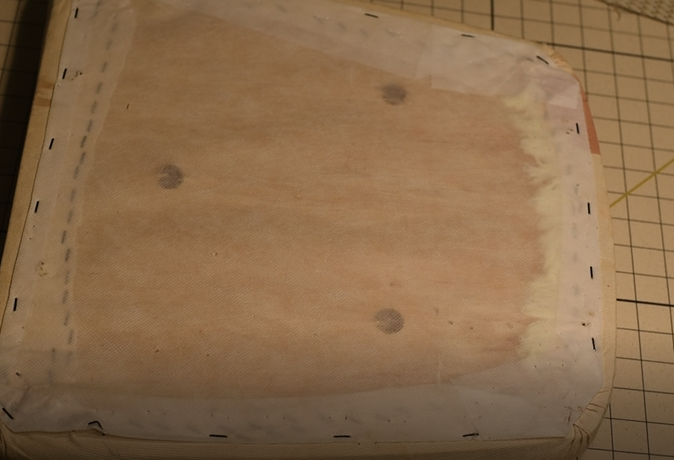
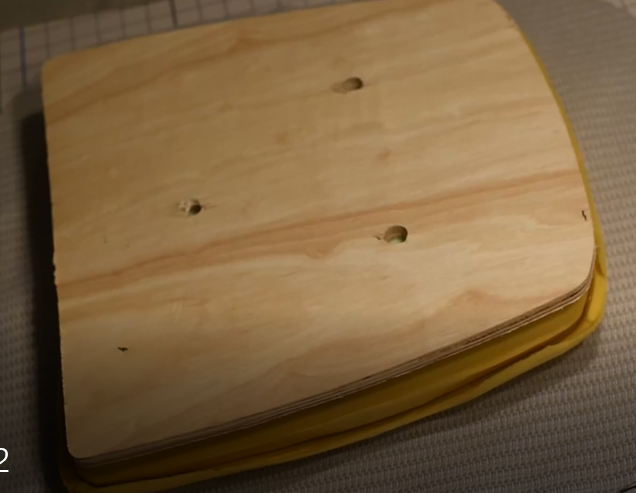
Recovering the Dining Room Chair Pads
Lastly, each chair seat needed to be recovered. The pads that came with the chairs were not very comfortable. They were not very dense and not very thick. The fabric was very stained as well from many years of use.
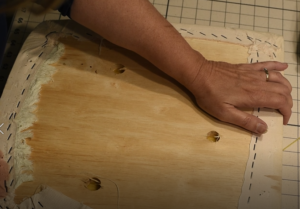
I took this opportunity to take apart the covers and replace the pads with a more dense and thick foam to help cushion. To do this, I needed to remove all the staples from the cover fabric so I could get at the padding. First there were approximately 20 staples on the facing fabric and then over a hundred staples holding the fabric on each cushion!
It was just too difficult to remove them so I ended up cutting away the fabric around the staples and just leaving the staples in the base board. It was taking me 15 minutes to remove just 8-10 staples. The staples were so flush with the board that I couldn’t get under them to pull them out. I ended up just turning over the board and placing the staples on the top side under the padding. Sometimes we just got to do what we got to do:)
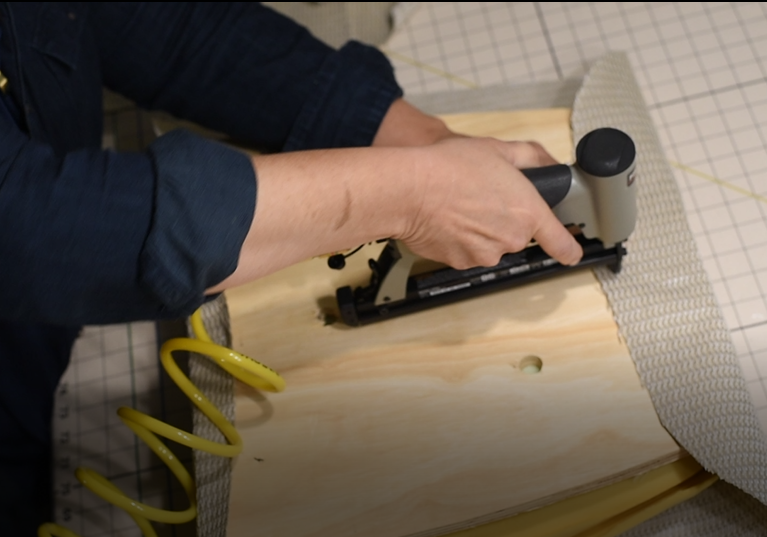
I then stretched the new fabric cover over the padding and base board. Then stapled it tight making sure the corners were smooth. I was able to achieve this by creating small folds on the underside gathering up the excess fabric.
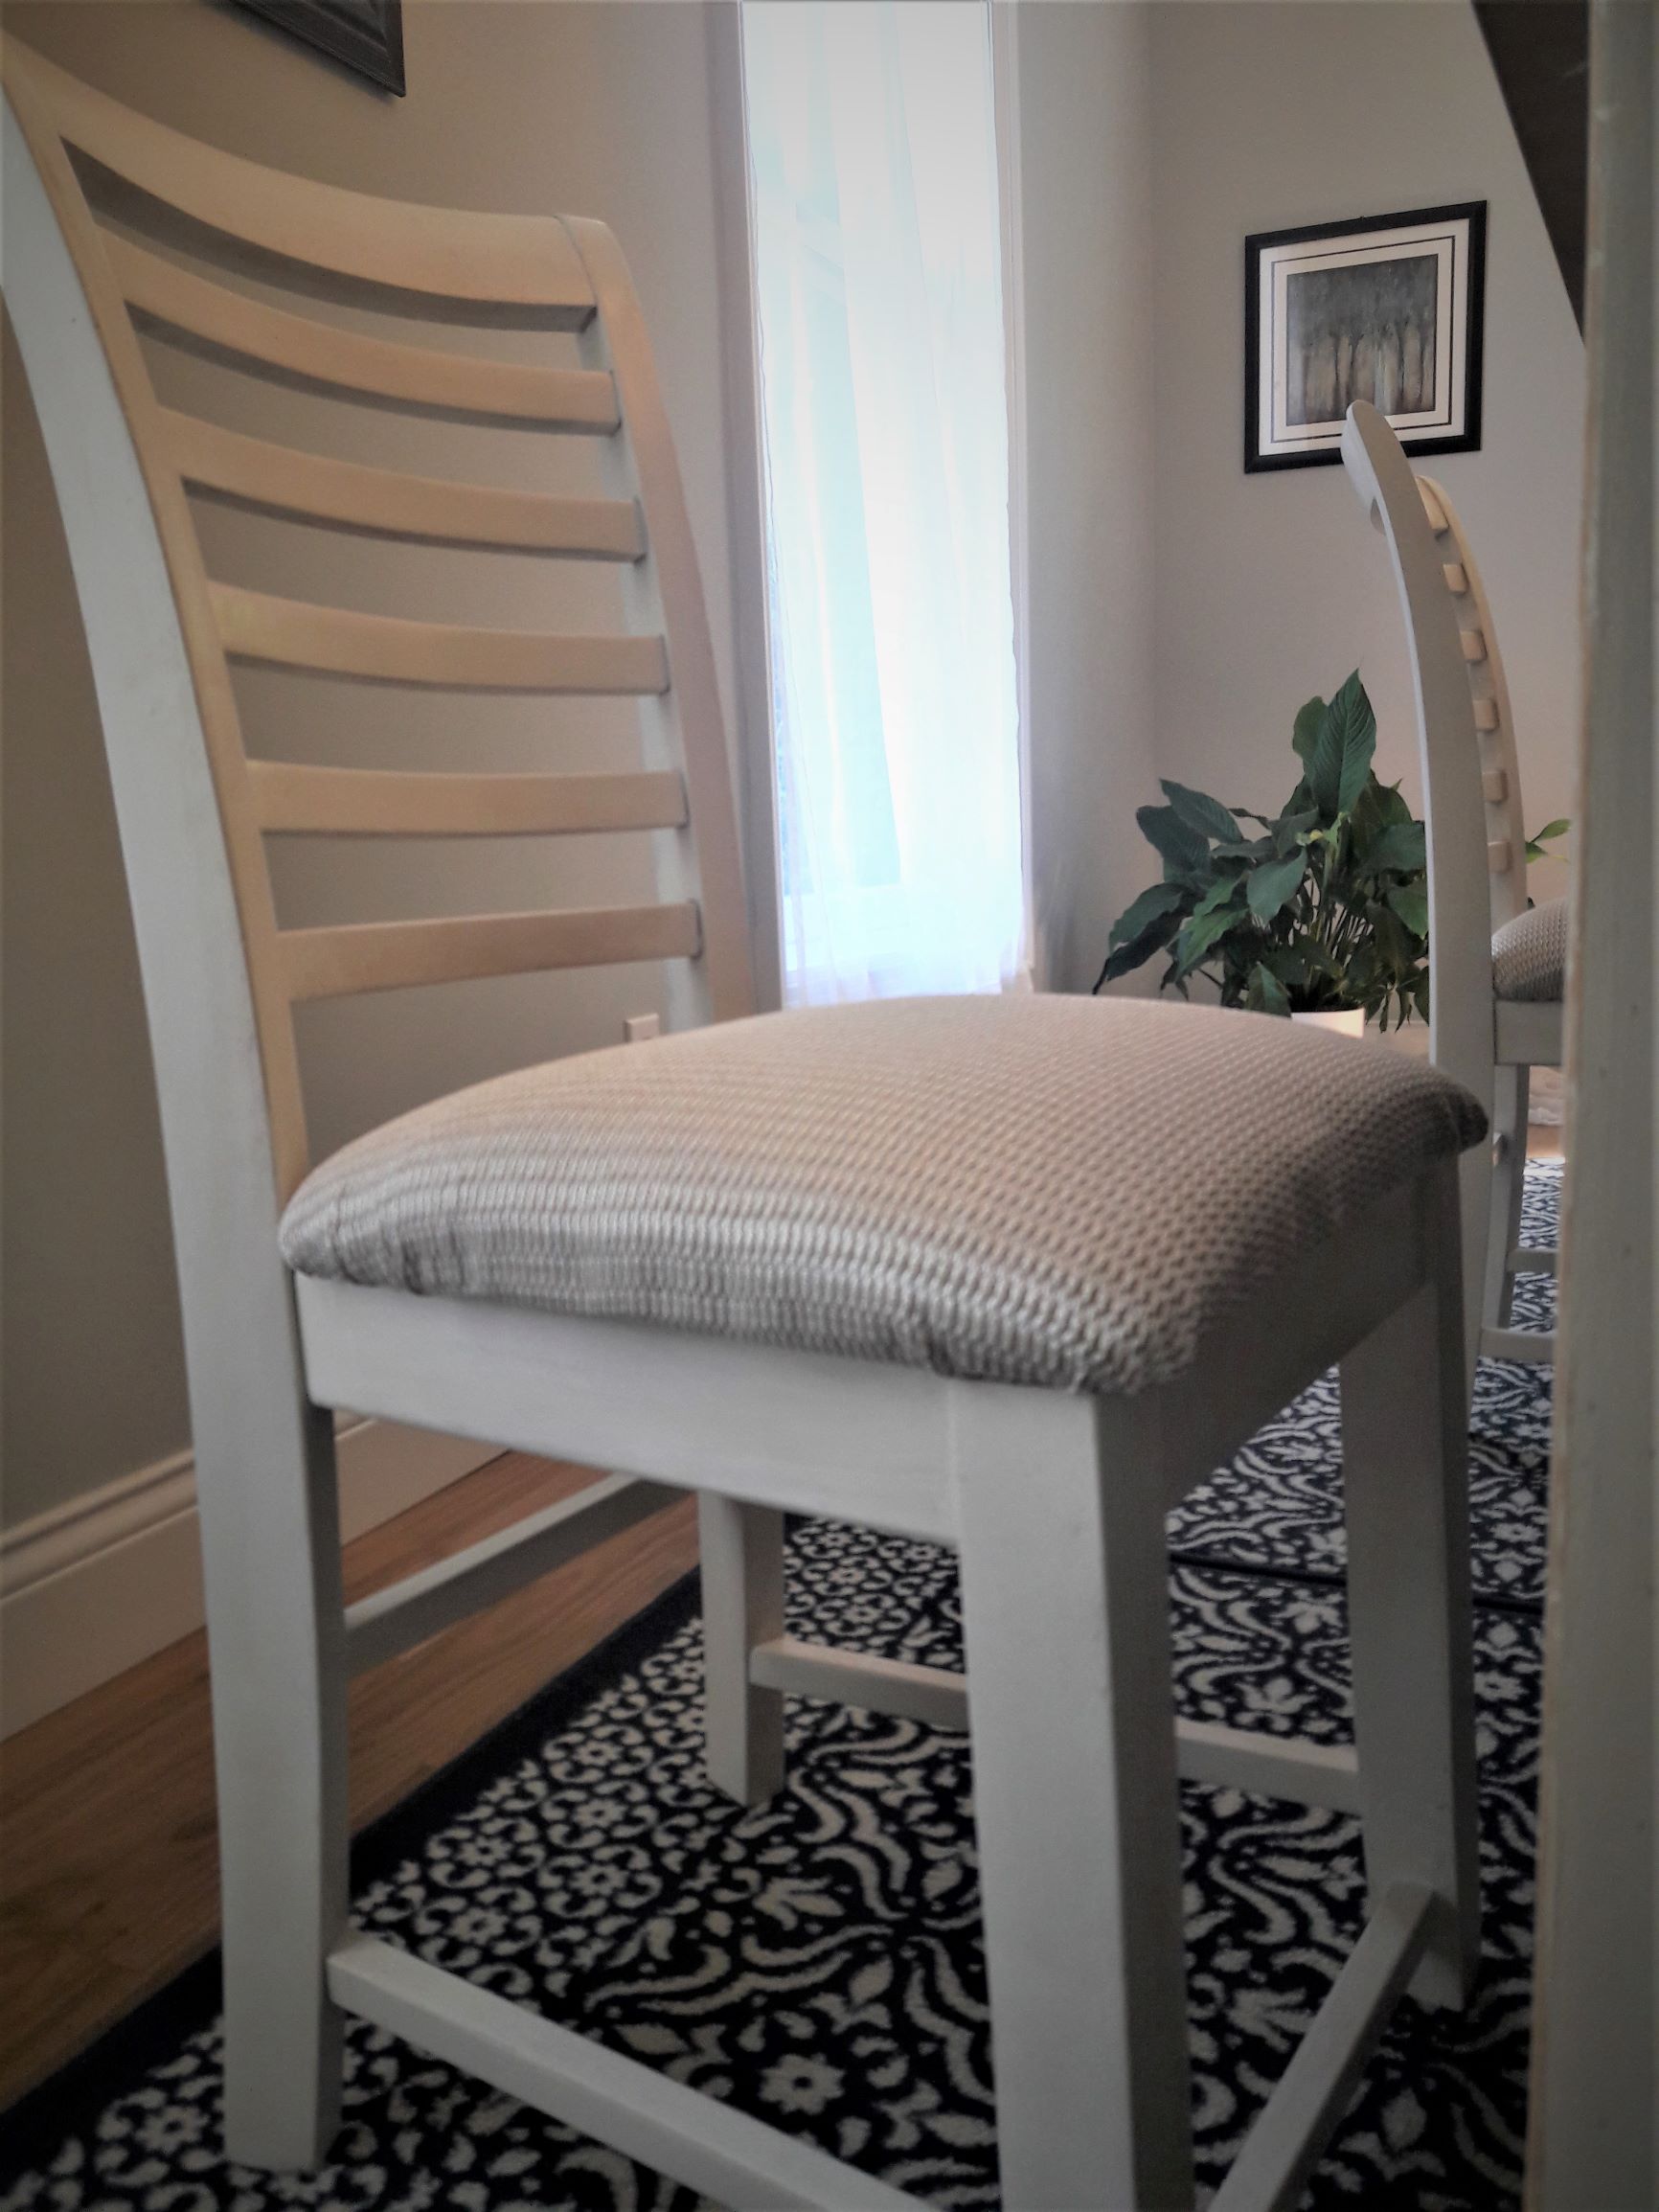
Ta Da! Finished!
As all projects go… there is always more to do…
On to the walls!
My style is a mix of traditional and modern, otherwise known as Modern European. I plan on painting them with a specialty limewash paint from Portola Paints. This will create a mottled finish similar to suede. I think it will look fantastic as a textured finish next to my buffet and modern accents.
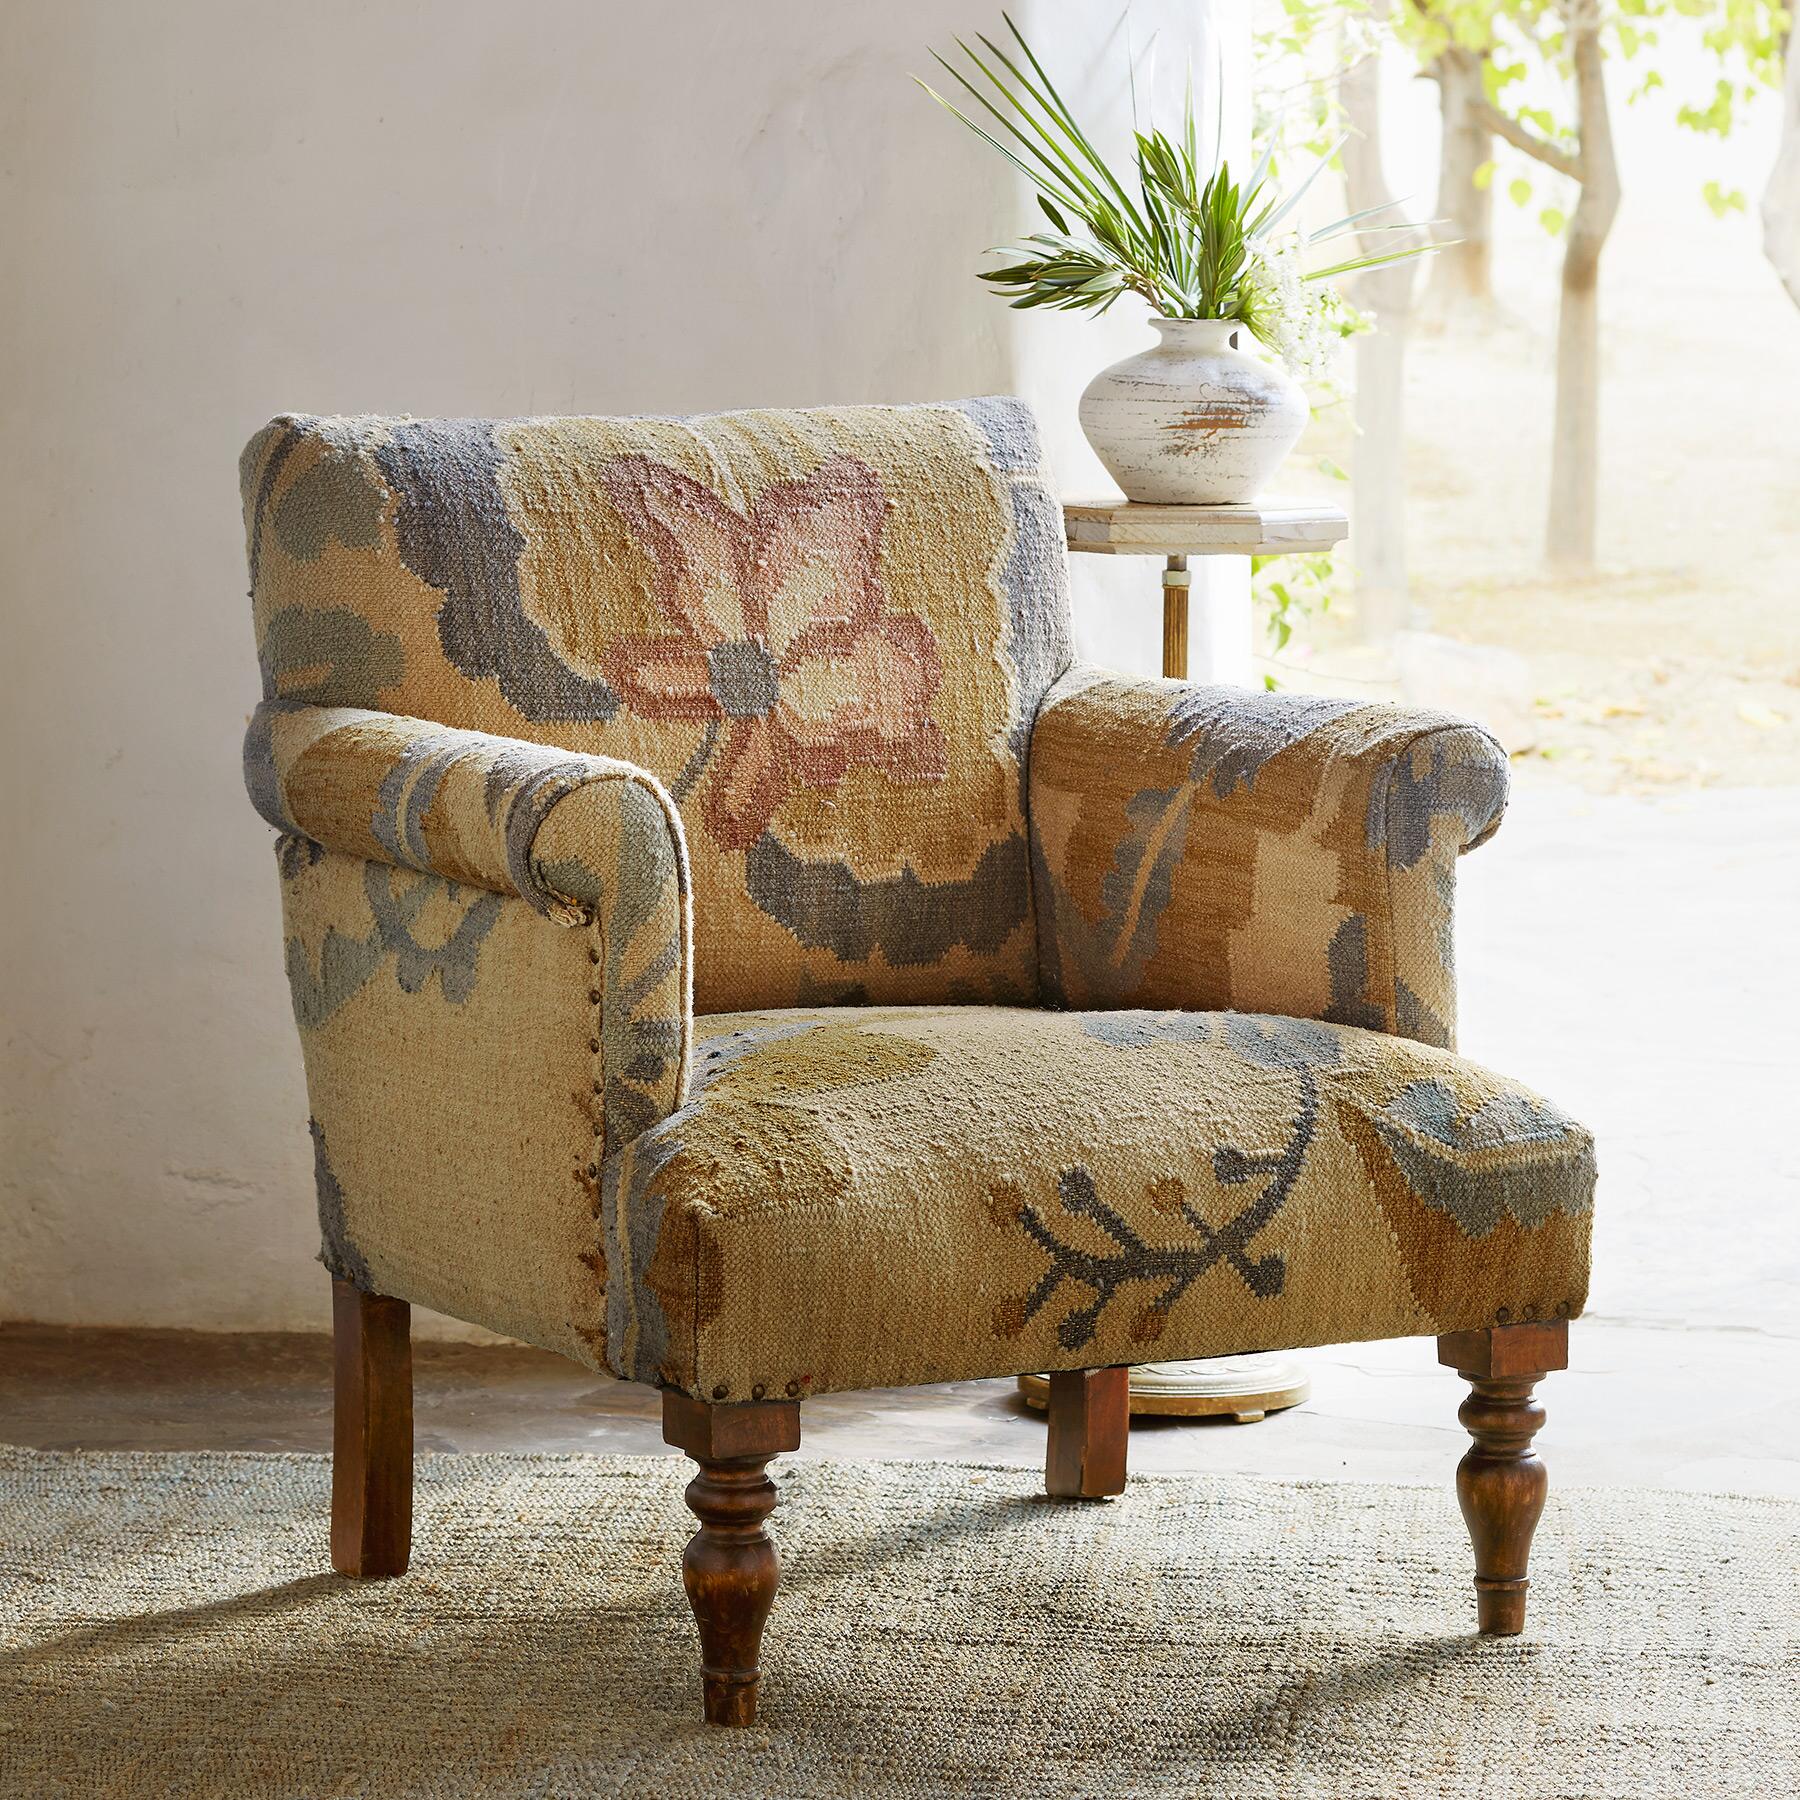
This chair was my inspiration. I love this chair made from a Kilim rug fabric. It is traditional with a fun twist. Just what I like in a statement piece.
I love to put a statement piece in every room and this fits the bill.
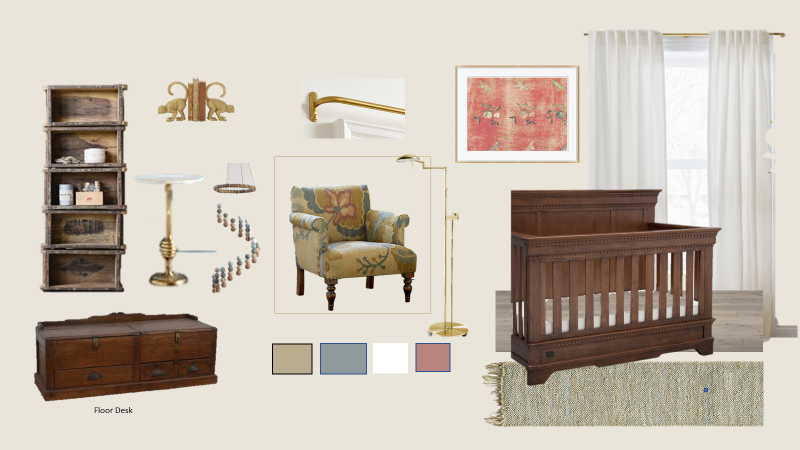
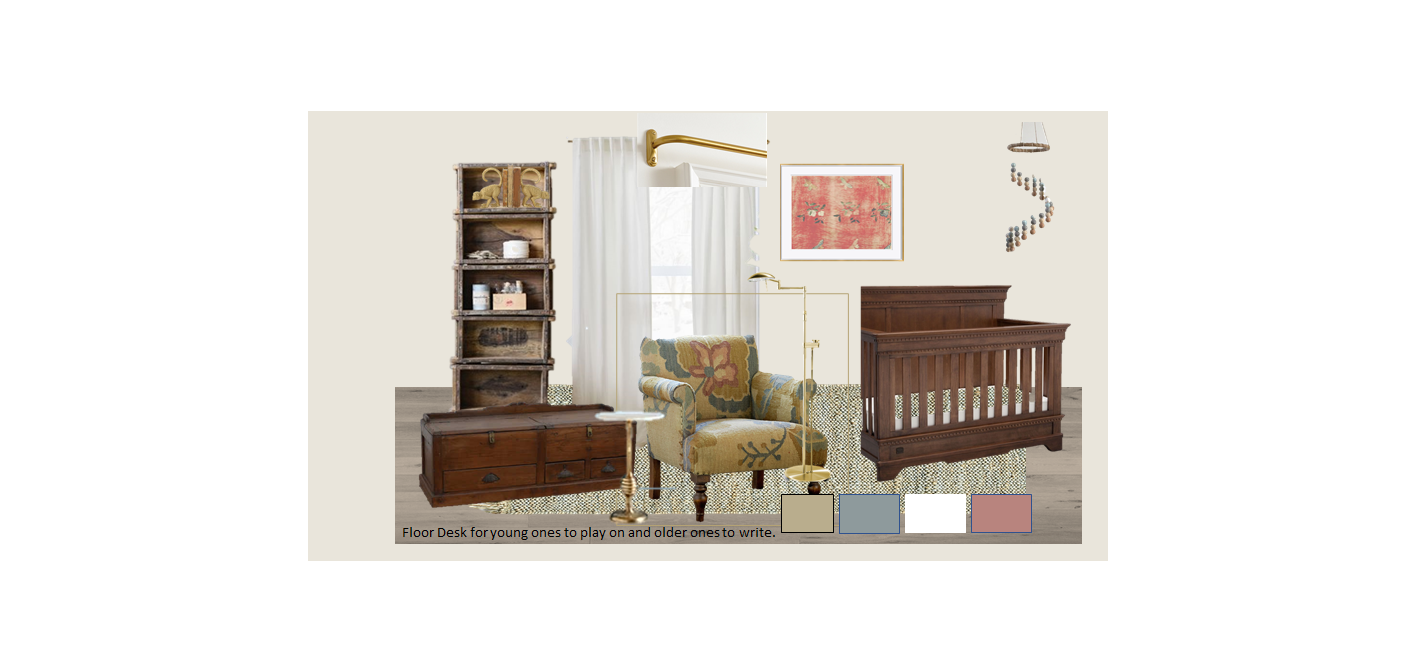
I decided to design a nursery using this chair as a stepping off point. Stay tuned to see another design using this chair in a sitting room in a more traditional design. This is the style I really enjoy. A mix of traditional and contemporary.
I don’t know about you but I am tiring of white. Don’t get me wrong. I love white. In fact, it has always been my favorite color! I know – weird. Right?!
White is a combination of all colors in light so it isn’t surprising that I love all design styles too. That’s why I love design. There are so many different directions to go.
So many of us have furniture that has been passed down to us from our family members and we want to incorporate those pieces but want to have a more up to date look. White is more difficult to blend with traditional dark wood pieces and still create a muted, understated and mellow environment in a bedroom.
This one fits the bill. It is a combination of traditional with 70s boho. Here’s what I came up with… Let me know what you think and comment below.
Here’s everything with a link if you find something you like.
Incorporate tall shelving with this vintage bookshelf or with something like this, which has a similar look but with soft curves to match the desk and chair.
Hint: Use a French curtain rod to close that gap on the sides in combination with a black out shade to minimize light during nap times!
Remember that you can still get the look with expensive and less expensive pieces. You just have to look around. Let me know if you have any questions or if you have a piece you want to build around.
If you like this kind of post, leave a comment and I will do more!
* post contains affiliate links – at least I hope to😊
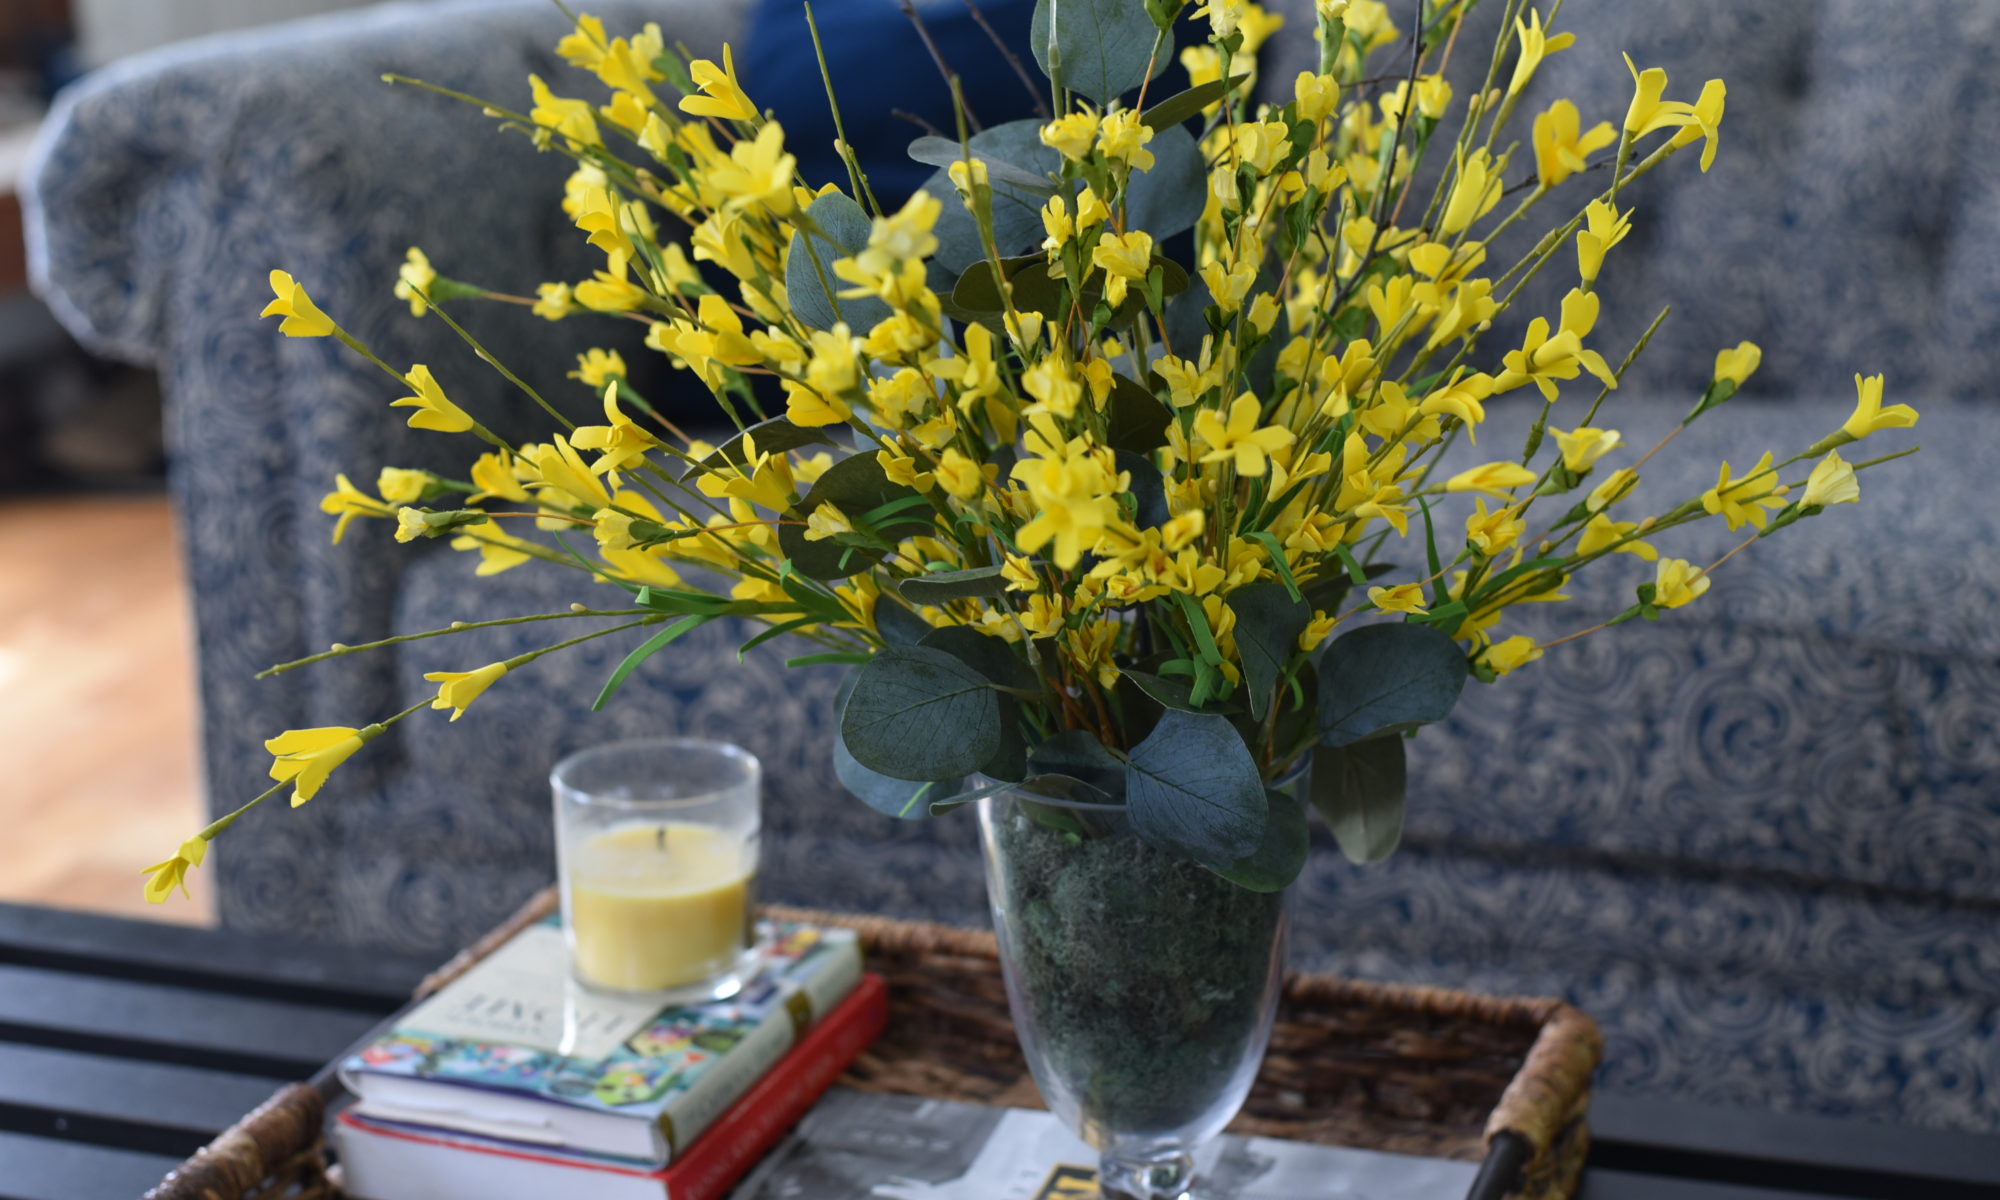
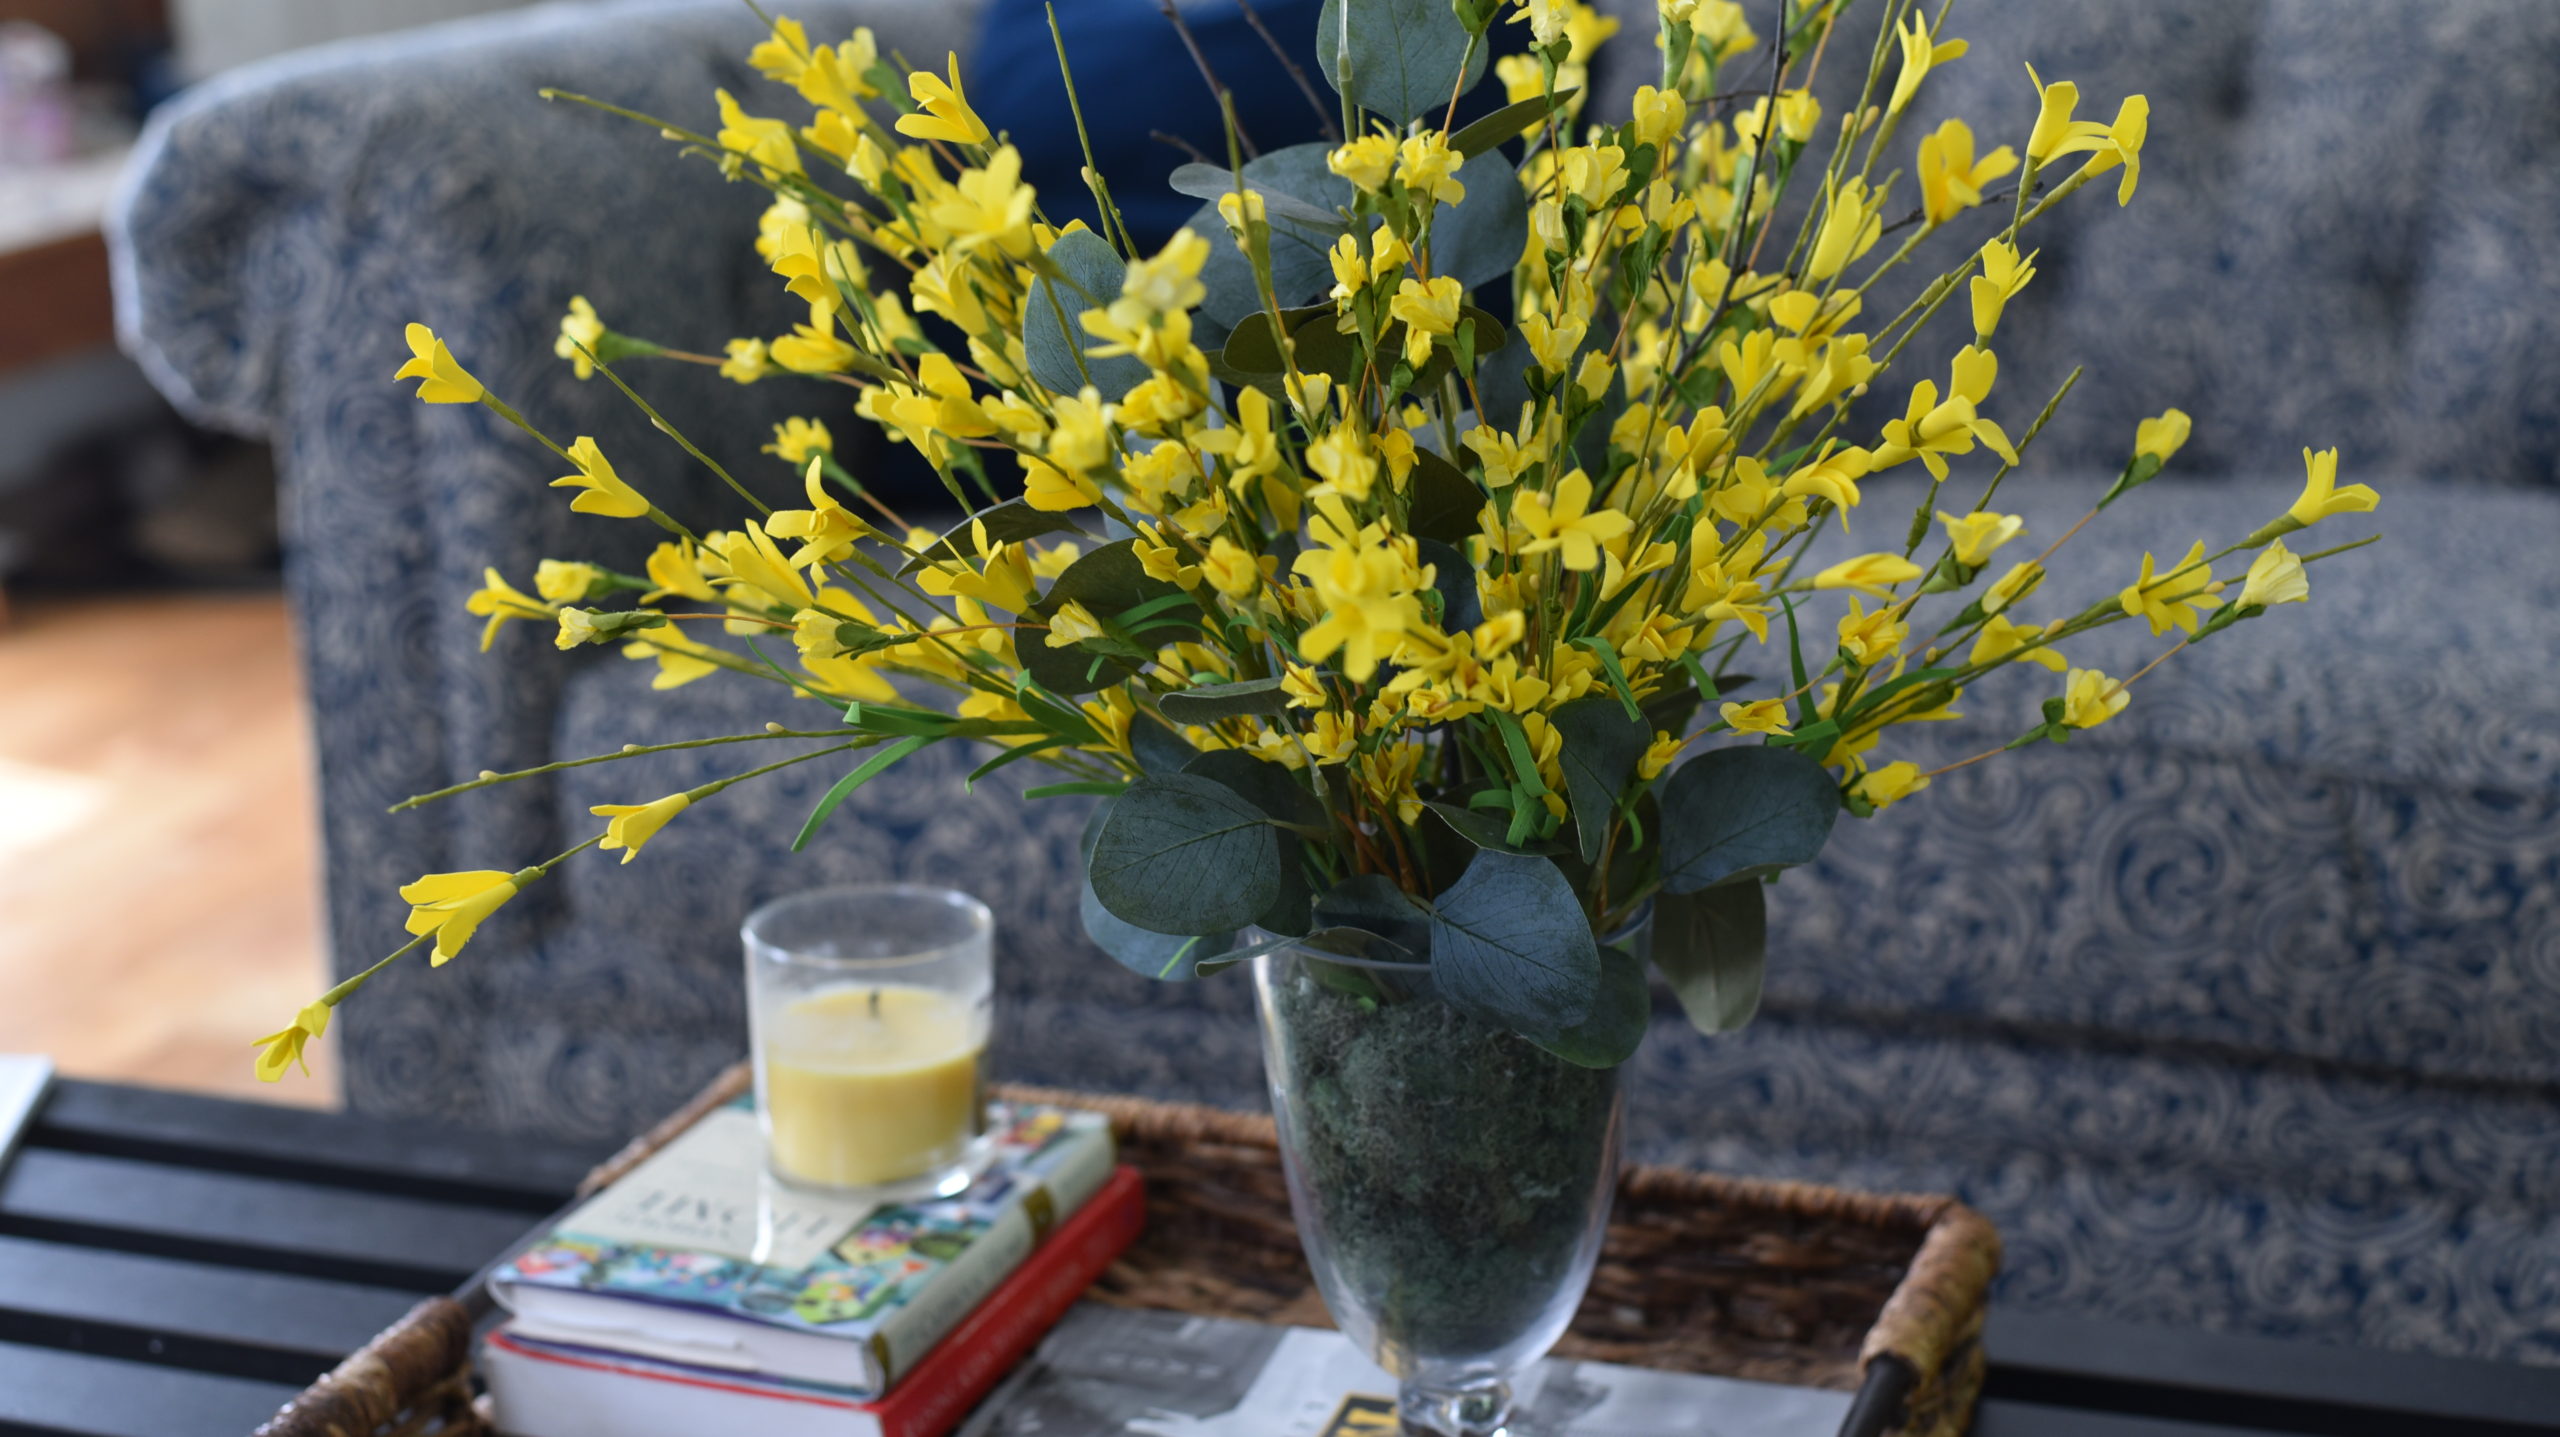
Gathering materials for your spring floral arrangement
This easy spring floral arrangement of artifical forsythia blooms is a delightful addition to a coffee table.
Forsythia was abundant on the east coast in Virginia and I absolutely loved seeing it burst forth every spring. It was one of the first signs of spring along with the crocus and dogwoods. If you aren’t familiar with this spectacular bush here is a link to a collection of google search images. I wanted to capture that feeling in that moment of Springtime by putting some forsythia in my family room. Today, I am going to show you how you can too.
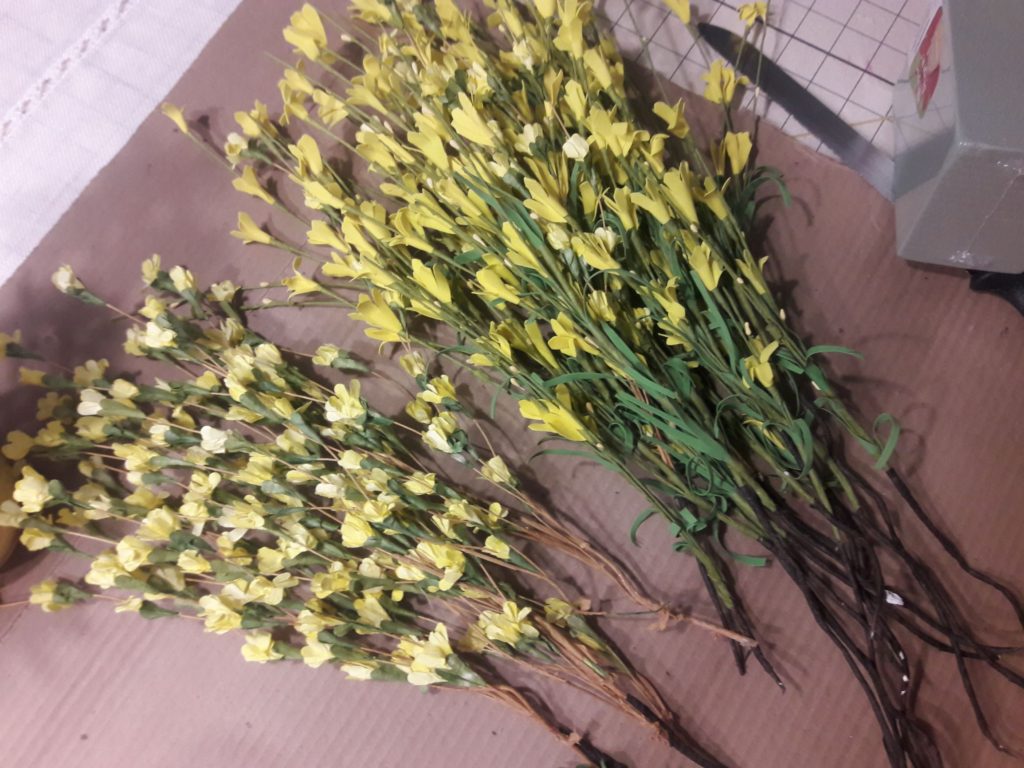
I got these artifical stems at Jo-Ann fabrics for about $2 a piece on sale. Two branches came on one stem so I cut many of them apart. It’s always nice to use at least two different size blooms to create interest and texture, especially if you’re making a flower arrangement with only one color like this one. I thought these would be a nice combination.
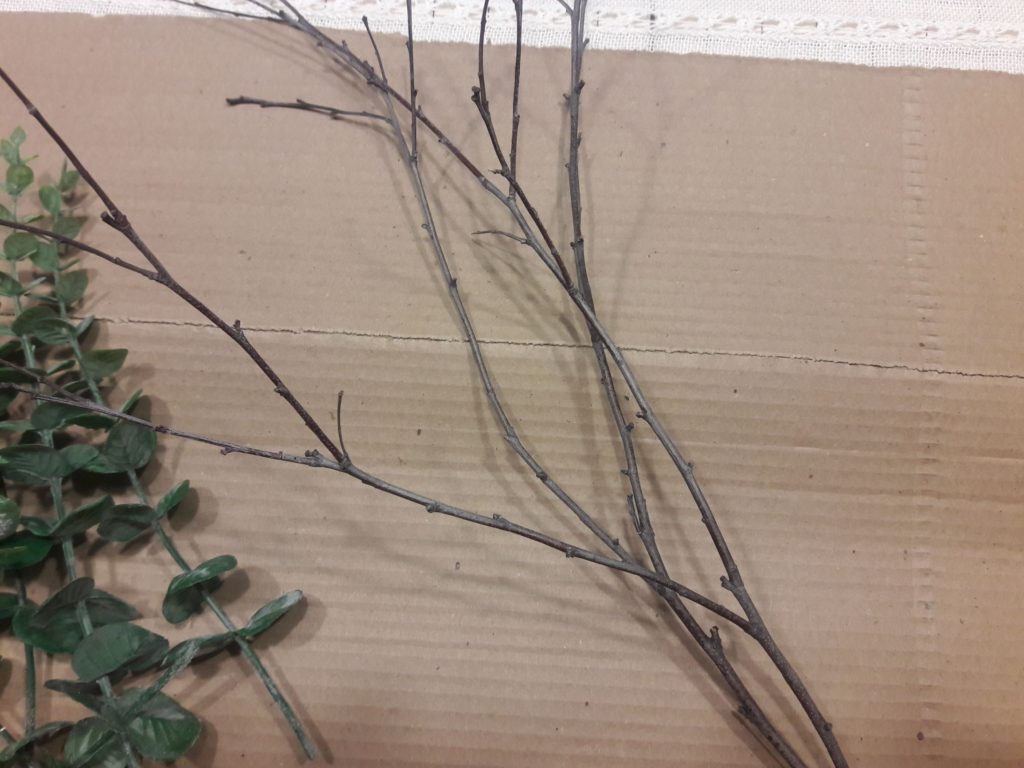
I also grabbed some Birch branches from my backyard. Your yard can be a wealth of possible material for a DIY flower arrangement. I’m going to use some of that for that natural look. If you don’t want it look all twiggy it’s nice to have a little bit of greenery at the base to hide some of those gaps between the stems.
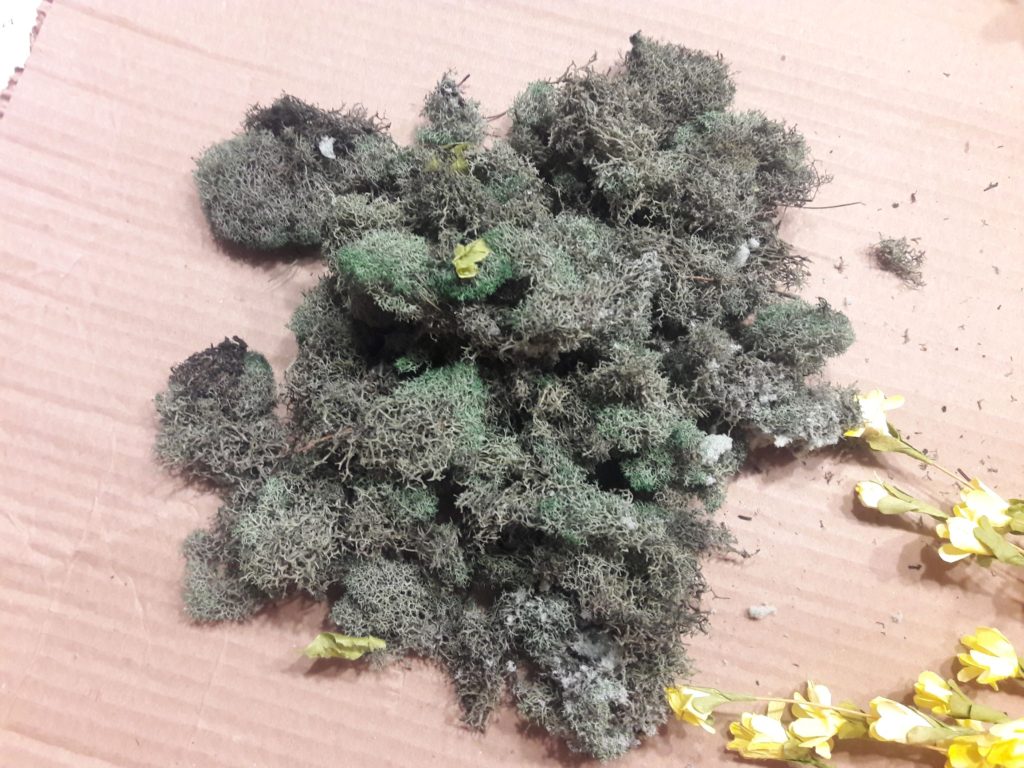
You will also need Spanish moss. The Spanish moss is for the base to cover the foam.
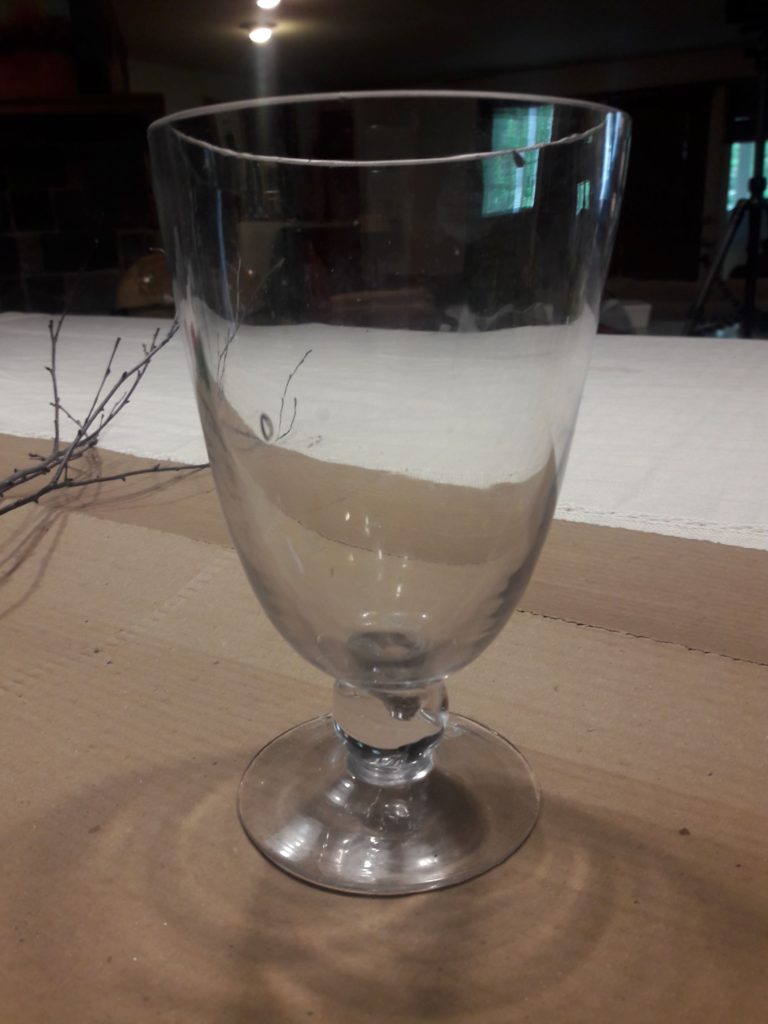
This is artificial foam. There is a darker green foam that you can use for fresh flowers. Since I am using artificial flowers and an open-topped vase, I’m using this foam. The vase came from my inventory of decor items I bought for decorating a hair salon each Christmas. So I thought I would use this for my base for my flowers.
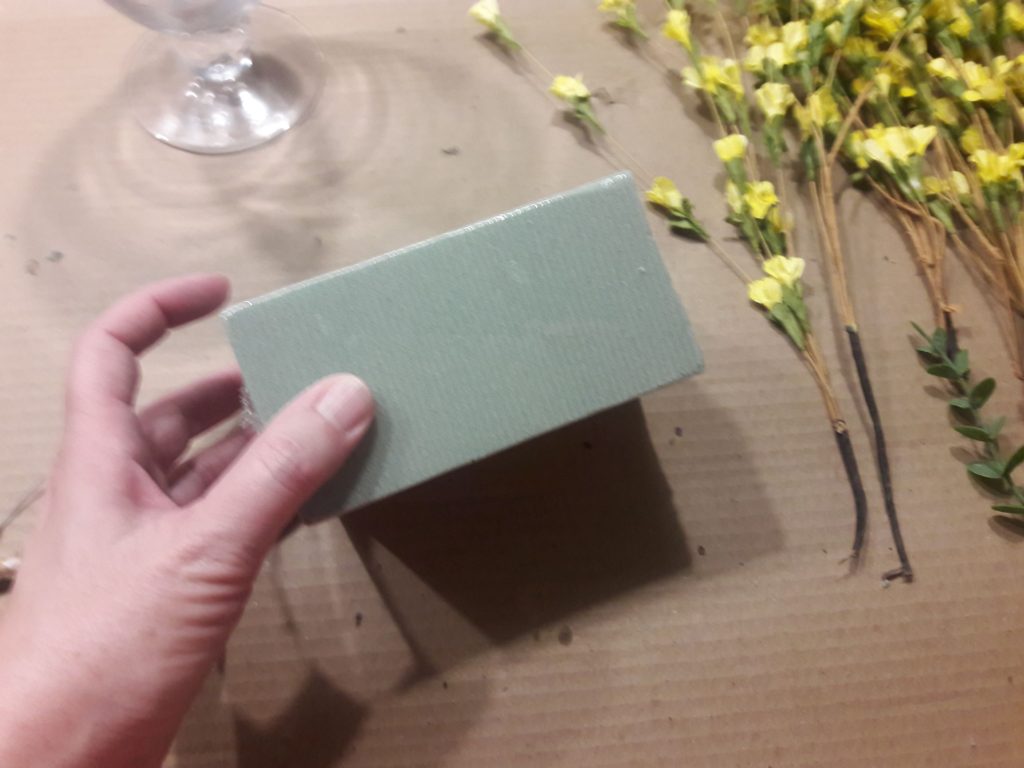
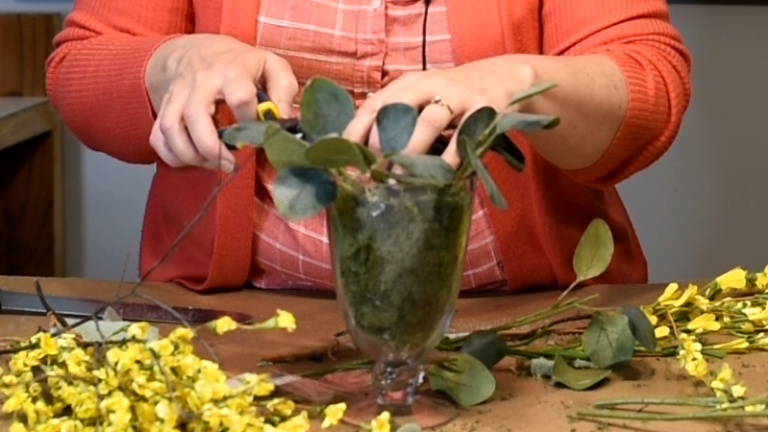
To begin, take some artificial foam and cut it with a bread knife or a serrated edge knife to fit into my vase. It’s easy.
The Vase for your Arrangement
You can use almost anything for a vase of a flower arrangement. Today I’m making a large and easy DIY flower arrangement.
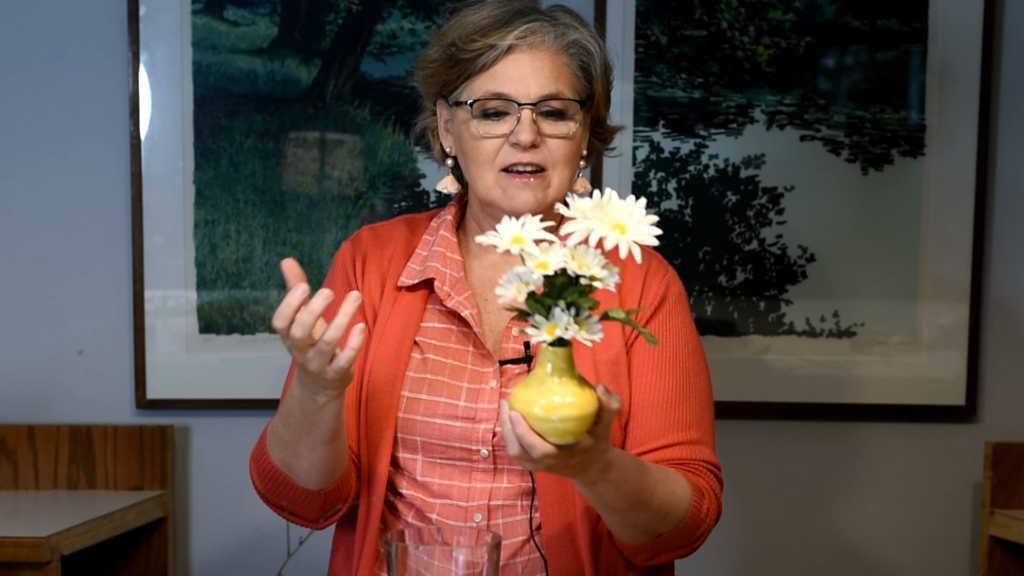
If you have a narrow topped vase…. My son made this. You don’t need anything but a couple stems. It’s a sweet little thing that we put by our sink.
So If you have a vase with a narrow neck you can just put a couple stems in it. But if you have something like the glass vase I am using which is larger, you are going to need some kind of a foam to hold the stems. Otherwise the stems would to just flop over
Because it’s a glass vase I don’t want the foam to be seen and have it touching the vase. I am going to put Spanish moss between the foam and the glass. Cut off the corners so it is not touching the vase. Then put some spanish moss at the bottom of the vase because there’s going to be a gap between the foam and the bottom of the curved vase. Fill in around the foam with the moss. Simple as that. Making sure that, as you go, that you’re pushing the moss down to cover the foam so you don’t see the foam. I use a long knife to get down to the bottom because my fingers aren’t long enough. It doesn’t look very natural when you see the foam. Right? Making sure that you can’t see the foam and there’s no gaps.
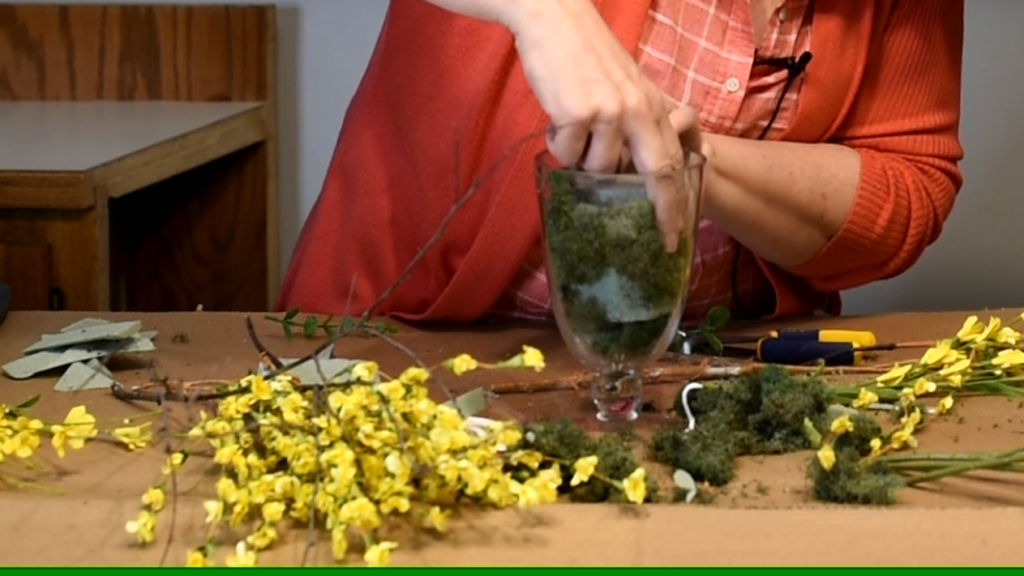
Preparing the Spring Flower Arrangement Base
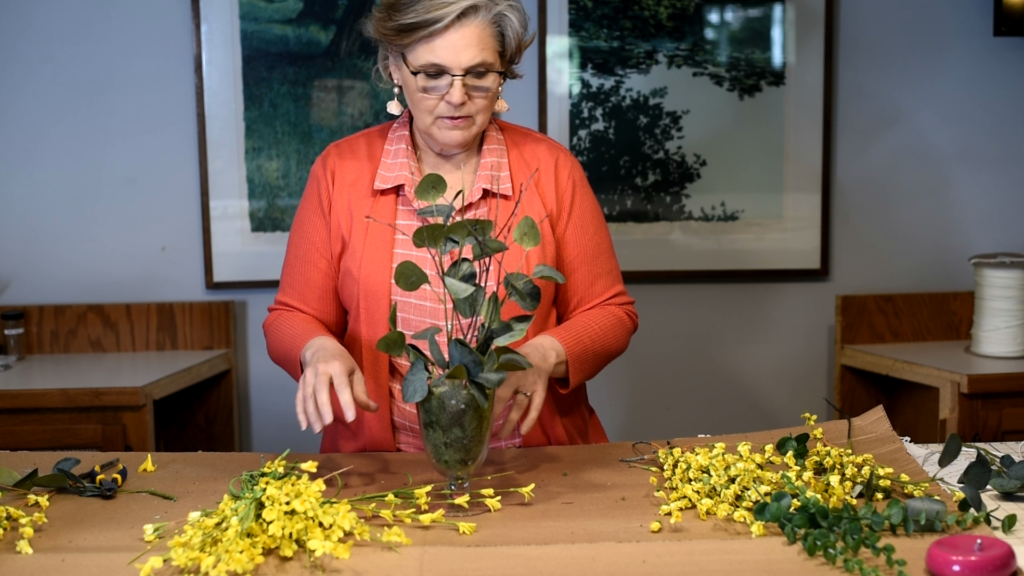
Before I can put the stems in, I want to put some greenery in the base here. Grab your wire cutters. You’re tempted to just cut at the bottom where the side stems meet the main stem but that’s a little bit too long for what I’m intending. It’s okay to go ahead and cut it even shorter than that if that’s what you need. The key to flower arranging is balance. So if I’m going to put a little bit on one side, I am going to put one on the other side so there is a balance and a symmetry to your floral arrangement. And put those on the other two sides so that there’s four or more coming from center. Those are going to be the base.
Arranging the Stems of a Easy Spring Flower Arrangement
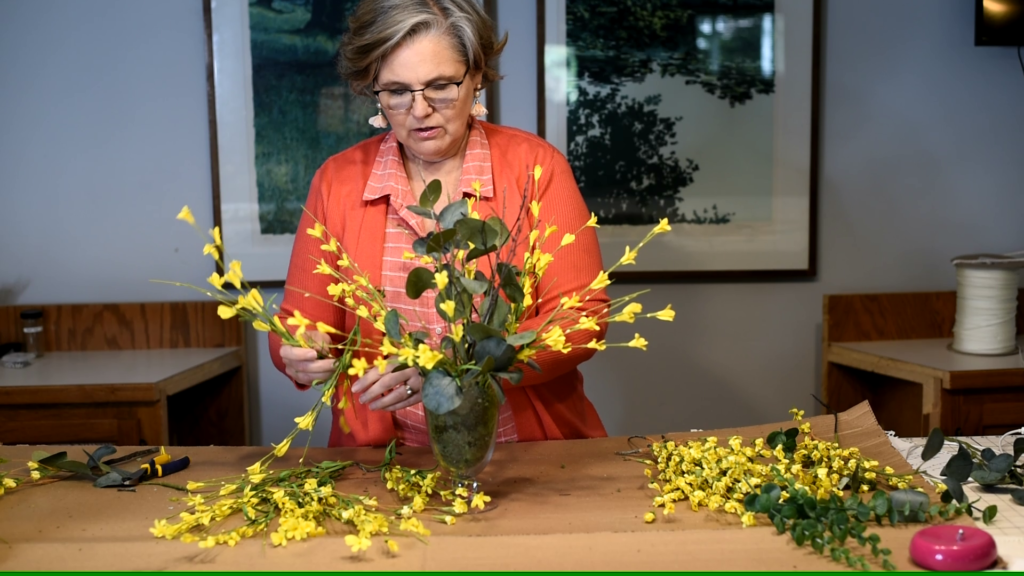
So we have laid in the foundation greenery to create the base. The next part is to create the height. The height of the flowers should be about one and a half times the height of your of the vase. My vase is seven and a half inches so we want to shoot for around 10 to 12 inches more for the flowers. I created height with those branches and a piece of the same greenery that I used for the base placed in the center. I want to bring the greenery from the base up into the inside of the floral arrangement to create cohesivity. You don’t want all the green on the bottom and the yellow on top. You want the green to be mixed up so I’m going to put that piece of greenery in the center.
Take the yellow… your main pieces and start working from the outside of the circle in rotating as you go. We are going to go around the outside first. Always fluff up your pieces as well so you don’t just keep them all together. What’s nice about artificial flowers is that they can be fluffed up a little bit.
Use rotational symmetry
Insert one stem on the right side and I turn it around and put another stem on the opposite side working and rotating as you go. As I put a piece on one side, I turn it around and put another piece equal on the other side. So now it’s all balanced and even. You don’t want to have more flowers on one side than the opposite side. There will be empty spaces in between and that is ok for now. I’m going to go ahead and fill in some of those spaces. One on this side and another on the opposite side, sticking each into that foam. Now, I am going to grab my smaller flowers. I place one in between the two and flip it and go to the other side. Continuing to do that all the way around, filling in the spaces. Looking at where there are holes. Just making sure that you’re symmetrical as you go along. Put one on this side and I want to put one on the opposite side. Keep working until you feel like it’s the full enough that you’re happy with it.
Work from the outside toward the middle
Work around and toward the inside increasing the height of the pieces as you get closer to the center. Here is alink to a video explanation if this helps to see the process visually.
Stand back and look at your arrangement and see what you think. Look at it and see if you’re happy with the way it has turned out. If there are any holes and if you need to add more You can always edit and take out. If you aren’t happy with it, you can always take things out. It is very forgiving to do floral arrangements. It is very subjective. Don’t be scared of them. It’s basically all about balance. Put one on one side, the other on the other and just keep rotating. If you only have 3 of something, make them equal distance apart instead of four. You don’t have to have to be equal in number but they do need to be balanced.
And there you have it. An easy spring flower arrangement. It is as easy as that. That’s going to be sitting on my coffee table for the rest of the summer and it will be reminding me of the forsythia of Virginia.
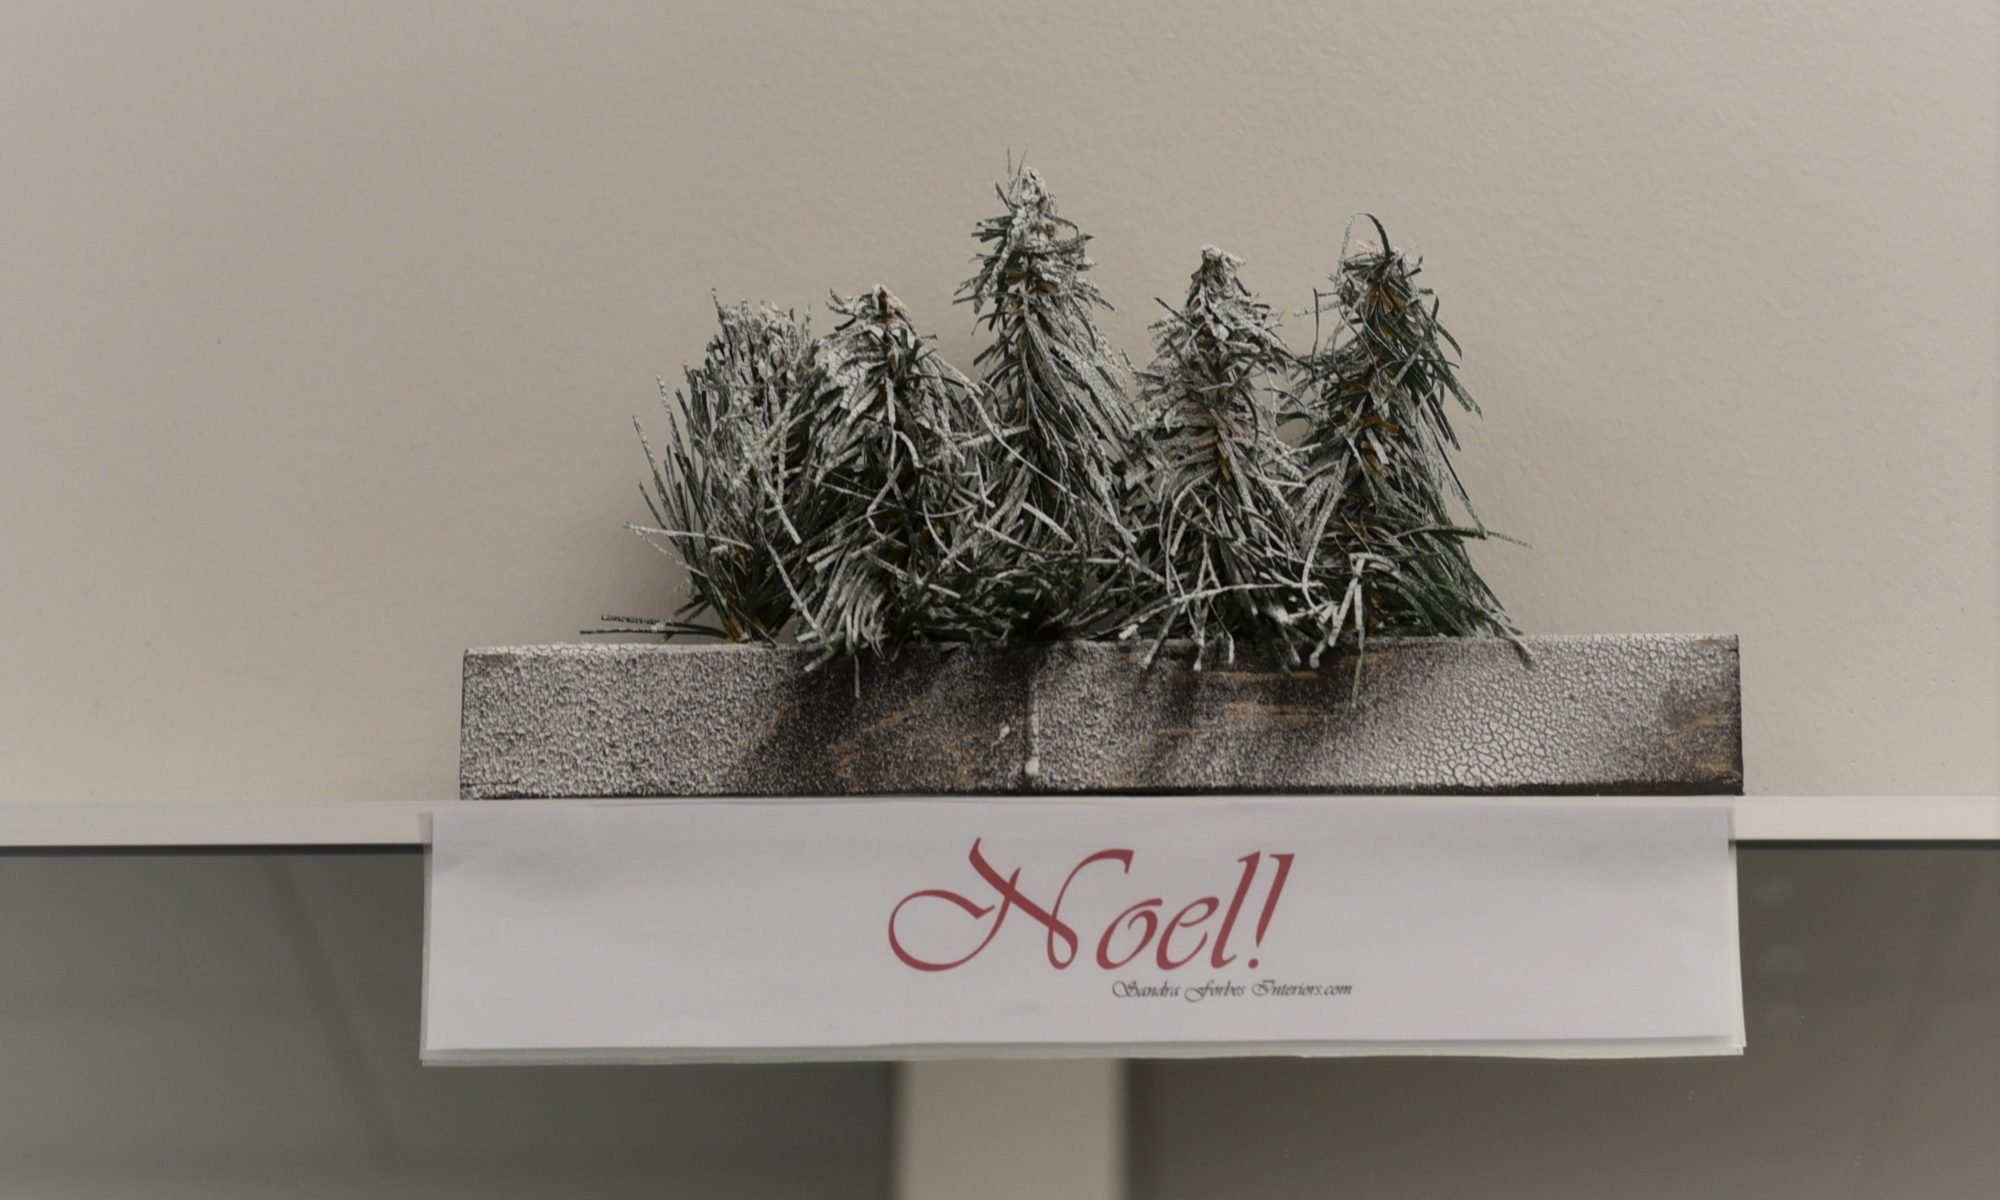
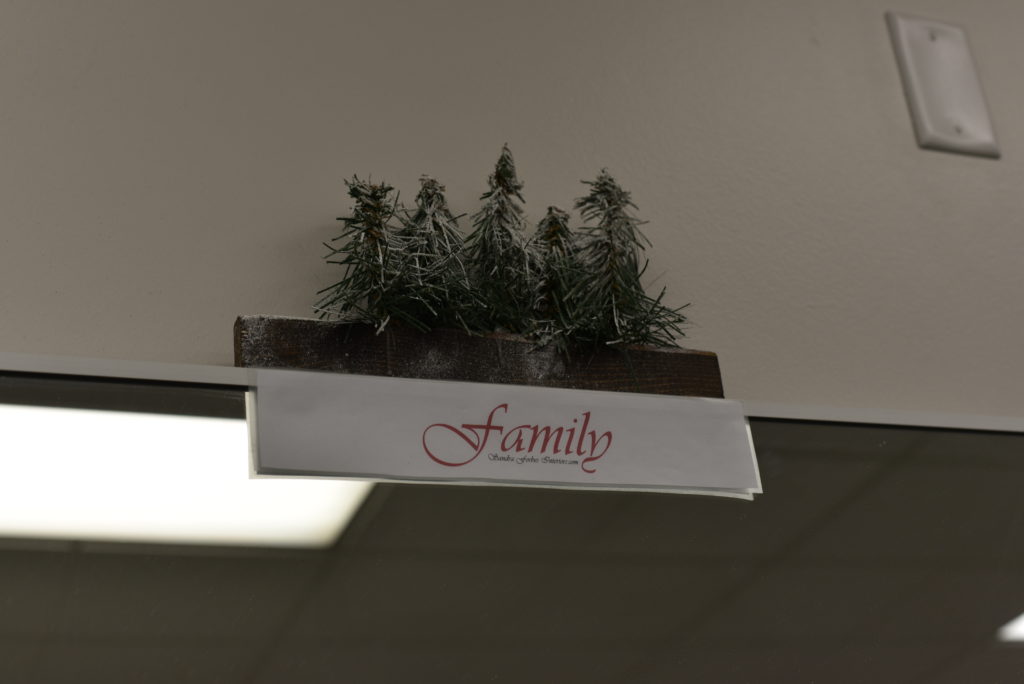
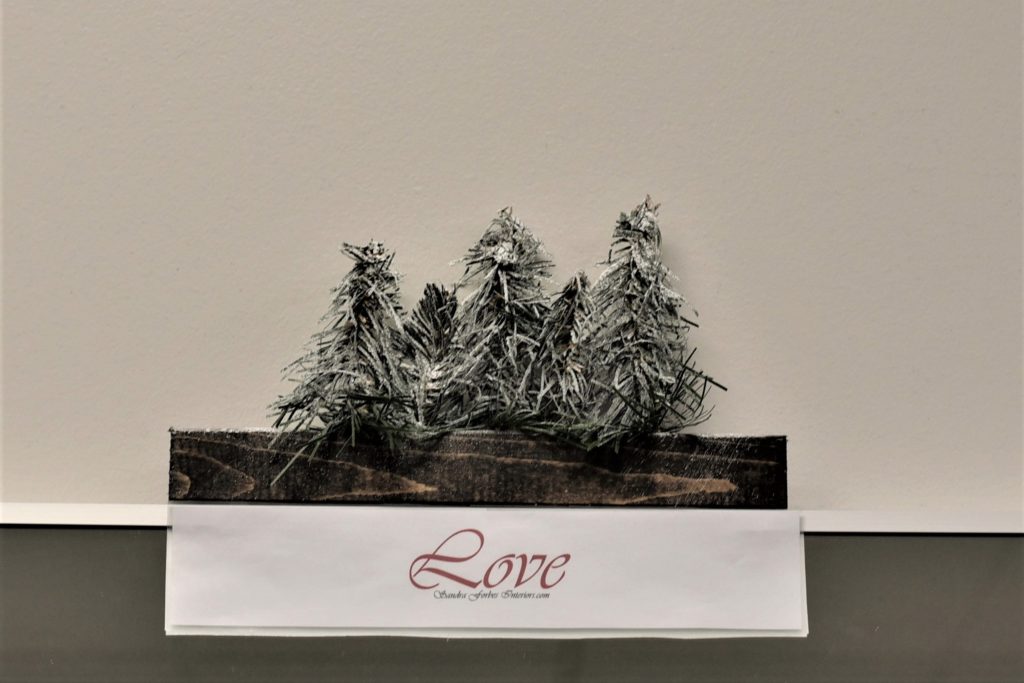
Here is a quick tutorial on how I made these Christmas Trees. I needed 50! It wasn’t in the budget to buy 50 bristle brush trees. Even at $5 each, I would have had to spend $250!
Here is how I made 50 trees for ZERO DOLLARS.
I had this 3 foot piece of artificial garland left over from last year. Why not take it apart and make trees out of each branch? That’s what I did. You can do it too.
My garland had 3 wires. 2 made up the base wire and then the third wire wound about the base of each branch tying them all together.
I simply unwound the third wire to separate the branches. Then all there was left to do was to cut the small bristles in the shape of a tree.
I have to say that they aren’t that beautiful by themselves but they make a nice statement when put together in a grouping.
My wonderful husband braved the cold and cut some 1 by 2 boards into 10-11 inch pieces. I needed 10 because my client was a Hair Salon and they had 10 stations that needed a decoration.
Each board was then stained a nice walnut finish and 5 holes drilled. The holes were drilled unevenly on purpose. I didn’t want the trees to be in a row. I wanted them overlapping a bit to help the look be more natural. Then each tree base was dipped in glue and one was put in each hole. All that was needed was a simple spray of snow. Voila! The only thing left was to print out a beautiful Christmas message to put under each piece.
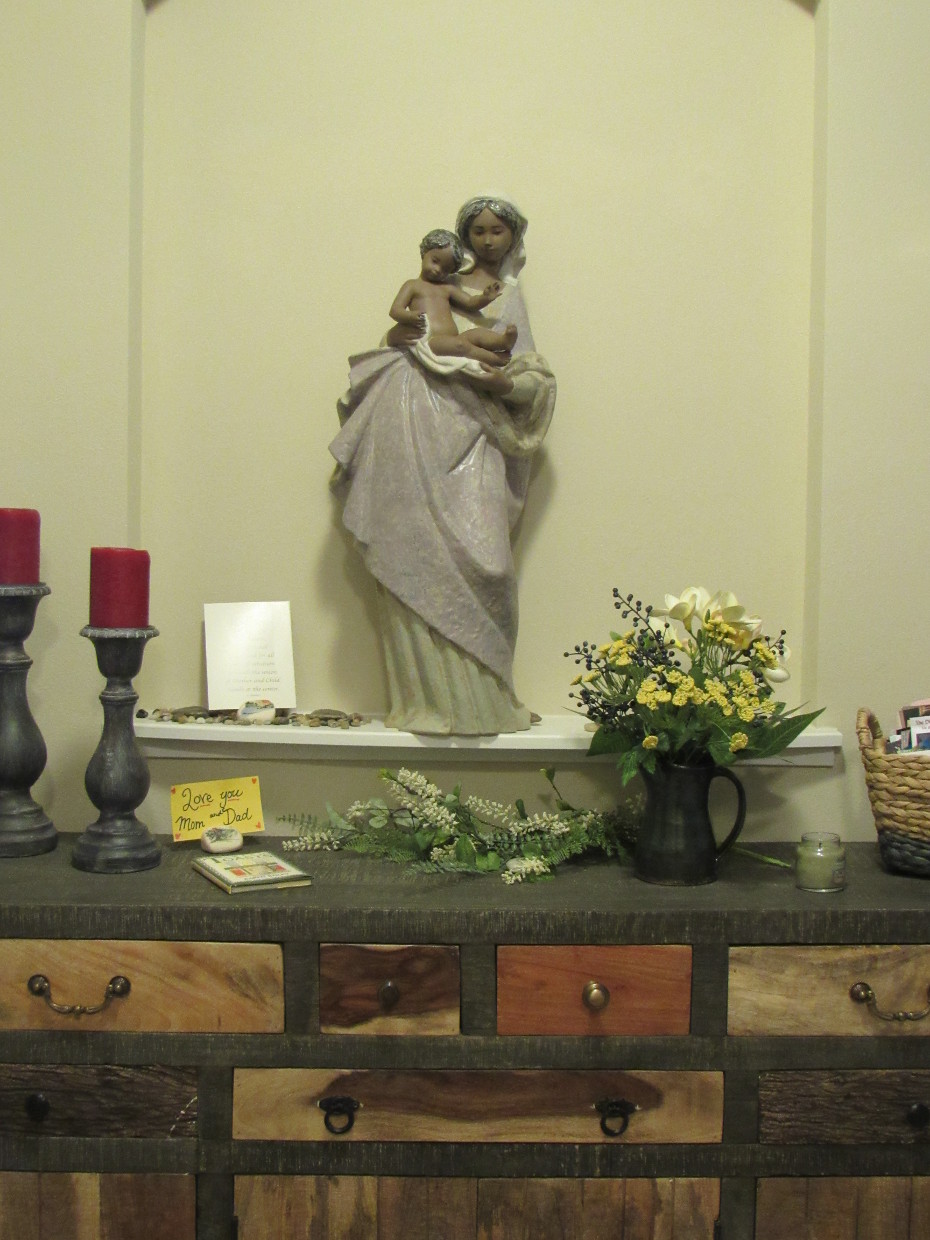
She wanted to rest and retreat from the stress in her life. This focal wall as you entered her apartment set the stage to what you would experience throughout her home. A restful retreat. This statue was purchased at one of St. Thomas Academy’s annual auctions. It is now a comforting feature in my client’s home.
After selling her long time home in St. Paul which I helped her stage, she asked me to help turn her new apartment into a home.
She needed a place to get away and reflect. She was entering a new stage in life.
Feature Wall
The first thing she asked me to do was to help with this feature wall that greeted you as you first entered her new apartment retreat. She wanted the statue of the Blessed Mother here but the statue seemed to fade into the white wall behind. We need it to be a focal point.
Statue needed to be featured
In response, I decided to raise it up and center it more in the space and create a faux painted wood panel to be installed behind it. This helped the statue of The Blessed Mother become a prominant feature without making it look “churchy”. I pulled the colors from the Blessed Mother and layered them when staining the wood panel.
Layering paint creates this beautiful faux wood panel to bring out the colors in the statue.
Hiding Wires
Then, there was the challenge of hiding the modem wires and finding a place for the grandchildren’s toys. She loved the modern touch that this buffet and the additional needed storage it provided.
Build in storage
A simple solution to hiding the TV and modem wires was these covers from the local hardware store. They worked wonderfully.
Hidden wires can help make a room feel less cluttered.
Paying attention to sight lines added to the Retreat Atmosphere
As a matter of fact, the living room wall happened to be the wall she saw from her bed. Therefore it needed to be addressed with a focal point. If you want to learn more about “sight lines” and “focal points” I talk more about them in the Love Your Layout Workshop. What you see from other rooms is important to consider when curating your home.
The placement of pictures can inspire!
Subsequently, she bought this print by Steve Henderson entitled “Ocean Breeze” [from greatbigcanvas.com]. Simply put, it was a delightful find that was an emotional lift at the start of each new day.
A Fresh New Day!
Additionally, she wanted to feature another inspiring painting that was created by her nephew when he was, also, going through a traumatic time in his life. The painting, entitled “Eternal Hunger”, represented a nursing child finding solice in his mother’s arms.
Mother and Child
And then it was just a matter of tying together her existing decor to create a cohesive color scheme that was calm and relaxing.
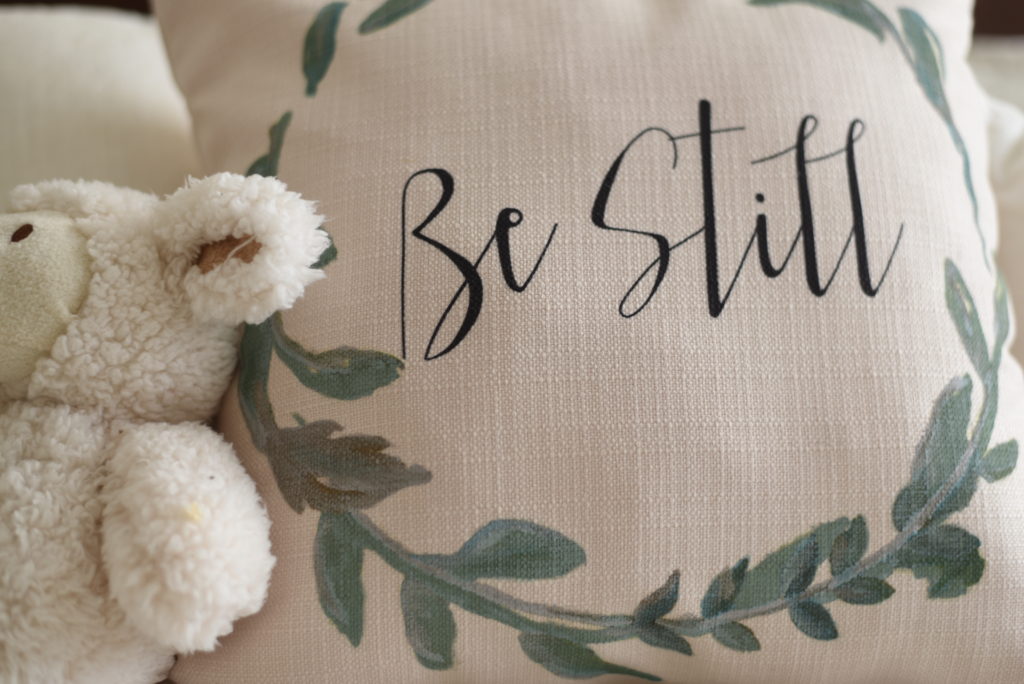
Retreat Guest Room Color Scheme
In the guest room, using the colors in a picture she treasured from a friend, we then took the soft teal from the ocean in the picture and repeated it throughout the room by painting the oak frame and hand painting the pillow to coordinate.
Working from things she loves
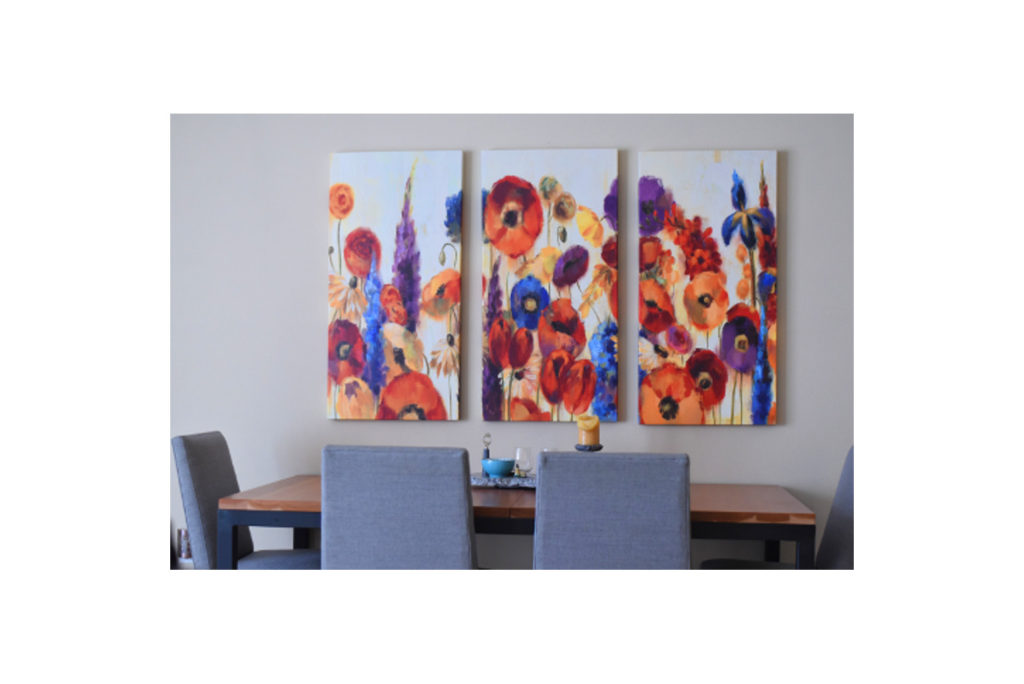
Focal Point for Dining Room
Lastly, we needed to create a focal point behind the dining room table. Since, it was an open floor plan with the living room, the colors needed to be cohesive. And due to the muted colors of soft greys and cream throughout these rooms , she found delight in the colors in this grouping. We centered them over the dining room table to draw the eye as if to call you to sit down.
Dining Room
A home is all about surrounding yourself with things that you love and inspire you.
It was, indeed, an honor to be a part of her journey to help her create a retreat to refresh and reflect and rejoice in God’s love for her.